Complete Tri

Best Fat Bike Tire Guide

fat bike tire

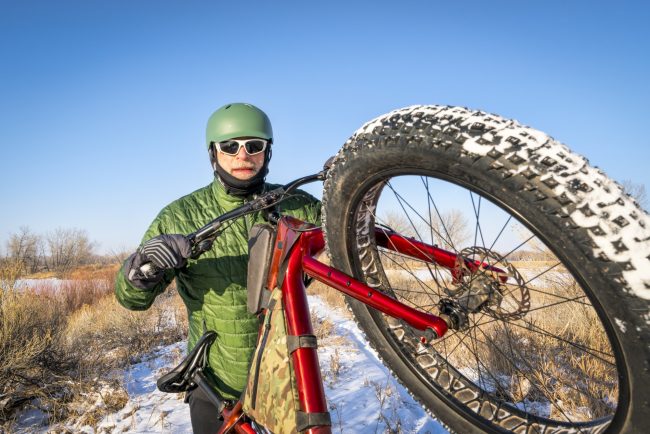
Cycling can be a notorious rabbit hole for those easily taken with marketing claims.  Admittedly, it is a past time that attracts gear junkies.  The vast options for fat bike tires is no exception. The newest bikes, parts, and accessories offer competitive cyclists a leg up, and even tempt recreational riders with promises of a revolutionized riding experience. For most of us with finite budgets and lives beyond bicycle technology, value is the name of the game: which investments offer real and noticeable improvements? Tires — in this article, specifically those for fat bikes — are the common answer, for an undeniable reason: no other part of a bike should touch the ground. Of course, even a bald and fraying tire might serve for grocery-getting, and its replacement could cost little more than an inner tube. It’s the extremes of bicycle performance where advanced designs, quality construction, and hefty price tags can come into play. High speeds, long distances, and challenging terrains can all make tire choice critically important. Fat biking is certainly an extreme, with tires to match. Ranging from just under 4” to over 5” wide, in 26” and 27.5” diameters, fat bike tire sizes alone can disorient a shopper more used to dry roads. Other factors are hardly simpler. Tread patterns vary in knob shapes, sizes, patterns and densities. Technical designators from “EXO” to “TRS” create a letter-and-word salad that varies from brand to brand. And brands themselves might be unfamiliar, with household names like Continental and Michelin replaced by such niche brands as Surly and Terrene. If your head is spinning by your fat bike tire options, you are not alone. Don’t worry – this guide makes picking the right tire for your fat bike a breeze. We’ll move step by step through the key features of your ideal tire. Then, we’ll highlight a few tire brands with particular strengths in the fat tire market, and discuss how specific models line up. What to Look for in Fat Bike Tires Diameter This is an area that is evolving.  In general, older fat bike models use 26” diameter wheels and tires while newer models use 27.5”. Some 27.5” models could fit 26” rubber, but interchanging the two sizes means new wheels and numerous pitfalls. We recommend sticking with what already works: 26” or 27.5” should be clearly marked on the sidewall of a tire, unless the respective metric numbers of 559 or 584 are used instead.  It is important to note that this is not simply about slapping wider tires on your mountain bike rims.  See the next section for fat tire width considerations. Width Tire width is really where fat bike tires become their own thing, as opposed to the mountain bike market. Tire width is usually measured in inches, but consider it more of a guideline than a precise specification. That’s why it’s important to use tires only as wide as a fat bike’s manufacturer (and just as importantly, the rim maker) recommends. The factory tire width has the right amount of space figured in for muck, sticks, and differences in size between makers. Go bigger at your peril: tires that don’t fit can be difficult to return, and it’s possible for even a tire that physically “fits” to cut into a bike frame over time! Most fat bike riders will seek the widest tire possible for grip, but what about smaller widths? The biggest tires are most capable in sand and snow, but carry a penalty in weight and drag. Fat bike riders with experience mountain biking may prefer the feeling of smaller tires on the trail. Tire “width” really means height too: a large change could feel more stable but may put pedals perilously close to the ground. What is confusing for many entry-level fat bikers is that the rims/wheel widths are usually measured in millimeters, while the tires are almost always marketed in terms of inches of width.  An 80mm rim is pretty standard for stock fat bikes these days. If there is a “standard” fit tire width, we’d say it is in the 3-to-4-inch range.  The equates to roughly 80-100mm tire, as you might often see them referred to.  This also goes for ebikes that call for fat tires, too. What is the widest fat tire width?  We see a couple models that are just over 5″, a width that usually is advertised as a specialty snow tire. Tread Bicycle tire tread is broadly misunderstood, and busting tread myths fill an entire article. Line up a half dozen knobby tires side by side and relatively few cyclists could correctly match the tire design to the intended terrain. Even worse, tire designers and manufacturers themselves have been known to mislead or misunderstand. Did you know that the most effective road or commuter bike tire for riding in the rain is completely smooth? The majority of new bikes for sale tell a different story, with numerous small channels or “sipes” in their tires even for pavement duties. The truth is, taking away material on the surface of a road tire means less area to contact the ground and less grip, plus a waste of energy if deep, wide sipes let a tire squirm on hard ground. Mountain bikes and fat bikes obey the same rules but ride on tall, thick knobs. These knobs mean more area to contact, and so more grip, because they dig into soft surfaces. The effect is proportional: the hardest surfaces like pavement are best ridden with completely smooth tires, while the softest surfaces like mud are the focus of extremely knobby tires sometimes called “spikes.” Somewhere in the middle, hard-packed dirt and snow have enough give for small knobs to add grip, without needing heavy and slow-rolling spikes. Speaking of spikes, “studded” tires bear mentioning: small metal points in these tires provide a dramatic increase in traction on slick, glassy ice. However, studs range from useless to harmful in other conditions. On pavement, studs make a distinct … Read more

Best E-Bike Tires

e-bike tire continental

E-bikes have exploded in popularity. As e-bikes get used more and more, their tires can wear, which requires some knowledge of which are the best e-bike tires to use as replacements. Selecting the right e-bike tire depends heavily on your riding type and the terrain the bike is used on. Urban riders might prioritize smooth rolling tires for city streets, while off-road enthusiasts might look for tires with aggressive tread patterns for better grip and stability. Regardless of the type of riding e-bike tires need to be able to handle the additional weight and speed that come with e-bikes. E-bike tires can experience more wear due to the motor’s torque and the overall increased weight of the bike. It’s important to regularly check tire pressure, tread depth, and overall condition to be sure your tires are always ready for the next adventure. Types of E-Bike Tires There are a few main types of tires to choose from, and part of it depends on your wheel’s rim and which type of tire it can handle. Beyond that, I focus on durability and compatibility with electric-assist speeds.  Tubed Tires Tubed tires are the traditional tire design you find on many bikes, including e-bikes, and are often referred-to as clinchers. These tires contain an inner tube that holds air andmaintains pressure. They are generally more affordable and easier to repair or replace if punctured. Most people who have been road bike riders are very familiar with the clincher-style bike tires. Pros Cost Effective Easier to repair: At least once you learn how Tubeless Tires Tubeless bike tires have become a favorite of cyclists over the past few years, and eventually will be the industry standard in my opinion. With tubeless tires, you are going to benefit from a reduction in punctures due to no inner tube being present. These tires let you ride at lower tire pressures, which can improve traction and ride comfort in many situations. Their self-sealing capability when punctured is great, as long as you carry some sealant with you. Pros Puncture Resistance: Higher resistance due to no pinch flats caused by tubes Performance: Lower pressures enhance grip and ride comfort on varied terrains. A proper sealant and tubeless-ready rims are essential to maintain the integrity of these tires. Solid Tires Solid tires, also referred to as airless tires, are entirely puncture-proof. I recommend them for riders who prioritize minimal maintenance and who will not be riding long distances. However, the ride quality is not as good as air-filled tires, so I don’t like them for longer touring rides. Pros No Flat Tires: Complete elimination of flat tires and need for maintenance. Durability: Typically last longer than their pneumatic counterparts. Solid tires require a compatible e-bike frame and wheels, as they can be harder to install due to their rigidity. Only use them if you really need a tire that requires zero maintenance. Understanding Bike Tire Dimensions Tire dimensions can seem like a foreign language to newbies. Don’t get overwhelmed, just focus on a few things. First, your rim, or wheel, dictates what tire you can use. Second, pay attention to width and diameter, as these are critical to performance and ride quality. Tire size is typically noted in a format such as 700x35C—700 representing the nominal diameter in millimeters, and 35 the width in millimeters, while ‘C’ refers to the tire width code.  As the tires get larger, they jump to being measured in inches – like 2.5 inch tires. This is a relic to the world of road bikes (which measure in centimeters) and mountain bikes (which measure in inches). The rule of thumb:  Wider tires can be ridden at lower tire pressures, which makes them more comfortable on rough terrain and gives them more traction in loose surfaces, mud, sand, or snow.  Skinnier tires are superior on pavement and flats, due to having less draft, but because they need to be ridden at higher pressures, they can feel stiff. For older e-bike riders, I suggest using a wider tire as opposed to a narrower one. Older riders might not have the same reflexes as a younger rider, and a wider tire is more sure-footed if you hit a pitch of loose trail or snow or ice. Tire Tread and Terrain Adaptability When I choose tires for an e-bike, I consider the types of terrain or trail surface the bike will spend time on. For urban riding, smoother tires are my go-to. They offer less rolling resistance, which means I can ride more efficiently and effortlessly on city streets. They can also tackle basic rough patches as long as they are not wet or prolonged. On the other hand, if I anticipate a variety of trail surfaces including dirt trails, loose paths, gravel, or unpredictable terrain, I look for knobbier tires. These have deeper grooves and more pronounced tread patterns that provide better grip and stability. Below is a quick comparison: Smooth Tires Best for: Asphalt, city roads Advantages: Lower rolling resistance; increased speed Disadvantages: Reduced grip on loose or “greasy” surfaces Knobby Tires Best for: Off-road, rough trails, gravel, varied terrain Advantages: Enhanced grip; improved control Disadvantages: Higher rolling resistance; potentially slower on smooth surfaces. Lots of “drag.” Terrain Guide: Pavement: I opt for a semi-slick or slick tire. Mixed Terrain: I lean towards tires with intermediate tread, and slightly wider. Rough Terrain: I choose tires with aggressive tread patterns. Remember, the condition of tires impacts not just my ride experience but also my safety. I always prefer to match my tire tread to the conditions I expect to encounter. Best Ebike Tires Here are some top choices each with their own strengths and challenges. Schwalbe Big Ben The Schwalbe Big Ben offers a dependable balance of comfort and stability for urban riders. It is a tire that you find one lots of fat bikes, too. Its puncture-resistant layer and reinforced sidewalls make it strong enough to bear the weight of an e-biker and rider, and we have always trusted the … Read more

Thule T2 and T2 Pro XT Bike Rack Review

As far as hitch-based bike racks go, the Thule T2 lineup (classic and Pro XT) are sturdy, durable, and will get the job done for a long, long time.  While the price is a little higher than we would prefer, if you have the ability to extend your budget to this price point, you won’t be disappointed by the Thule T2 models. Find them here: Thule T2 Pro XT Thule T2 Classic How I Tested the Thule Racks I gave the Thule XT racks a good test in two settings. First, I did a thorough in-store inspection, which allowed me to see the racks in an out-of-the-box state and perfectly clean, which was nice. Second, at a bike race I was, doing, I arranged through my riding partners to examine and use the Thule T2 and T2 Pro. I was looking specifically for things like: Is the rack intuitive to use? How securely does a bike attach to the rack? Is the rack hard on the bike? Does the rack sit securely in the car hitch mount? Can you fit the advertised number of bikes on the rack without them rubbing each other? Thule T2 and T2 Pro XT Overview I love the Thule car bike carriers because, in our experience, they are well-built and very intuitive to use even for someone who is new to cycling.  They cost a little more, but car bike carriers are one area where you truly get what you pay for.  Skimp and your bike will be hanging from a flimsy carrier while you are doing 65mph down the road. The Thule brand name, build quality, and reputation for durability all contribute to the premium pricing, but what you get for it is a premium product.  Not to mention, if you ever decide to sell it used, you will fetch a lot more for a Thule than you will for a no-name rack from China. The expense of a lost or damaged bike obviously depends on the bike itself, and it follows that serious cyclists with significant investment in their bikes should invest proportionally in racks to carry them. That means eschewing the private-label racks from the discount tool supply or mega-combo department-grocery for a more thoughtfully engineered and constructed rack from a respected brand. Any model carried by a bike shop or upscale sporting outlet fits that bill, but few brands are as synonymous with quality rack and carrier solutions as the venerable Swedish outfit Thule (pronounced “TOO-lee”). Dating to the 1960s, Thule’s current line features carriers for everything from skis to stand-up paddleboards, including their most refined bike racks yet. We are big fans of the T2 bike rack lineup. Thule T2 Features Thule’s T2 range are the ideal configuration for many cyclists: tow-hitch mounted, with trays to securely hold bikes by the wheels. The hitch mount means a rack effectively bolted to the vehicle frame, while the tray system holds bikes in place only by the wheels to prevent damage from clamping on carbon fiber frames or delicate finishes. And while the rubber bands on some racks may work, the security of the Thule T2’s metal and composite construction is an undeniable benefit, even if it’s largely psychological. As the name suggests, the T2 iterates on the popular T1. The default configuration carries two bikes, with additional two-bike add-on units available. The Thule T2 Classic and T2 Pro XT models share the same 2-bike hitch-mount and tray-secured design, as well as the same basic operation. Both are clearly priced as premium offerings compared to Thule’s more affordable frame-hanging and clamping options, but the T2 Classic still provides a significant savings over the T2 Pro XT. The greater use of aluminum in the Pro XT’s frame provides an 8 lbs weight savings over the Classic, but at 52 and 60 lbs, respectively, the difference is not immense. Instead, the XT promises greater strength and stability with large-section shaped aluminum tubes replacing the Classic’s plain steel rectangles. The XT’s adjustment points are also significantly more substantial and ergonomic in use, especially the tilting function: an exposed steel linkage and small latch on the car end of the Classic are replaced by a large handle on the XT, placed conveniently at the very rear end of the rack. On both models, the tilt serves a dual purpose, allowing a slight tilt with bikes mounted for hatch access and folding away completely when not in use. For fat bike riders, you can buy a conversion kit (here) to make the wheel tray wide enough for your fattie. You will need to buy one kit per bike, it only converts one pair of trays. Thule T2 and T2 Pro – Positives and Negatives What I liked: Sits solidly in a 2-inch hitch receiver Super intuitive folding up when the rack is not in use Holds bike to rack securely with all the pressure on the tires, not the frame Fast to mount and dismount bikes. Intuitive design. What I would change: Feels “plastic-y”. Probably doesn’t affect the performance of the rack at all, but I like when these racks have more of a metal feel. I wish the rack had some reflective tape, to remind vehicles behind you that it is on there. You can always add this yourself. I might not want to cram the max number of bikes on, if they are higher-end carbon fiber bikes. But that goes for most racks I test. Thule T2 Classic vs. T2 Pro XT Let’s address one elephant in the room:  Thule’s T2 comes in a couple popular varieties — the old Classic (which has been discontinued but you might find several floating around used), and the Pro XT.  Which is better? For Thule shoppers picking between the T2’s Classic and Pro XT flavors, budget is likely to be the first consideration. However, those interested in exploring the 4-bike capacity offered with Thule’s add-on system might take caution from user reports of quality issues. T2 pro … Read more

Should You Buy a Used Bike?

Should You Buy Used Bike: A Guide to Used Cycle Shopping When I first started cycling more seriously I (like many of you) had some sticker shock at the price of new bikes. Unless you are a high-earner getting into cycling after making a few bucks, it can seem crazy to spend as much on a bike as you would on a basic used car. Naturally, I looked at used bikes. My first two “real” road bikes were used, and while they worked out fine, I learned a few things about used bike buying in the process. The bottom line – buying a used bike can be a way to get more for your money, but don’t let the tail wag the dog when you start seeing discount prices. Don’t settled for the wrong bike! Why Consider a Used Bike Budget Friendliness Obviously, the whole point of buying a used bike is to save money. New bikes can be crazy expensive, even cheaper road bikes, whereas used bikes are often significantly cheaper. This means that I can get a better quality bike for my budget if I choose to go used instead. I might even be able to find a really good deal on a brand-name bike that’s been well-maintained by its previous owner. It is pretty common for a 5-year-old bike to be about 40% the cost of what it was new….. and that is assuming it is still in excellent condition. Shopping for used bikes could mean that your money will get you a road bike and a mountain bike, for example, instead of having to choose between one or the other. Environmental Impact Another reason I’d consider a used bike is that it’s an environmentally friendly choice. Cycling itself is already a green mode of transportation, but buying a used bike takes it a step further. When I buy a used bike, I’m helping to reduce waste and extend the life of a perfectly functional item. It’s a small step towards a more sustainable lifestyle. Factors to Consider When Buying a Used Bike When I decide to buy a used bike, there are a few factors I need to take into consideration. I want to make sure I’m getting a good deal and a bike that will serve me well. The last thing you want to do is regret saving a few bucks because you get the wrong bike, or a defective bike. Bike Condition Just like buying anything used – a car, or even a home – you want to be sure the bike is in the condition that works for you! Before purchasing a used bike, I always check the bike’s condition in detail (which makes it difficult to buy site-unseen on Ebay.) This includes inspecting the frame for any cracks – especially if carbon fiber, or any signs that the frame was damaged or bent in a crash.  I like to look at metal parts like the chain for rust, as it can be an indication on how well the bike has been cared for. Check to see if the wheels spin true and straight, or if there is a wobble. Then be sure that the brakes are working properly and don’t squeak.  If the prior owner was content with poorly-fitting brakes, then he or she probably didn’t take perfect care of the bike. I make a note of any parts that need to be replaced or repaired, as this will add to the cost of the used bike. If there are too many issues, I move on to the next bike.  I am not looking for a fixer-upper. Bike Fit One of the biggest advantages of buying a new bike is that you can get the size that fits you just right.  Be sure that your buying used doesn’t compromise your ability to get the right fit! I once bought a bike on Ebay that was a great deal, and a relatively new bike for the right price.  But instead of buying the 58 that I should have gotten, this bike was a 56.  It was fine for a summer, with the right adjustments, but it was never going to be the bike that I would grow to love, due to the sizing.  I sold it a few months later. In short, look for: Standover height: When straddling the bike, I make sure there’s about an inch of clearance between my groin and the top tube. Saddle height: I adjust the seat height so that when my heel touches the pedal at its lowest point, my leg is fully extended. Reach: Sitting on the saddle, I check that I can comfortably reach the handlebars without leaning too far forward or back. Another approach could be to buy a used bike that generally fits you well, but then get a professional bike fitting to modify it and perhaps update parts like the stem and saddle so it fits just right. Doing so might still save you money versus a new bike, in many situations. Plus, you should be doing a bike fitting anyway, any time you get a new bike. Safety Checks Don’t skimp on safety when it comes to your new bike!  Check the following: Frame Go over the frame with your finger, feeling for any cracks or ridges that might be caused by a fracture. They can be hard to detect with your eye. Especially on a carbon fiber bike, a frame crack could be a major safety risk.   Tires and wheels I examine the tires and wheels for any damage, such as cuts or excessive wear. Don’t worry about tire pressure, you can pump it up, but do be concerned if the tire doesn’t hold air (which can be common with a tubeless tire that has not been used in a while).  Then you need to decide if the tire just needs new sealant or a tube, or if there is a bigger issues.  Also, be sure the spokes are all good … Read more

Tacx Flux Smart Trainer Review

tacx flux 2 review

The Flux models, the Flux 2 and Flux S by Tacx, are solid smart trainer options for the money.  The term “sweet spot” comes to mind when writing about them — they occupy a nice price point but also provide impressive functionality. What we like most about the Flux models is that they give you a full ability to enjoy smart bike training, but hold off on just enough of the “splurge” features to provide a significant value. Tacx is a legitimate leader in the connected smart trainer market. Best known for the “hold nothing back” Neo 2T, a high-end trainer, Tacx has a couple more affordable smart trainers on the market too.  The Flux lineup makes the outstanding Tacx technology a little more accessible who want to keep their investment under $1,000. Here, we will take a hard look at the two Flux models — the Flux 2 and the Flux S.  You can get them both direct from Garmin, here. Tacx Smart Trainer History and Lineup Tacx has been making smart trainers since 2014, but the company has been around a lot longer than that.  Tacx is one of the longstanding cycling companies, originally building old-fashioned rollers and roller parts.  Rollers gave way to spinners and trainers, which gave way to the smart bike trainers we know today.  Actually many rollers and traditional trainers are still in use by people across the globe. While the Neo 2T sits atop the lineup for Tacx, the Flux models — the 2 and the S, are lower-priced options that can be great buys for some riders, depending on what you are looking for. Today, Tacx is owned by Garmin, the maker of everything from GPS units to the best fitness watches on the market. If you are into other Garmin equipment, it might be to your advantage to go with a Tacx trainer. Garmin tends to add features that are only available to people on their platform with every new product release. Tacx Flux Competition and Alternatives The Flux 2 and Flux S sit in a unique spot in the market.  The primary competition probably comes from the Wahoo KICKR Core, the less-expensive version of the Wahoo KICKR.  Saris, another heavy-hitter in the industry, only makes the one trainer — the Saris H3 — but they keep some bells and whistles off and price it just a hair above the two flux models. I guess you could say the other competition for the Flux 2 and Flux S are traditional bike trainers, which sell for less.  But comparing traditional vs. smart trainers is really like comparing apples and oranges, which is why we really don’t consider them competition. We commend Tacx for offering these lower-priced options to the decked-out Neo 2T, much like we like the fact that Wahoo has a KICKR Core option for people looking to save a few bucks.  What do you lose out on by spending less on the Flux models versus the Neo lineup?  We go in to more detail down below, but in short you will get a lighter flywheel and less of a ride-simulating feel. Don’t let that make you think you won’t get great workouts on a Flux.  You can get the same sweat on a Flux that you will on a Neo or Peloton, only or much less. Flux Ride Experience We love riding Tacx products, because are smooth to pedal, very quiet, and connect seamlessly with your app — no matter which you are using. For the money, we found that both the Flux 2 and Flux S provide a great indoor riding experience.  Fully connected, you really don’t lose any compatibility with the bike training app that you use, be it Zwift, Sufferfest, Rouvy, Trainerroad, or something else. Our experience with the ride quality was excellent — the Tacx Flux is smooth, although you will notice that you don’t quite have the resistance that you do with the Neo 2T.  That is because the flywheel is smaller.   This is a good time to note some of the differences between the Flux 2 and Flux S, and it starts with the aforementioned flywheel.  Think about the Flux 2 as being midway in between the low-end Flux S, and the high-end Neo 2T.  The flywheel on the Flux S is the smallest, while the Neo 2T has a big, heavy flywheel.  The Flux 2 is positioned right in the middle, in a sweet spot of sorts. Why is this important?  Because the flywheel size is a big factor in your ride experience, especially at heavier resistance levels.  Flywheel size and weight determines several things:  The overall resistance you can get (max wattage), the responsiveness of increases and decreases in power, and in some cases the smoothness of the overall ride — although Tacx tends to excel on that last point, regardless of which model we are talking about.   We found that the flywheel of a Flux model is going to be enough to give us some really hard work, and we think it will work for most riders as well.  We found that the Flux can give a solid, stable resistance in that magic zone of 150 to 400 watts, which is where most riders will spend their time.  Spurts up to 900 watts were high-quality.   The Flux 2 is going to be a bit more smooth and stable if you are someone who does intervals (or climbs on Zwift) and really wants to push into high wattage routinely. The Flux 2 offers a max power of 2,000, the Flux S offers 1,500.  Both are enough for virtually any rider out there, although if you are a semi-pro, it is nice to not be riding at the very top-end of the trainer’s limits. With all of that said, there is a difference in the inertia you feel when riding the Flux 2 vs. Flux S, so if you are asking yourself “what makes the 2 worth $150 more?”…. that is probably … Read more

Clincher vs. Tubular Bike Tires

Clincher or Tubular?  When it comes to bike tires, those are your choices.  It is a common question among cyclists, triathletes, and recreational bikers.  Why are there even two types of bike tires?  Each evolved with its own set of reasons and following.  We wanted to give you the definitive low-down on which tire you should go with. Before we go any further, the clincher is the “normal” tire that you are probably used to from riding other bikes – ranging from your childhood bike to a BMX racer to a typical mountain bike or comfort bike.  The clincher is far more common, and generally viewed as the standard. Clincher Bike Tires Clinchers are the bike tires you rode as a kid.  They have an outer “carcass” made for whatever type bike they need to be.  The name clincher comes from the fact that these tires “clinch” to the rim of the wheel with a bead of hard rubber.  Like a car tire, a clincher has an open bottom, and the only way it stays on the rim is to clinch to it. A clincher needs an innertube in order to operate.  The tube is what holds the air, and creates solid pressure against the tire.  When you pump air into a clincher tire, you are really pumping air into the tube.  The tire just sits on top of the tube. You will have a couple choices in valve stems for pump air into the tire – Schrader vs. Presta valves. The one found on many kids and standard bike is a Shrader valve, it is wider and more basic.  The thinner, sleeker valve stem is the Presta valve.  It is what you find on pretty much all road or triathlon bikes, but you need to make sure you have a bike tire pump that can accommodate it. Clinchers are easy. Easy to install, relatively easy to fix on the road if you get a flat. There are many great clincher tires to choose from, and it really all depends on the combination of durability and performance you are looking for.  Our favorite clincher tire right now is the Vittoria Rubino Pro. (find it here on Amazon). Tubular Bike Tires Hardcore cyclists and road bike racers have long considered tubulars to be the gold standard.  They ride like a dream because of the lighter weight and tight adherence to the him. Tubular tires look the same as clinchers on the outside, but work in a very different way.  Tubulars are completely round, so there is no open part of the tire that needs to clinch.  There is also no tube needed – -the tube is basically sewn into the tire and is part of it.  As a result, the tubular is just one piece, whereas the clincher is two pieces (tube and tire).  Tubular tires are often glued to the rim, because without some glue they tend to move around a bit. Tubulars are less common, but have a strong following with many road and triathlon cyclists.  We will get into a comparison below, but they tend to be lighter and sometimes more durable.  If you are not used to working with tubulars, though, it may take a little practice to become handy with them. Tubulars are a pain for install and repair, so bear that in mind. Our favorite all-purpose tubular is the Vittoria Rubino G+ (here on Amazon). Comparison of Clincher vs. Tubular Bike Tires Here are a few of the pros and cons of tubulars vs. clinchers, based on our experience in input from many experienced cyclists. Cost.  Advantage Clinchers.  Clinchers tend to cost less than tubulars, and while not significant difference it is probably in the 20-30% range.  What really causes the clinchers to cost less is the fact that when a tubular goes flat, you change the whole tubular.  When a clincher goes flat, you typically just change the tube, which costs $5 – $7.  (note that you need to change a clincher tire once in a while too) Note that tubulars require a different rim for your bike wheel, as well. Simplicity.  Advantage Clinchers.  Some would argue that as long as you learn how to work on a tubular, it is every bit as easy to change as a clincher.  That is the problem though – most beginner and intermediate cyclists have not worked on tubulars, but they know clinchers.  Tubular tires also require glueing them to the rim.  That can be a tedious job, but something you get good at just like changing a clincher tire (for a road fix, you can usually get by without the glue for the ride home).  Just know that if you make the move to clinchers, you will need to spend a little time learning how to change the tire. Durability.  Advantage Tubulars.  This obviously depends on which tire you buy.  A clincher Gatorskin is going to be stronger than a tubular slick.  But all things being equal, the tubular is typically going to give you a little more mileage because of its construction.  Having the tube basically sewn to the tire gives you a bit more strength, and it also eliminates the possibility of pinch flats or getting a small piece of rock in between the tire and tube (which almost always causes a flat). Weight.  Advantage Tubulars.  Because you don’t have the clincher bead, and the tube is really part of the tire, the tubular tire is usually going to be a bit lighter.  It is not uncommon for a tubular setup to be 200 grams lighter – per tire – than a clincher setup.  While this might matter for elite cyclists, most of us would probably notice more of a weight difference if we simply lost a pound or two! Road fixes.  Advantage Clinchers.  This one is a very clear advantage.  Fixing a road flat is pretty quick with a clincher, especially if you have a few reps under your belt.  Fixing a … Read more

Buying an Entry Level Triathlon Bike

Buying your first entry level triathlon bike can be a daunting task.  When I bought mine, I was extremely excited about getting on a built-for-triathlon bike, but a little nervous that it was going to be an entirely new type of bike for me. Of all the investments you will make in the sport of triathlon, no single one has the potential to carry the cost of your tri bike. While any given race will see its share of $3,000, $4,000, and higher-priced top-end cycles, the right bike for a beginner triathlete doesn’t have to be that expensive even though the triathlon bike entry-level pricing has gone up dramatically in recent years.  Still, it is pretty easy to spend $1,500 to $2,000 on a quality starter triathlon bike and end up with a very good ride. Here are a few things to look for in your entry-level tri bike, along with a few recommendations. Tri Bike or Road Bike? Perhaps the most common question from new triathletes is if they should even buy a triathlon bike at all, or if it is smarter to just go with a road bike.  (By the way, if you were looking for a deep dive on road bikes, we did that too.  Check it our complete guide to road bikes) The answer seems obvious, but it is worth articulating: It depends on the type of riding that you plan to do. If triathlon might be a once-every-few-years type of thing for you, but you have paved trails in your area, you might opt for a road bike. We won’t go into road bike recommendations, because they exist all over the web. If you think, however, that you might want to do a triathlon each summer, or maybe train for a Half or an Ironman, then investing in a triathlon bike can be a great idea. Triathlon bikes are built with specific geometry to give you a posture allowing for a more direct transfer of power to the cranks, and puts you in a position that will leave you with a little more gas in the tank for the run. You will most notice the power difference of a tri bike when cycling hard down a straightaway. The power transfer to your cranks can be pretty exhilarating. We do recommend investing in one or the other — a triathlon bike or a nice road bike — instead of splitting the difference on two mediocre bikes.  Having a go-to bike that you can get to really well, become comfortable with, and gradually upgrade the componentry on will make you a better cyclist over time.  We even like putting that bike on an indoor bike trainer in the winter so you get good work on the very bike you will be racing on.  Riding the same bike year-round will give you a great feel for the bike and make it very responsive for you over time. Of course, if you have the budget, having both a nice tri bike and a nice road bike are nice to have, but we know it comes at a cost. What to Look for in a Triathlon Bike There are a few things I recommend you look for in your triathlon bike, regardless of your budget.  Triathlon bikes come in all shapes and sizes, and all price points. At the entry level, here are a few things we suggest you focus on to make sure you are getting the most value for your money. Fit Every good bike advisor will tell you that getting the right fit is the single most important factor in if you will enjoy your bike. The fit should be one that feels comfortable, but also allows you to transfer max power to the pedals. A high-end bike that stretches you out a bit too much, for example, will not ride nearly as well as a lesser bike that fits you. Note that different brands have different angles and builds, so a 56cm bike in one brand is not always identical to the same size in another brand. The bottom line:  Do not compromise on fit. Invest in a good bike fitting once you choose your bike, or even before you choose it! Frame One of the biggest determinants of triathlon bike pricing is the frame materials.  It is not as easy as saying “this one is the best”, it really depends on how you plan to ride. Carbon Fiber costs more than Aluminum, which costs more than Steel. You really won’t see many steel bikes on the market anymore, so let’s rule those out for purposes of triathlon training.  As you look at frame options, know that carbon is going to be the lightest of the entry-level price point frames, and it typically provides the best overall ride on the road.  It can be a very responsive frame on hills and accelerations, and is in some ways the standard out there today.  The downfall is that it can be easily damaged, and the damage is not always visible which can create safety issues. Aluminum is by no means going away.  People like the durability of aluminum, and the fact that it is less expensive.  If a manufacturer makes a bike with an aluminum frame, it often means that they had more money left over to put better components on it, all while staying within their target MSRP.  In some ways, you get get more bike for the money, although it is likely going to be a little bumpier riding down a rough road.  You won’t see many steel-framed bikes on the triathlon market, save for some very old used models.  Titanium is also a growing type of frame, but typically not as the entry-level price point.  In general, try to get the highest-end frame that you can afford, because you can always update components over the years. Why? Because the better the frame, the a) lighter it will be, and b) the more your effort will … Read more

5 Great Entry-Level Road Bikes

best felt road bike $

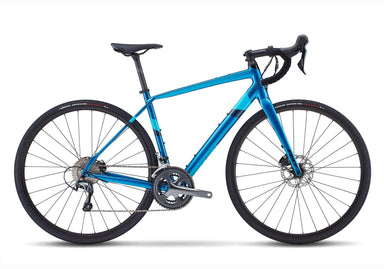
We love seeing people get into cycling – whether it is purely recreational, or to build up to longer rides, or to ultimately compete in a bike race or triathlon.  Our attitude is that the more cyclists there are — regardless of your budget — the more demand for trails, dedicated bike lanes, and bike amenities which we all benefit from.  It creates a productive cycle – not to mention, it can make the population healthier which is good for all of us. Buying an entry-level bike, though, can be mind-boggling.  Not only do you have dozens of brands to choose from, but each model seems to have an unlimited combination of components.  No doubt, when you start looking for a bike, you will either fall in love with the first one you see, or be numbed by all the choices and decisions you can make. What’s more, for many manufacturers nowadays, “entry level” can mean anything up to about $2,500.  That is a bit more than the typical newbie might consider to be entry level, but if you plan to ride a lot, you don’t want t skimp either.  Luckily, there are still some pretty good options in the $1,000 to $2,000 range, too. A Note About Road Bike Buying Before we get into the entry-level road bikes that we really like, we wanted to make a couple comments on the process of buying a bike.  We might be a triathlon blog, but at any tri club or on race morning of a triathlon, you will see lots and lots of road bikes.  They are part of our sport so we know a thing or two about buying them. First, there is a reason that Independent Bike Dealers have been a mainstay of the cycling community for so many years.  If you aren’t quite sure what you are looking for, and even if you are, they can be incredibly helpful in finding a bike that works for you.  Sure, we can make a buck or two if you buy through one of our partners (linked below), but in the bigger picture we want people to ride the right bike for them.  If that means a trip to your local bike shop, we are all for it.  Our website has never been intended to take business away from local bike shops.  Just the opposite — we want to get more people into the sport so that independent bike dealers have a larger universe of customers! Fred Clements of the National Bike Dealers Association says it best, “a good bike mechanic is an artisan, not a laborer or engineer.”  Find a good mechanic at a local shop, and he or she will get you on the right bike for you. Second, the decision that you really need to make is threefold when it comes to buying a road bike.  Which bike frame/make do you want (and this should largely be based on fit), which “moving component” set to do want, and then which bells and whistles are you looking for.  This is why you might see one bike model that comes in 20 different variations – there could be an almost endless number of component combinations you can outfit a single bike with. Third, we list some bikes  here that eclipse the $2,000 mark – which might seem like it is way above entry level.  We do this for a couple reasons – first, for the right cyclist, $2,000 is a bargain for a good road bike.  If you are someone who ultimately gets hooked and puts 5,000 miles a year on your bike, you will want something with some quality and features.  Finally, bikes are often discounted by various retailers – so a $2,000 bike might be found for way less if you can catch it at the right time. 5 Great Entry Level Road Bikes Let’s just get to the point.  Here are 5 “entry-level’ road bikes that we really like right now and are easier on the budget (if you were looking for triathlon bikes, don’t worry, we researched that as well, here). (Cutting to the Chase, our Favorite is…..) If you want to spare the reading, we will help you get to the point.  We assessed these bikes, rode them, inspected them.  There are two that stand out.  The Felt VR40 is just such a great value for what you get, riding the smooth aluminum frame is a dream.  And you gotta love the Trek Emonda, especially when it gets the hand-me-down features from its more decked-out siblings. With that said, let’s outline the top 5. Cannondale Topstone Road Bike The Cannondale company has been building bikes since 1971.  While many bike companies tend to be based in the Northwoods of Wisconsin or Minnesota and Western USA, Cannondale is an East Coast company, based in Connecticut.  We like the lineup that Cannondale offers, although they crank out enough bike models so it can take some time to get your head around it all. The Topstone is actually a pretty massive lineup of bikes — positioned just under the Synapse lineup which has become a little too pricey to be “entry level” in our book.  Some Topstone models can be found at the entry-level price point, and depending on componentry will typically be found for $1,000 to $2,000.  That is a good price for a very high-quality bike.  Other models can cost double that price or more.  We are obviously focused on the entry-level price point for this article, so are talking about the alloy frame.  The one that we recommend is the Topstone 1, a great alloy bike that gives you an excellent ride on both fast pavement and hardpack gravel (it is actually also on our list of best gravel bikes for this reason), and is even a good commuter bike — an excellent all-around model.  If you want to spend just a little more, there is the Synapse 105, coming with (as you could … Read more

Our 5 Favorite Climbs on Zwift

zwift vs peloton

Zwift has grown in its popularity by leaps and bounds, now with an estimated half a million users (maybe more) and being the talk of the town among indoor bike riders. For anyone with a smart trainer, they have no doubt heard of Zwift if they aren’t already using it. While Peloton has the huge commercial presence, with heavy marketing to prove it, Zwift has more grown consistently because of the word-of-mouth of the riding community. It differs from alternatives like Sufferfest and Trainerroad in that it is a true gaming experience, where you can interact with other riders in addition to the trainer. One of our favorite things to do on Zwift is to climb. The climbs are something we always look forward to on our rides, and they are made even more fun by the fact that they are often timed segments where you can gauge progress against your own PRs as well as other riders.  Making the leaderboard for a hard climb is a true accomplishment, given that you are riding with finely-tuned riders from all around the world. Plus, climbing workouts are one of the best overall indoor cycling workouts that you can get, in our opinion.  Here are our favorite climbs on Zwift right now.  Not necessarily the hardest (OK, one is) or the longest — you could easily just sort the climbs by elevation if you wanted that.  But these tend to be the ones we keep coming back to, our favorite climbs to tackle. Fox Hill. Surrey Hills course. 1.86 miles, 512 vertical feet. We start with Fox Hill, which to us is a great test of how good a day we are having. We love the variety of the Surrey Hills rides, and Fox Hill is a nice, short, steady hill that will put you through a good test. Many consider this portion of the route as a nice recovery during a lovely ride. This means that you won’t lose your pack, even if you’re kind of taking it easy. You can very well rely on Fox Hill whenever you’re in the mood for a ride that doesn’t require loads and loads of effort. What’s most important here is to maintain speed and position. Other details we should mention about the Fox Hill segment is that its lowest elevation is 36m, the highest elevation is 156m, so the elevation difference is 120m. While having an average grade of about 4%, keep in mind that there will be times when you’ll climb at a grade of approximately 11%. Be ready for the start – this hill throws the double-digit grade at you right in the first minute and two.  The only real coasting comes toward the very end of the segment. Fox Hill is a pretty popular ride, thus there are a lot of other enthusiast riders you can compare results with. Plus, you can admire some lovely sceneries along the segment, which is another bonus point for this sweet, simple climb.    Innsbruck KOM (forward), Innsbruck course. 7.43 km. Who doesn’t like a great ride through the Austrian Alps? Following the UCI Worlds Lap Course from 2018, the Innsbruck KOM climb is one that packs a punch.  This segment’s lowest elevation is 296m, the highest elevation is 696m, thus the elevation difference is 400m. With an average grade of 5%, the Innsbruck KOM Forward will, from time to time, have you climbing at a grade of about 12% or more. While the first few minutes of this ride are flat as you leave Innsbruck, it doesn’t take long to hit the incline.  When you do, it will be several minutes of intense climbing with very little break. The Innsbruck KOM Forward course will gift you with charming and awe-inspiring natural sceneries all around. Besides that, as you round for the final corner, you can use timing as well as the surrounding landmarks to your very own advantage.   The Forward KOM segment obviously follows the Reverse KOM path. The two courses are nearly symmetrical, and meet up again at the bottom of the mountain.  You can do the loop either way, but Zwift will default to having you go clockwise — the “Forward” route. When you’re on this route, enjoy the sprint, conquer the climb, adapt your pace, and stay adequately hydrated. Look to your right and admire the scenic Swarovski Crystal Worlds Giant, a mammoth face that was built, piece by piece, by a talented 3D artist. For a typical “fit-but-not-elite” cyclist, this is roughly a 30 minute segment, and it is popular so there will be plenty of other riders to compare yourself to. The last time I rode it, there were 750 people on current leaderboard.  It throws a little bit of everything at you, but won’t leave you as sore and spent at the Road to the Sky because it incorporates more flats for catching your breath in between uphill sprints. It was difficult to choose just one climb from the Innsbruck course.  While this tends to be our favorite, doing the reverse route is a quality climb, as are the longer rides that incorporate these routes. Leith Hill, Surrey Hills course. 1.95km. 7% incline. It is funny how a grade averaging 7% may not seem like a terribly intense climb, but when you are in the middle of a 10-minute all-out climb like the one on Leith Hill, you will wish it was more like 4%. Truth be told, you will spend some time on this climb at more like a 10%+ grade. Fast enough to be able to keep your chainring turning, and short enough so you can go anaerobic for a bit, this climb can actually be done in the same session as the Fox Hill climb. Since this course often keeps you off of flat ground, you’ll definitely get plenty of climbing done along the way. Interestingly, the segment starts at a different spawn point compared to other courses along the British capital, … Read more

Best eBikes Under $2,000

riding ebikes

E-bikes are more popular than ever! E-bikes help people ride further, faster, make riding more fun, and help people get on a bike who otherwise couldn’t. And with more manufacturers making e-bikes than ever before, the cost of an e-bike has become much more accessible, as well.  We are going to take a look at the three best e-bikes under $2000. We’ll talk about each bike and who it’s best for. We’ll also talk about some important information, such as battery life and bike design so you can choose the best e-bike for your ride. Let’s get started.   Best eBikes Under $2000 Electric Bike Company Model R This is quickly becoming my favorite e-bike in the sub-$2,000 range. The Electric Bike Company’s Model R is a great all-around bike for the money, and by buying direct from EBC we think you get a better value than you might when buying a bike through traditional retail channels, given the markups needed to make them profitable. Electric Bike Company only sells direct. They have the shipping process that enables the bike to arrive fully-built, in a rugged shipping box on a pallet. Basically, the bike shows up in your driveway ready for a quick charge, and then you can ride it. Pros Powerful 500 watt motor Step-through design that made it perfect for someone who was looking for an easy bike to get started on Seamless shipping process Bike arrives fully built, ready to go Ability to customize when ordering Cons Local dealerships might be less familiar with them if you need service, but that probably isn’t a bike problem A little lead time is needed to get the bike given that it is custom built for you and then shipped Find it here Coop City e2.1 Coop City e2.1 is easy and comfortable to ride. You’ll find it has a multimode pedal assist, an upright riding position that still allows for some aggressiveness when you need it, and a factory a rear rack. Offers Class 1 pedal assist up to 20mph  Up to 50 miles of pedal assist 418-watt hour battery capacity  Bike weight of 50.5 pounds  Low stand-over height  Upright riding position with adjustable stem  Three pedal assist modes Front suspension  Shimano hydraulic brakes  The rear rack can accommodate a kid carrier, pannier, or trunk bag Front and rear lights run on the battery  The total weight limit is 300 pounds   We love this bike for daily commutes and fun weekend rides. The rack holds up to 59 pounds, so it’s suitable for a child seat or to get groceries, making it perfect for commutes or family fun rides. The upright position with an adjustable stem means you can adjust the height of the handlebars to whatever comfort level you need.  Pros Coop is REI’s inhouse brand, so if you live near a store you can get easy access to service and parts Best battery assist life of the 3 options Good size range. Sizes accommodate both larger and smaller riders Cons Some riders might be looking for a more aggressive, mountain-bike fit  Find it here Cannondale Treadwell Neo2 This bike is lightweight and fun to ride. Since it is lightweight and snappy, this is a great bike if you want to be able to turn off the battery and get a little extra exercise. And the rear hub drive is barely visible, so it won’t be evident that you’re riding an e-bike, and the upright position makes it very comfortable no matter how you ride.  Plus, Cannondale is one of our favorite bike brands for road bikes and gravel bikes, so they likely figured out eBikes too. Offers class 1 pedal assist up to 20 mph Up to 47 miles of pedal assist per charge  250 Wh battery  Just 34 lbs Free Cannondale app works with the bike to track speed, distance, calories, and reminds you of service needs Great for in-town rides and crowded streets 7-speed drivetrain / Tektro mechanical disc brakes This bike is great for anyone looking to use their e-bike for both exercise and assisted riding. It’s the perfect bike for Sunday brunch and ice cream Sunday runs! You can do unassisted interval training and get your workout in, too.  Pros Super lightweight as far as ebikes go Concealed battery – bike looks like a normal bike Cannondale brand — timeless and trusted Most drivetrain range of the 3 options Cons Stock tires are not that tough. May want to upgrade if riding on rough surfaces. Find it here Wing Freedom Street If rough roads are on your horizon, the Freedom Street by Wing is a great choice. It has extra-wide puncture-resistant tires, making your ride feel smoother and lessening your chances of a flat tire.  Up to 43-mile range on a single battery  Up to 20mph pedal assist Optional second battery for an extra 25 miles of run time.  A brushless gear hub motor gives you plenty of power for urban streets and challenging hills  Hydraulic disc brakes for excellent stopping power This bike is perfect for in-town roads. If you’ve got a long urban commute or some steep hill climbs, you’ll love the extra distance you can get from the dual battery.  Pros Easy online buying and shipping process Lightweight for an eBike Anti-theft system Cons Newer brand (but it doesn’t concern us) Battery life is in the expected range but on the short side Aventon Aventure E-Bike Rugged and comfortable is the name of the game with the Aventure E-Bike. It’s got plenty of tech, a bit of sophistication, and terrific handling.  You have probably seen a lot of Aventon bikes around, they have established themselves as a market leader. One of their other models, the 500, is one of our favorite ebikes for older riders too. Front suspension fork Extra cushy fat tires Exceptional handling Built in fenders  Integrated front and rear lights  Backlit LCD Class II Ebike, but can be reconfigured to be Class III  Top Speed of 28mph  … Read more