Complete Tri

Power Meter Buying Guide – Review of the Best Models

Cycling power meters can help cyclists take their conditioning and speed to the next level.  A good power meter might not be on the “basic needs” list for a beginner, but many intermediate and advanced cyclists and triathletes can benefit from one.  Powermeters can be relatively easy to install, and used both with tri bikes and road bikes.  For that matter, they can really be used with any bike, but most people who use them are trying to increase their training precision and crank up their speed. You wouldn’t lift weights without knowing how many pounds were on each dumb bell.  The logic of power meters is the same — you can improve what you can measure. Most cyclists and bikers are gear junkies, but power meters add another level of sophistication to bike gear.  They can be a bit difficult to get your head around because of the fundamentally different options available for measuring power, but we will try to simplify it in our guide below. First, we are going to get right to the point and share with you our favorite power meter models and setups for different situations.  We are listing our favorite 4, from least expensive to most. Best Bike Powermeters For 2024 Best Pedal-Based Power Meter / Best Overall:  Garmin Rally 200 Here. We hesitate to choose a single power meter model as best, because every type of power meter has its own merits and it can be hard to compare one to the other.  We describe how various power meters work below, but if you want the simplest possible design this is it.  Garmin makes a pedal-based power meter that measures our watt output based purely on the force exerted on the pedals.  Yeah – that is pretty incredible.  While you might miss just a bit of the accuracy of a full-on power-measuring system, we have found that pedal-based power meters give you everything you need on performance, and some pretty incredible data as well.  It is a high-tech product and our experience is that the readouts are going to be accurate. We did a full Garmin Rally 200 pedal review. Note that Garmin suggests this power measurement is accurate for riders up to 240 lbs.  Above that, we are not exactly sure what happens, but they suggest it might not work as well. An important factor to consider with the Rally 200 is the cleat type. This pedal is currently made in two pedal styles — the RS is the SDP-SL model, and the XC is the SPD model.  You can get one-sided or dual-sided (meaning you can have just one pedal give you power readouts, or both).  There is not reason to not go with the dual, other than the higher price. We had good luck with the batteries, good for up to 120 hours per the manufacturer and we believe it based on our field tests.  As for getting your readout of power, the most common method is probably going to be to add the Garmin software to your phone and logging it that way.  For those who want an easy way to monitor power while on a ride, you may want to mount the head-unit on your bike, but the place to track your data from ride-to-ride is on your Garmin Connect, not your watch or computer. The only issue we had was that the battery cover came off a couple times.  We lost it once. You can save money going with the Rally 100 pedals, but that is only single-sided so you get none of the pedal symmetry stats. For $1,100, this is not cheap but if you have the budget, you will be astounded by the data provided.  Of the choices you have, this is going to be by far the easiest and simplest to install.  It is as easy as putting a new pedal on.  Buy it direct from Garmin for the best deals and service. Runner-Up Power Meter:  Stages Crank Arm-Based Powermeters Also at the simple entry level, but in a different concept, is the stages line of power meters.  We love these.  Like the Garmin, they rely on making just a slight adjustment on one side of your power system.  Unlike the Garmin, the Stages model does it through a modified crank. The crank that you put on your bike is a carbon fiber, high-end crank that has a weight and material on par with the good Shimano and Campy products that come stock on your bike.  They make models for mountain and road bikes – we are obviously focused more on road bikes (and triathlon bikes) in this review.  The powermeter sits inside the left crank, and it is already fully installed and sealed inside.  You don’t need to do anything but put the crank on the bike (with a torque wrench — these are delicate materials). The cons of a crank-based approach are that you are obviously messing with something — the crank length and design — that you might be completely comfortable with already.  You really won’t feel much of a difference if you swap out hubs (noted below), but you may feel a difference when you use new cranks.  Still, these are very well-designed cranks, so for most people it will be a lateral move or even an upgrade. The battery life is going to be significantly longer than the pedal model, at 200 hours or more.  You can measure up to 2500 watts, which is more than enough for any cyclist on earth, same with the up-to 220 RPM tempo measurement.  We love that the weight will only add about 18-20 grams to an otherwise 170-200 gram setup, hardly enough to even register.  Note that it is designed to only go on one of your cranks (usually the left) so your reading will be from that side only.  For most cyclists, that shouldn’t be an issue. The Stages Crank Arm-based meter comes in both Ultegra and Dura-Ace models, to … Read more

Smart Bike Trainers and Cycling Apps Buying Guide

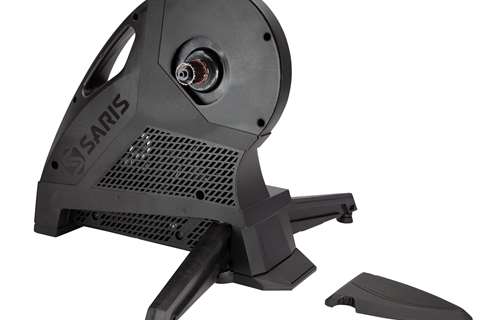
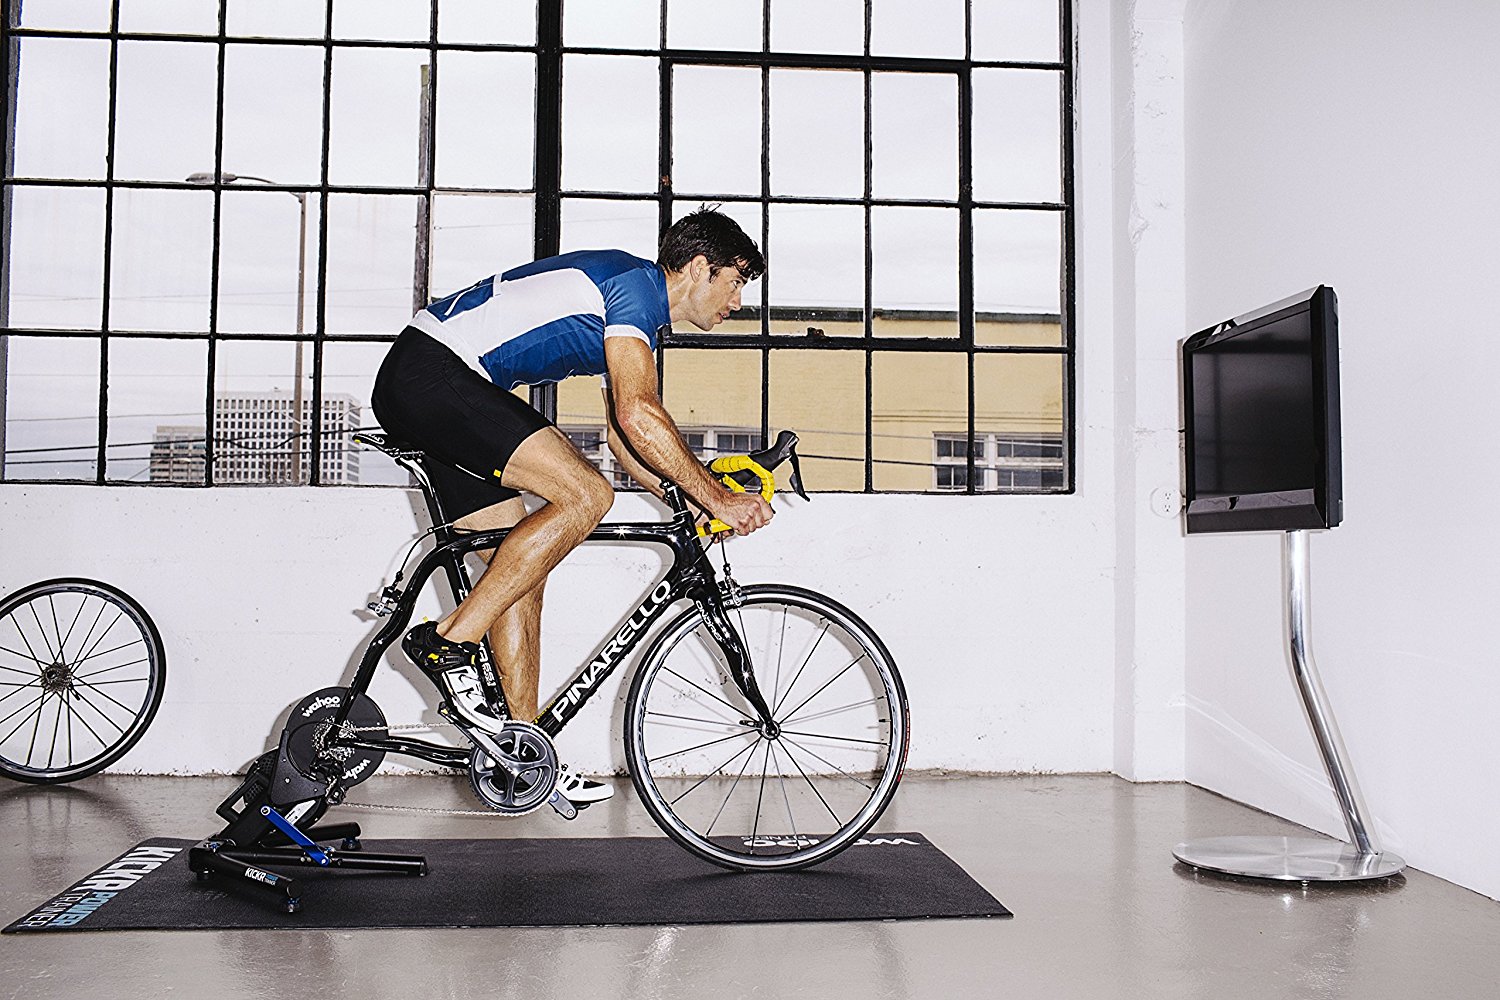
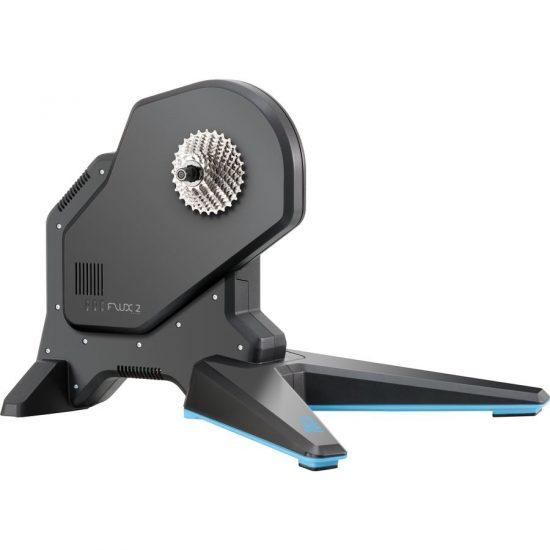
While the “smart bike trainer” phenomenon had been gradually building for years, a worldwide pandemic really shifted it in to high gear. Now that we are past the pandemic, “smart” bike training seems to have stuck, and for good reason. It is convenient, it can be very precise, and it is often safer than riding on the roads at rush hour. Why the popularity? Pairing a turbo trainer that can connect to apps like Zwift or Peloton makes for an entirely different indoor cycling experience.  For those who do at least some of their riding and training indoors, it is probably safe to say this new technology is a gamechanger. We could probably do a piece on smart bike trainers, and then another piece on all of the apps available to someone who wanted to do smart cycling workouts.  We decided, however, that it would be most useful to our readers if we put them together, in the same article, because one feeds off the other. When we started doing a roundup on the market of smart bike turbo trainers, smart stationary bikes, and the apps that go with them, our head began to spin.  The choices, and the number of “if-then” statements, can be a bit overwhelming.  We will do our best to simplify everything into plain terms. Just Get to the Point: Which Smart Bike Trainer is Best? Next, some definitions: Smart Bike Trainers Also known as spinners, turbo trainers, a bike trainer has long been an important tool for offseason and interval training.  You put your bike up on it, clamp everything in securely, and pedal away.  The “smart” part is what is new – we consider a smart trainer to be one that allows your speed and power to directly interact with the app or program you are cycling to.  When you cycle harder, the app knows it.  When your course calls for you to go hard uphill, the trainer knows it.  For the purposes of this piece, there are also smart stationary bikes that can be used instead of a trainer. Smart trainers are often “driven” by a direct connection to the chain.  Old-fashioned bike trainers are driven by a tire coming in contact with a roller, creating friction, but also variation in the pressure based on how pumped-up the tire is.  In a direct-drive smart trainer, the rear wheel is off the bike creating a more direct transmission of power. Smart trainers are quite a bit more expensive — about 3x — than a regular trainer, and they require a more involved setup process in our experience.  But if you are someone who plans to ride indoors for an extended period of time — like with the winter months — they can be great. What Are Smart Cycling Apps? When you have your bike on a smart trainer, you almost always use an “app” to go with it. This way, you get the full interactive experience. A smart cycling app is a program or live stream that allows you to interact with the workout in a two-way manner.  It could be an interactive class where your cycling stats are being streamed to the coach who is in a different part of the world, or where your trainer is responding to the changes in the course on your screen.  It can also be that you are “virtually” riding next to your friend – who happens to live 3,000 miles away.  This latter part is the key for many — the ability to join a network and cycle with other folks.  We have even heard of avid cyclists who have moved all of their training indoors to a smart trainer so they can get off dangerous roads, but still ride with friends on a regular basis. Smart Trainer App Examples Some of the apps you might hear about include Zwift, Peloton (which is a little different, we will explain more), Sufferfest, Rouvy, and Trainerroad.  We spend time riding each one, so we know how various apps respond to various trainers. We are going to go into more about apps down below, so if you need the crash course, keep reading after the smart trainer review section. We also did a deep dive on the four most popular training apps, so be sure to check it out if you are getting serious about committing to one.  They typically require a monthly subscription.  These obviously require an internet connection, and you can access the app through an Ipad, computer, an Apple TV (in some cases) or sometimes via a bike computer.   If you are not going to use an app, there isn’t much reason to use a smart trainer. You might as well instead set your bike up on a regular trainer, save a lot of money, and just listen to some music or watch training DVD or a streaming video. What Will This setup cost? This is where it gets complicated.  You can spend a little or a lot! To do this right, the upfront investment can cost anywhere from about $600 (for a smart trainer, assuming you have your own bike to put on it) to $2,500 (for a Peloton setup).  There is also a way you can rig up a non-smart trainer to have some level of feedback to the program….. but we don’t recommend it. You will miss out on some of the two-way benefits.  To enjoy the latest technology, we recommend not buying anything more than a year or so old, since the engineering is advancing so quickly right now. The streaming programs (or apps), in order to truly be compatible with the trainers, will have a cost as well.  We have seen a monthly cost ranging from $10 to $40.  Compared to the price of spin classes at a health club, that is highly competitive, especially when you consider that the app will be on-demand and have hundreds of routes and workouts to choose from.  Popular examples are Zwift or Sufferfest. … Read more

Vittoria Corsa Pro vs. Corsa Speed vs. Continental 5000 Road Bike Tires

Vittoria Corsa Speed

The Vittoria Corsa Pro and Vittoria Corsa Speed, alongside the Continental 5000, have emerged as the leading options for avid cyclists who need the best speed from their tires. These tires are all designed to provide good speed and acceleration on various road conditions, but they also have some subtle differences that are worth knowing about before you buy one. The Vittoria Corsa series is celebrated for its blend of low rolling resistance, grip, and durability. The Corsa Pro model offers a balanced performance that appeals to both competitive and casual riders. The Vittoria Corsa Speed is focused on delivering the lowest rolling resistance and is a top choice for time trials and high-speed endeavors. Its thin tread and puncture-protection layer make it a specialized tire for races against the clock. The venerable Continental 5000 tire is a direct competitor, renowned for its all-round performance. It incorporates Continental’s latest technologies, like the BlackChili compound and Vectran breaker, offering exceptional grip and puncture resistance. We have always appreciated its versatility and reliability, which is why it has become a staple on the road biking scene for various types of riders and terrains. All are considered some of the best road bike tires on the market today. Overview of 3 Premium Road Bike Tires When it comes down to it, most cyclists are trying to balance between speed, durability, and puncture resistance. Every tire has a set of tradeoffs. The key is knowing which tradeoffs you can live with and which are nonstarters for you. Vittoria Corsa Pro The Vittoria Corsa Pro tire is recognized for its excellent grip and durability. Cyclists like its puncture resistance and consistent air retention, particularly in the tubeless models when used with sealant. Though it may be marginally slower than some competitors, reliable sources suggest that its overall performance is comparable to other top-tier tires. Vittoria Corsa Speed For riders who are focused mainly on speed, the Vittoria Corsa Speed emerges as a top choice, reportedly saving about 3 watts per tire compared to other models. Ideal for time trials and smooth tarmac racing, this tire offers an aerodynamic advantage. However, it is optimized for speed at the potential cost of reduced puncture resistance, a tradeoff that we don’t think is worth it for most cyclists. Continental 5000 The Continental 5000 is a versatile all-rounder that has stood the test of time, touted for its balance between aerodynamics and durability. This tire is a favorite for a wide range of road cycling activities, from training to racing time trials. Its popularity stems from a combination of good puncture resistance and a competitive price point, making it a repeat choice for many cyclists. Comparative Analysis We wanted to get down-and-dirty with each tire, having them in hand both on a rim and off. Here is what we saw. Performance Factors The Vittoria Corsa Pro and Corsa Speed tires are known for their superior grip and comfort, especially in wet conditions. The Corsa Pro balances flexibility and strength for a responsive ride, while the Corsa Speed is designed for optimal speed with a lighter construction. The Continental 5000 is the jack-of-all-trades, recognized for its exceptional handling and all-around performance, making it a versatile option. Tire Durability In terms of durability, the Continental 5000 shows a resilience that is well-suited for high-mileage riders — really important to our testers. It’s built with a robust Vectran breaker layer which contributes to its longevity. The Vittoria Corsa Pro, with its thicker tread, also offers an impressive lifespan and our team has owned some Corsa Pros that stand-up very well to wear. The Vittoria Corsa Speed, though highly efficient for race day, may not have the same long-term durability due to its focus on reducing weight for speed. You’ll probably have more flats. Rolling Resistance A lower rolling resistance translates to faster speeds on the road. The Vittoria Corsa Speed is specifically designed to minimize rolling resistance, giving it an edge in time-trial and race scenarios. The edge is slight, but might be noticeable if you are being timed. The Continental 5000 competes closely with a laser-focused design on low rolling resistance while maintaining good grip. The Vittoria Corsa Pro offers a balance between low resistance and other performance factors but may not be as optimized as the Corsa Speed in this particular aspect. Our Road Test We did a few spins with each of the three tires — there is no substitute for actually riding them on real roads and trails. In test-riding the Vittoria Corsa Pro, Corsa Speed, and the Continental 5000, we observed notable differences in real-world conditions. Speed Comparison Vittoria Corsa Speed: Offers a very slight speed advantage on certain (perfect) road conditions. However, the gain is subtle and may not be perceptible during a ride. Probably more of a time trial advantage. Vittoria Corsa Pro: Provides a reliable alternative with basically the same speed, with competitive speed and efficiency noted. The differences in speed compared to the Corsa Speed are very minute for non-competitive riders. The tire feels more durable, and we’re all about fewer flats. Continental 5000: Remains a firm favorite for its all-around capabilities, rolls nicely and can accelerate easily, is durable enough to withstand road debris. Our team often chooses it for its consistency during different types of rides. Mounting and Durability All tires mounted as expected, no significant differences were observed. Our riders had a couple flats with the Vittoria, but none with the Continental 5000. We can’t say this was a controlled experiment though — road and riding conditions change by the hour as you know. Rider Preferences Several riders expressed a preference for the Continental 5000 during training, citing its balance of speed and durability. For time trials, the Vittoria Corsa Speed was the overwhelming preferred choice, although many riders were content with the Continental 5000. Aero and Rolling Resistance In terms of aerodynamics, there are some very slight differences but are generally they are overshadowed by other factors such as rider position and equipment. The Vittoria … Read more

Bike Safety Tips

Any cyclist with any mileage behind them remembers close calls with motorists.  When I think back to the close calls I’ve had over the years, there are a few that quickly come to mind and make me cringe, and two more from last summer were officially added to the list. Most recently, I was stopped at a stoplight with several cars.  I saw the light for me turn green, and the cars to my left (going in the same direction as me) began to move.  I started to clip-in and roll. Then, I heard horns. A car was coming from my left to my right, through the intersection, blowing its red light by a good 4-5 seconds.  Not even close. The cars going in the same direction as me had all slammed on their brakes.  Had it not been for someone’s horn, there is a good chance I would have been in the intersection when the inattentive driver blew through the intersection.  The car was probably doing 25 mph, so it undoubtedly would have been an injury accident or worse. It got me thinking about the things a cyclist can do to avoid accidents., especially when on a road bike.  3-4 “rules” to follow that cover a large percentage of the known bike-car accidents.  This all assumes that you are already doing the basics, of course: Wearing a helmet, following traffic laws, riding on safe roads, and trying to be visible. Rule #1:  Don’t be aggressive at intersections   45% of collisions between bikes and cars happen at intersections.  When you are cycling, you are never the alpha on the road compared to even the wimpiest car. Swallow your pride and don’t be aggressive. There are several websites that show diagrams of common bike accidents, backed up by statistics on bike-car collisions.  When you look at the 10-12 most common accident types, one thing is obvious: Intersections are bad. Treat them as if they are danger zones, even if the laws say that you can fly through them. When the cars have stop signs or red lights, assume they can’t see you. When a motorist is coming to an intersection, and signaling that they are going to turn left across your straight path, assume they will cut you off. Statistics tell us that car-bike collisions commonly happen at intersections, especially in urban areas.  The chances of a collision are no doubt higher if the cyclist is cranking as hard as they can, staring at his or her timer or triathlon watch, trying to set a new PR on their favorite segment of their regular ride.  One of the best things a cyclist can do is to treat each major intersection as a bit of a breather or break.  Slow down, perhaps even come to a full stop and unclip.  Take a drink of your water, and then survey the situation.  Pick a calm moment to proceed through a busy intersection. When a light turns from red to green, give it a few seconds to be sure every last red-light runner has had a chance to clear out. Intersections are nasty.  Drivers are often under pressure to make a light, or to thread the needle between a couple moving vehicles, making you a sitting duck.  Chill out, don’t about your average speed, and slow down. Treat each intersection as if you will need to slam on the brakes in any given second. Rule #2:  Don’t ride at night or in the evening rush   The data is clear — a highly disproportionate number of accidents happen during the hours of 4pm to 9pm.  This correlates with two things: The evening rush hour, and sunset. According to the NHTSA, most fatal bike accidents occur in a tight three-hour window of the day:  between 6pm and 9pm. It might go without saying, but if you are able to, take steps to stay away from cars while cycling. If you are a bike commuter, you might not be able to avoid the afternoon rush hour.  In that case, try to find trails, bike lanes, or safe shoulders to spend more of your commute on.  The combination of more cars on the road, and many of those drivers being in a hurry to get somewhere, create an amplified hazard situation for you. If you are not a bike commuter, then figure out ways to just stay off the roads later in the day.  If you must do your workout at 8pm, when it is dusk or even dark, consider using an indoor trainer or, at a minimum, ride on trails (with a headlamp) instead of on the shoulder or road. And don’t forget that when you start your ride, it will be later in the day when you finish it. That nice 30-miler that you want to sneak in at 7pm might not end until 8:45pm, when it is officially dark and way less safe to be on the road! Rule #3: Use Cycling Safety Lights Daytime running lights for bikes have gained in popularity in recent years. While there is some debate in the cycling community on if these lights are necessary and even legal, they seem to have a safety benefit.  Anecdotally, as a driver, I tend to notice those bright, flashing lights well before I would have noticed a cyclist on the shoulder. While I would like to see more studies on the topic (maybe Complete Tri will commission one!), there have been some studies showing promising results.  A Danish study found that the bright, flashing running lights reduced daytime car-bike accidents by 20% to 30% or more.  That is a significant finding. A Clemson University study also found that a flashing tail light was much more visible than an always-on tail light from 200 meters away. We did an entire piece on cycling safety lights here, including a list of our favorites. What is the debate in the cycling community? Some believe that the lights make it harder for cars to judge … Read more

Shifting from Indoor to Outdoor Cycling

moving to outdoor cycling

You’ve been training indoors, getting your conditioning up and doing structure bike workouts. You probably have a decent base built, but are ready to get outside and work on your endurance. How do you known when is the right time? And what do you need to know before you hit the pavement or trails? Indoor cycling is often full of shorter workouts, interval training, and other structured work that can really improve your VO2 max and FTP threshold. Outdoor riding is more often longer endurance riding with less focus on power output. One can definitely translate to the other. Indoor Cycling to Prepare for Outdoor Biking Bike training indoors is a great way to prepare for your outdoor ride and race season. By using indoor cycling as a tool for conditioning and improving your cycling capacity, cyclists can train year-round regardless of the weather conditions outside. The goal of indoor cycling should be to get you ready for the real, outdoor rides and races — and to keep you in excellent shape, of course. Indoor Cycling Periodization Cycling indoors requires some precision, and can actually provide a more structured type of training than your outdoor rides. One way to add precision is by intentional periodization. Periodization is an important concept in cycling training. It involves breaking up your training into different phases or cycles, each with a specific focus. Indoor cycling can be used to help with the different phases of periodization. For example, during the off-season, indoor cycling can be used for base training, with increasing load levels is you get closer to your outdoor training season. This involves structured rides that might include phases of riding at specific power ranges. As the season approaches, indoor cycling can be used for more intense training, such as intervals and hill repeats. Speed Work vs. Endurance Work Take advantage of your indoor cycling season to focus on both speed work and endurance work. Speed work involves shorter, high-intensity efforts to improve your ability to generate power. Endurance work involves longer, lower-intensity efforts to improve your aerobic capacity. Some of the best indoor training weeks are a combination of longer sweet spot sets, right below the functional threshold power (FTP) mixed with other, shorter workouts that have high power output, for 30-45 seconds at a time. These higher power workouts might resemble sprinting down a road during an outdoor race. Training Programs and Apps Indoor cycling isn’t what it used to be, and that is a very good thing!  There are so many training programs and apps available for indoor cycling. These programs and apps can provide cyclists with structured workouts and training plans, often with actual coaching behind them. Some popular indoor cycling training programs include TrainerRoad and Zwift. These programs offer a variety of workouts and training plans to help cyclists improve their fitness and performance. They by far work best when used with a smart bike trainer, which will help you dial-in on specific power levels and be incredibly precise with your rides. Shifting Gears to Outdoor Riding So it’s time to transition to outdoor riding. If you have had a productive indoor riding season, this transition should be a welcomed one that you are very ready for. For someone who has been cycling indoors to get themselves into shape, transitioning to outdoor riding can be an exciting and challenging experience. Here are some of our first-hand tips (from experience) to help make the transition smoother and more enjoyable. Get your cycling gear ready That bike that has been hanging in the garage for the winter, or mounted on your trainer?  Yeah, it needs to be checked-out before you start whipping around corners at 20mph. As you should regularly do, check your bike for any necessary repairs or maintenance, and while you are at it, take a good look at your clothing and accessories. On the bike, put the bike up on a bike stand so it is easier to inspect, and take a close look at: Did any screws or metal parts corrode? This is especially important for people who used the bike on their trainer. All that sweat accelerates corrosion. Are your spokes and rims in good shape? How are your tires?  Sometimes we finish a season with tires that are well-worn. Might want to start the new season with fresh ones. If you use tubeless tires, put some new sealant in them Lube everything Take a torque wrench to all bolts and screws, and be sure things are snug up to specifications As for your other gear, some essential items to consider include: Is your helmet still fitting well, or do you need to upgrade? They are meant to be replaced occasionally. Did you finish last season with clothing that was on its last leg? Are your cycling shoes – and the pedal cleats on them – in good shape? Do you have some good sunglasses? That’s something you don’t have to think about indoors. Water bottle or hydration packs Take a look at your bike bag, probably for the first time in months. Do you have tire repair tools and CO2 cartridges, and a multi tool?  Safety Reminders for Outdoor Riding For those first few rides outside, you might have a learning curve on safety items, after all that safe indoor cycling. Think about: Always wear a helmet and eye protection Be sure you are adept at clipping-in and out of your pedals, when stopped. This might mean adjusting the pedal tension. Stay visible by wearing brightly colored or reflective clothing and using lights on your bike Avoid distractions such as using your phone while riding Ride with a partner or group for added safety Weather conditions: Avoid riding in extreme weather conditions such as heavy rain or strong cross winds, especially if riding on roads and shoulders. Time of day: Consider riding during daylight hours to ensure visibility and avoid potential hazards. Many bike accidents occur at dusk and dawn. Traffic: Find routes … Read more

What to Wear for Cold Weather Cycling

fat bike tire

I’ve done my share of cold weather rides, be it pure winter rides on a fat bike or those fall or spring rides when it looks warmer than it really is. I’ve learned it is a delicate balance of being cold or overdressing, neither of which are good. The art and science involved in dressing for colder-weather cycling is something that takes a while to develop, but I want to share with you what I’ve learned over many years of dialing-in my cold weather riding system. I’ll go body part by body part, which seems like the best way to do it. What to Wear for Cold Weather Cycling Core Warmth: Base Layer and Jacket It all starts with the core. Keeping your core warm is essential for cold weather cycling. If your core can’t stay warm, you will have a hard time being comfortable on the ride. At the same time, overdressing on the core can very quickly cause you to overheat. Start with a moisture-wicking base layer to keep sweat away from your skin. For me, this is often a synthetic t-shirt. Then, I often add another long-sleeved base layer if it is a cold day, but one that is thin enough to not be bulky. Once I feel I have my core heat taken care of, I add a windproof jacket, but one without too much insulation. I’d rather rely on layers than a heavy outer layer. Look for jackets with vents to prevent overheating. I like my jacket to be design specifically for cycling, with a svelte cut and pockets in the back. Recommendation: The Pearl Izumi Amfib jacket is great. It is quite warm for how low-profile it is. Legs: Knee Warmers or Cycling Tights Next up, those legs. Your legs will actually stay warmer than you think, but you still need to take care of covering them. For your legs, you have two options: knee warmers or cycling tights. it is usually an either-or, I don’t use them together. Knee warmers are a great option for milder temperatures. They are just what they sound like, meant to be worn over your knees to keep the joint and ligaments warm. You might be tempted to use them for running, too, but they really don’t work for that. The running motion makes them jostle down your leg. But they are great for cycling. Best of all, they are small enough so if it warms up and you want to take them off, you can just toss them in your jacket or jersey pocket or your bike bag. Cycling tights provide more insulation for colder weather, along with full coverage (knee warmers leave some exposed skin.) Look for tights with a sheen that will break the wind. They key is to not get thick or cloth tights – it is hard to explain, but you don’t want them to double-up on your bike shorts in the saddle. That would cause discomfort over a long ride. I prefer to wear my regular cycling shorts with both knee warmers or cycling tights, so I don’t choose the tights with a chamois. Just thin ones that can go over my bike shorts. Recommendation: The Castelli brand Knee Warmer is comfortable and you will be shocked how effective it is down to relatively low temps. It is only for cycling, not running, though. When running, it will work its way down off your knee. Hands: Gloves Your hands are one of the most vulnerable parts of your body in cold weather. Look for cycling-specific gloves with insulation and windproof material to keep your hands warm and dry. Consider getting gloves with touchscreen compatibility so you can use your phone without taking them off. Be sure that when you gloves are on with your preferred cycling jacket, you don’t have a gap of exposed skin between the glove cuff and the jacket cuff. This might mean either having a longer jacket or a longer glove cuff. Every cyclist should have multiples pairs of bike gloves, because this is one area where you will want to be able to choose based on conditions. 10 degrees can make a huge difference. Recommended: For colder weather rides, I really like the Pearl Izumi Lobster Evo gloves. They are a cross between a glove and a mitt, and are extremely effective against the cold even without any additional layers or handwarmers.   Feet: Heavy Socks, Maybe Shoe Covers Far and away, the body part that gives me the most trouble on rides are my feet. Specifically, my toes. Even on rides that aren’t brutally cold, my toes freeze before any other body part. I think it is because the toes are cutting into the wind the entire ride, with little break. Most cycling shoes are designed for warmer weather, so what makes them breathable when it is 90 degrees out makes then not great when it is 25. Keeping your feet warm is crucial for a comfortable ride. Wear heavy socks made of wool or synthetic material to keep your feet dry and warm, and ideally socks that extend well up your shin and calf.  If you ride when it is quite cold or have a history of freezing toes, you can also consider wearing shoe covers to protect your shoes from the elements. They provide just enough coverage to keep some of the windchill off your toes. Neck: Gaiter or Balaclava It is often forgotten, but I really like to keep my neck warm on a ride. I use a neck gaiter on 90% of our colder rides, and a full balaclava on the other 10%. You can pull the gaiter up over your chin, mouth, or even most of your face if you need to. A balaclava is a more complete way to keep your neck and face from the cold. It’s a good option if you are worried about your face getting cold, but I usually am OK on the face, I just … Read more

Best Cycling Gloves

There are many reasons cyclists wear gloves when riding.  They can help cushion your hands and prevent callouses. Sometimes a glove is enough shock absorber to make your elbows and shoulders feel better on a ride. Some cycling gloves are designed to keep your hands warm. Other gloves can give you protection against a spill or a stray tree branch.  The best cycling gloves can do a little of everything. Finding the right glove depends partly on the type of riding you do.  A century (100 mile) road rider might want different gloves than a mountain biker.  Still, there are some gloves that are just superior to others, and the good news is that they don’t change that much. Cycling gloves differ from running gloves in that they have some padding. Here are our 5 favorite cycling gloves right now Open Finger Bike Gloves Garneau Biogel RX-V Here on Amazon. When it comes to cycling gear, we have always trusted the LG brand – they make some of our favorite cycling shorts too.  The Garneau gloves reflect the design and construction of all of their other gear — consistent, durable, and functional.  The RXV gloves have enough palm padding to provide comfort while cycling, but enough ventilation so your hands will not be overheating. The LG Biogel gloves work well for both road and mountain biking, but we think they are probably ideal for road biking.  The gloves are open-finger, a favorite for summer riders.  They provide enough padding to take pressure off the shoulder, elbow, and wrist.  Durability seems very good, both in terms of longevity but also the ability to withstand a scrape or two. While the gloves are technically not waterproof, they dry out quickly and hold up well when machine-washed between rides. Highly breathable Comfortable – quickly molds to your hand’s shape Many Color Choices Great low-profile design for road cyclists Find here. Pearl Izumi Elite Gel Gloves Here on Amazon. The honor roll of great cycling gear companies continues with Pearl Izumi, which is right up there with LG.  Pearl Izumi is a lock on nearly every “best of” list we have for cycling gear or triathlon gear, because their products are just that good.  Whenever we see the combination of “Pearl Izumi” and “Elite”, we know that it is likely a very good product line. A typical cyclists’ closet has lots of Pearl Izumi Elite things in it – from shorts to jackets – and they are as reliable as anything. Equally suited for the road or the single track trails, the Pearl Izumi open-finger Elite gloves are unisex and come in four color options. We like the bright yellow for our road rides, as we try hard to make everything as visible as possible. The Pearl Izumi Elite gloves have gel padding in the palms, probably a bit more substantial than the Garneau gloves above. If your attitude on cushion is “the more the better”, you will probably like these.  Pearl Izumi has worked hard to minimize the number of seams on the glove, resulting in a silky smooth fit. They tend to run a bit tight, so choose a size up if in doubt. They come in five size options. Heavier padding Bright colors Nearly Seamless Great value Best palm protection if you want to pad from falls or rocks Find here. Castelli Arenberg Gel Here on Amazon. Castelli makes some of our favorite and good-value bike shorts, and they also have gloves that have stood the test of time.  The Arenberg model has been beloved by both mountain and road cyclists for years. One thing we have always liked about Castelli has been their price points.  They make good gear that is going to get good use, but they keep the price ranges reasonable.  You can get higher-end gloves, but you will have to pay for them.  The Arenberg is a glove that will do a great job for many. Fit is normally spot-on, and the gloves are very comfortable once broken in.  The heavier gel is strategically placed so your pressure points during a ride, and likely contact points during a fall, are reinforced. While the Castelli gloves seem to excel for mountain bikers, these gloves should work well for any type of cycling. Not as bulky Great padding on palms Versatile Mesh top for better breathability A nice in-between option for cyclists who find themselves in all kinds of situations Find them here. Closed Finger Bike Gloves Pearl Izumi Cyclone Gel Gloves  Here on Amazon. For a good pair of closed-finger gloves, you really can’t go wrong with the Pearl Izumi Cyclones. The Cyclone gloves provide just enough warmth to be a difference-maker on those colder days.  Full-finger coverage and a nice wrist gusset help keep skin from the wind and cold.  They are rated for 40 to 60 degrees, but we’ve used them in the 30s and they worked well. At the same time, the Cyclones have gel padding in the palm, to offer all of the benefits you would normally find in the open-finger Pearl Izumi gloves.  The padding is throughout the front of the glove, focused on the palm and the base of the fingers. Because of all of the gel padding, it takes a little while to break them in.  Once you do, though, they will form-fit well. It just gets a little tricky if you switch bikes and postures a lot. We think these gloves work well between about 35 and 50 degrees, so a great option for fall and spring riding, and winter riding in areas where the mercury doesn’t dip too low. Great shoulder season gloves Covers the knuckle, protecting you on those single track rides Nice padding Good finger length for riders with longer fingers Excellent wrist protection e-tip so you can use touch screen devices w/ gloves on Find here Sealskinz All Weather XP Gloves  Here on Amazon. The Sealskinz gloves hit the scene several years ago, but really … Read more

Schrader Valves vs. Presta Valves

presta vs. schrader

I’ve seen it a few times. I get someone setup on their beginner road bike, their first one ever. They start looking over the bike, and get to the wheels, look at the valve, and ask “what’s this?!” There are two main types of bike wheel valves: The Schrader valve and the Presta valve. Both serve the same purpose of controlling air flow in and out of the tire, but there is a reason the two are used in very different situations. The Schrader valve is the most common valve found on general bikes, and it is probably the one you had on your bikes as a kid or the commuter bike you ride around town. It’s also the same type of valve used on car tires. It’s a sturdy, all-purpose valve that’s easy to use and can handle high pressure. You’ll recognize it by its wider stem and a spring-loaded valve core that is kind of recessed in the center. Schrader valves are the ones found on more entry-level bikes, cheaper mountain bikes, and kids’ bikes. The Presta valve, also known as a French valve, is the one that you will find on nearly every road or tri bike. It is a narrower valve that’s increasingly used on higher-end mountain bikes too. It has a threaded stem with a locking nut that you need to unscrew before inflating the tire. The Presta valve is designed for high-pressure tires and it can dial-in the PSI (pounds per square inch) more precisely than the Schrader valve. It’s also lighter and more aerodynamic, making it a popular choice among road cyclists or anyone who has a higher-performance bike. Schrader Valve Design and Functionality For years growing up, all I knew was the Schrader Valve from my mountain bikes and BMX bikes. This is what many might consider the standard bike tire valve. This valve has a simple design consisting of a metal stem with a rubber seal that is pressed against the valve opening to prevent air from escaping. The valve is opened by depressing a spring-loaded pin in the center of the valve stem, allowing air to flow in or out. Common Uses Schrader valves are commonly used on tires for mountain bikes, BMX bikes, and some hybrid and cruiser bikes. They are also used on car tires, air compressors, and some inflatable toys. Compatibility and Sizing When it comes to compatibility and sizing, Schrader valves are generally easier to work with than Presta valves. They are compatible with most pumps and can be inflated at gas stations or with a standard air compressor. Schrader valves are available in two sizes: standard and large. Standard Schrader valves have a diameter of 8mm, while large Schrader valves have a diameter of 10mm. Advantages and Disadvantages A big advantage of Schrader valves is their durability. They are stubby and strong, so less prone to damage from debris and can withstand more knocking around than Presta valves. Schrader valves are also compatible with almost any air pump, like those found at gas stations, so they can be an advantage if you need to pump your tire while on the go. However, Schrader valves are heavier and bulkier than Presta valves, which can be a disadvantage for road cyclists who prioritize weight savings. Additionally, Schrader valves require a larger hole in the rim, which can weaken the rim over time. Presta Valve Design and Functionality I am exclusively using Presta valves these days on all my bikes. It is a slender valve that is commonly found on high-performance bikes. The valve has a threaded stem that allows it to be securely fastened to the rim of the wheel. The valve core is also removable, which makes it easy to add or remove air from the tire. Common Uses Presta valves are the valves you see on road bikes, gravel bikes, higher-end mountain bikes, and other high-performance bikes. They are also used in tubeless tire setups. Because of their design, Presta valves can handle higher pressure than Schrader valves, making them right for any tire that needs higher pressure like a road bike tire. They can also let air out of the tire with great precision, an advantage if you are trying to dial-in your PSI very precisely. Compatibility and Sizing When it comes to compatibility, Presta valves are not as widely used as Schrader valves in the overall bike universe, but they are actually much more common in the world of road bikes, triathlon bikes, and gravel bikes.. Most bike pumps come with a Presta valve adapter, which allows you to inflate tires with either type of valve. Presta valves come in different lengths, so it is important to choose the correct length for your rim depth. If you have a rim that is deep and aerodynamic, you need a longer valve or it won’t be able to peek out of the rim! Advantages and Disadvantages The biggest advantage of Presta valves is that they are able to handle higher pressure than Schrader valves. This makes them the best for road and triathlon cyclists. Another advantage is that the valve core is removable, which makes it easy to add or remove air from the tire. The only real disadvantage of Presta valves is that they are not as widely used as Schrader valves, so lots of tire pumps in parks or at convenience stores might not have the ability to pump a Presta valve.  Another downside is that te valve stem is more fragile than the Schrader valve, which can make it more prone to damage. What makes the Presta valve so ideal for getting precise PSI is also a downside in some cases perhaps. If you put pressure on the valve core to let some air out, you can let 20 PSI out in a hurry!  A Schrader valve isn’t as touchy. When to Use Schrader Valves, When to Use Presta Valves Here are some simple guidelines on when to use Schrader valves … Read more

Best Triathlon Watches

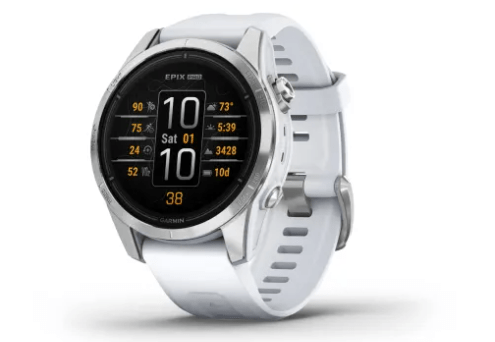
Garmin Epix Pro

There was a time when running or sports watches could only offer time and heart rate, and offered little additional value.  Thankfully, those times are long gone.  With the proliferation of GPS-enabled devices and better waterproofing, today’s best triathlon watches are quite advanced in their offering and can help any athlete train with more precision.  These are true multipart watches that can be used in a number of workouts and races. We will even take it a step further:  We think you need a good triathlon watch in order to train effectively.  Training precision is key because it helps you train less, but smarter and better. If you have looked at fitness watches or trackers lately, then you know that one of the problems is the sheer number of choices.  It can be paralysis by analysis. For 2024, the watchmakers have turned the simple watches into complex fitness tracking tools.  They can tell you how far you’ve gone, how fast you are going, the intensity of your overall workout, other key health info, and even integrate with your bike’s power meter (if you have one).  They can upload data to shared apps (like Strava) to help you share your training with the community. These triathlon watches work in three different modes of swimming, running, and cycling. If you are running a triathlon and looking for a smart watch, you need to look for all these modes. Through comparing different watches available in the market, we have identified our four favorite watches for you.  Some are spendy, some are cheaper.  All are watches that we would recommend other triathletes in various situations. You do not need to be a triathlete to benefit from these multisport watches. Why wouldn’t you, for the same price, go with an option that can accommodate cycling and swimming, in addition to running. We think it is a no-brainer for anyone who is active. Spoiler alert:  There are going to be lots of Garmins on this list.  They are investing the most in designing good multisport watches these days. 7 Best Triathlon Watches With no further adieu, here are our picks: Garmin Forerunner 955 or, Find here on Amazon.   Lets us cut to the chase — the 955 is our favorite multisport watch on the market today, especially for the price.  Garmins are cranking out the best full lineup of multisport electronics for 2024, as evidenced by them having 3 of the top 5 spots on our list.  I’ve noticed that Garmin is pushing the Epix and Fenix lines harder than the Forerunner, but my experience with the Forerunner, and the experience of my triathlon circle, won’t let me ignore it. The Forerunner lineup is time-tested and reliable for triathletes and cyclists. The 955 took the already-good 945 and 935, and dialed up the functionality, precision, and options in a way that will be intriguing for those who have richer budgets or want to be incredibly scientific about their workout trending.  It is an absolute gamechanger in one respect, and that is the ability to stream your music and podcast to your bluetooth headphones. Who ever thought you would be able to listen to music on your run without having your phone or Ipod along (assuming you have bluetooth earphones). Garmin figured it out with the Forerunner 955.  For some, that will be enough reason to upgrade. There is also a Forerunner 955 mode, but we actually like the 945 better. It isn’t as chunky on your wrist. Design The watch has the nice rounded-face that we are fans of, because it feels less bulky and more like, well, a watch.  It comes in just one color — black — and may look more casual than the Fenix which we profile below.  It has five buttons around the watch face, so if you are going for the “ultra-sleek” design, just keep that in mind.  On the outside, it looks pretty much identical to the 935, and with a depth of 13.7mm, it doesn’t feel too “chunky” on most wrists. But on the inside is where it is really a different device than its predecessors — let’s get to that next. Features This is a multisport-specific watch, which means it is also great for cycling, running, and swimming individually. The features of the 955 put it in a different category than the 935 and are a slight upgrade from the 945, which for some will make a no-brainer case for purchasing, and for others might be more than you want in a run and bike workout tracker.  The watch can hold up to 200 hours of activity data, allowing you to go back and analyze your past several workouts without using an app.  A whole slew of sensors gives you everything from heart rate to temperature, barometric pressure to a gyroscope and a compass. Perhaps the most notable advancement is that you can play smartphone music from the watch, as long as you have bluetooth headphones to pair to the watch.  This feature will impact battery life, but may well be worth it to not have to carry multiple devices.  Music storage is up to 1,000 songs, which is impressive and on par with early-generation ipods. Pretty impressive. As for sports, it does everything.  Cycling, running, swimming, skiing, golf, elevation, etc.  It provides pre-programmed maps of routes as well as ski runs.  It integrates with your Strava or other 3rd party apps so you can have the watch be a one-stop-shop.  Sleep tracking, heart rate tracking, and VO2 max tracking are all included — but nowadays most Garmins come with those features. The watch also gives you more of the functionality you find in the Apple watch, such as the ability to pay at a scanner with your watch, as well as some preloaded workout maps.  For all this, battery life is pretty good if you are using the basic functionality, but if you are wearing it and using all the functionality all day long, a … Read more

Bike Fitting: Cost and What to Exect

bike fitting

Bike fitting is an underrated service, and honestly one that more cyclists should get. In this article, I’ll give you an idea of what a bike fitting should cost, and what you can expect from the fitting session. I know lots of cyclists who have cycled for years without a real bike fitting, and when they finally got one, they wish they would have done it sooner. Bike fitting can range from a basic adjustment of the saddle and handlebars to a more comprehensive fitting process that involves analyzing the rider’s body measurements, flexibility, power positions, and riding style. The cost of bike fitting can vary depending on the type of bike, with road bikes often requiring more time and attention than other types of bikes.  Basics of Bike Fitting Bike fitting is the process of adjusting a bicycle to fit the rider’s body and riding style. It goes WAY behind just making sure that the bike generally fits, like you might do when hopping on a new or different bike. It often involves making changes to the bike’s components, such as the stem, saddle, handlebars, and pedals, to ensure that the rider is comfortable and efficient while riding. A proper bike fitting is done by a professionally-trained fitter, who is often someone who does that as their only occupation. Secondarily, some bike shops have fitters on staff who might not be quite as advanced but still have the know-how to do a cursory fitting. There are a few different types of bike fitting that you’ll see on the market, ranging from cursory to very detailed. I recommend doing the more extensive kind. A proper bike fit can can be a gamechanger for a cyclist of any level, in my opinion. It can improve comfort, eliminate ride soreness, reduce the risk of injury, and increase efficiency and power output. A poorly fitting bike not only lessens your power output, but it can actually create misalignment and overuse injuries, believe it or not. My Bike Fitting Experience Put me in the camp of people who didn’t realize the importance of a real, professional bike fitting for a long time.   I rode for years without ever getting a professional bike fit. I would buy bikes that I knew fit me pretty well, have the bike shop spend 10 minutes adjusting things, and then I would tinker on the fit as I rode. The problem was that I did not have the technical expertise to know if I was adjusting things just right. I was just doing what I thought made sense, and eliminating any obvious discomfort.   I finally started investing in real bike fittings, and wow, the difference was immediate.  Within 10 minutes of my first professional fitting, I had learned so much from the fitter about assumptions I had been making that needed to be corrected. I learned from him that there is an absolute right way to set a bike up, and it should be based on many more factors than the typical cyclist assumes.   When I finally got a quality bike fitting from a pro, my ability to do longer and more demanding technical rides shot up immediately. I think my power increased by about 5% too.   Having a bike that is even a few millimeters off here or there will really compromise you!   Cost of Bike Fitting The cost of bike fitting can vary depending on the type of fitting and the level of expertise required. It can also vary based on the type of package you decide to buy. Professional Fitting A professional bike fitting is a comprehensive process that involves a detailed analysis of the rider’s body and bike. It is usually conducted by a certified bike fitter who has extensive knowledge and experience in bike fitting. The cost of a professional bike fitting can range from $250 to $500 or more, depending on the location and the level of expertise of the fitter. The professional fitting cost often includes one brief follow-up visit to make minor adjustments that might be needed. In some cases, you might buy a package of fittings from a professional bike fitter. I purchased on recently that was a “buy and fit” package, where the fitter had me go through a battery of measurement on a “fitting bike” – a bike that looks like a space-aged device and its sole purpose is to measure your cycling position. Based on my measurements, we ordered a new gravel bike that was nearly perfect for me right out of the box, and then he adjusted it to all the specifications that he had determined during the initial fitting. During a professional fitting, the fitter will conduct a detailed analysis of your body measurements and your pedal stroke, along with your preferred position for maximum comfort and power. They will take detailed measurements and analyzing your power, flexibility, strength, and range of motion. They will also analyze the rider’s pedaling technique and adjust the bike’s components, such as the saddle, handlebars, and pedals, to ensure that they are in the optimal position for the rider’s body. A good professional bike fitter will have the attitude that no cyclist should have any discomfort on the bike. If your back is getting sore, or your wrists are getting numb, there is a reason for it and it can be fixed. Basic Fitting A basic bike fitting is a less comprehensive process that is usually conducted by a bike shop or a bike mechanic. It involves adjusting the bike’s components to fit the rider’s body based on basic measurements and observations. The cost of a basic bike fitting can range from $50 to $150, depending on the location and the level of expertise of the mechanic. If you are buying a brand new bike from the bike shop, there is a chance that the fitting will be thrown in as part of your bike purchase. During a basic fitting, the fitter will … Read more