Complete Tri

5 Creative Things We’ve Seen Endurance Athletes Use For Nutrition

butter endurance

We all know that doing a triathlon or running or cycling race takes a lot out of you. The longer the race, the more you need to strike that balance between keeping yourself nourished and keeping your gut happy. It can be a challenge staying fueled and hydrated during long events. As you can imagine, we have seen a lot of different things at races when people are trying to their hydration, electrolyte, or sodium levels in a good spot. Sometimes it is what you would expect – energy drinks, gel packs – but sometimes it is exactly what you would NOT think. Here are 5 of the craziest things we see people eat or drink at a race. 5 Most Creative Things We’ve Seen Endurance Athletes Eat Pickle Juice Probably the most common one on the list, pickle juice has gained popularity among endurance athletes due to its ability to prevent muscle cramps. It is high in sodium and other electrolytes, which are lost through sweat during long endurance races. Pickle juice is believed to work by triggering the oropharyngeal reflex, which helps to reduce muscle cramps. It can be carried in a belt, jersey pocket, or stashed in bag drop on a long endurance race. Does it taste good on an 80-degree day? Sorry, but we cannot vouch for it. But pickle juice gives you sodium and potassium, but because virtually every pickle recipe is different, the exact amounts will vary. Mustard Packets Mustard packets are one of the craziest ways we have seen for endurance athletes to prevent muscle cramps, but I first heard about it from an ultra gravel racer who wanted to carry some small packets of something to give him sodium. Those little packets of mustard are compact and easy to carry, and they keep for a long time, making them a popular choice among endurance athletes. Mustard works by stimulating the oropharyngeal reflex, which helps to reduce muscle cramps. It is recommended to use the cheaper mustard as it is more vinegar-y and the acid in the mouth may cause immediate/temporary cramp relief. You can use plain old mustard packets or specialty mustard like from an Asian restaurant. Black Vinegar Another option from the condiment tray at your local restaurant, Black vinegar is a popular condiment in Asian cuisine and has been used for centuries for its health benefits. Many non-athletes like it because it can help with digestion and improve circulation. But for athletes, Black vinegar is also high in acetic acid, which can help to reduce muscle cramps. It can be carried in packets and taken during long endurance races. Like mustard, it travels well and keeps for a long time. Between the mustard and vinegar, you might have one that sits better with you. Try them both and go with whichever flavor you are attracted to. Gas Station Sandwiches I first heard this tip from an Ironman triathlete, who swore by eating gas station sandwiches before a race, or even taking a bite in the middle of the long bike leg. Gas station sandwiches may not be the most glamorous food choice, but they can be a lifesaver before or during long endurance races. They are high in sodium, carbohydrates and protein, which are essential for maintaining energy levels during long races. Plus, that shot of fat is a nice counterbalance to all the pure carbs and electrolytes your gel packs are giving you. They are also easy to find and can be purchased at any gas station along a long ride route. Stick of Butter Yes, a stick of butter. I first heard this one from someone who did sled dog races, and have since heard of it from other ultra-endurance athletes. While it may sound strange, but some ultra-endurance athletes swear by taking a bite from a stick of butter during long races. Butter is high in fat, which provides a slow-burning source of energy. It also contains essential vitamins and minerals. Taking a bite or two of a stick of butter is a dense way to get some fat in your gut without eating too much, and that can help your body process all the sugars, gels, and sport drinks you are consuming along the course on a multi-hour bike ride. The Real Thing – Nutrition for Your Races So while there are some strange things you can eat during a ride or race, there are also a few things actually intended for your endurance work. Much has been written about these, so I won’t go into detail, but it is worth hitting on them. Solid Foods vs. Liquid Nutrition One of the biggest debates in endurance race nutrition is whether to consume solid foods or liquid nutrition. Everyone has a preference when it comes to their favorite nutrition. Both have their advantages and disadvantages. Solid foods can provide more sustained energy, but they can also be harder to digest and may cause stomach upset. Remember, your body is trying hard to run or bike, and doesn’t have the same energy to devote to the gut. Liquid nutrition or energy drink mixes, on the other hand, is easier to digest and can provide quick energy, but are not as satisfying as solid foods. Experiment with both solid and liquid nutrition during your training runs to see what works best for you. Some athletes prefer a combination of both, while others stick to one or the other. Energy Gels and Chews Energy gels and chews are a go-to for any endurance athletes doing more than a short race because they are easy to consume and provide quick energy. Most gels and chews contain carbohydrates and electrolytes, which can provide a shot of energy and prevent cramping. It is important to read the labels of energy gels and chews to ensure they contain the right balance of carbohydrates and electrolytes for your needs. Some gels and chews also contain caffeine, which can provide an extra boost of energy, but … Read more

Vittoria Corsa Pro vs. Corsa Speed vs. Continental 5000 Road Bike Tires

Vittoria Corsa Speed

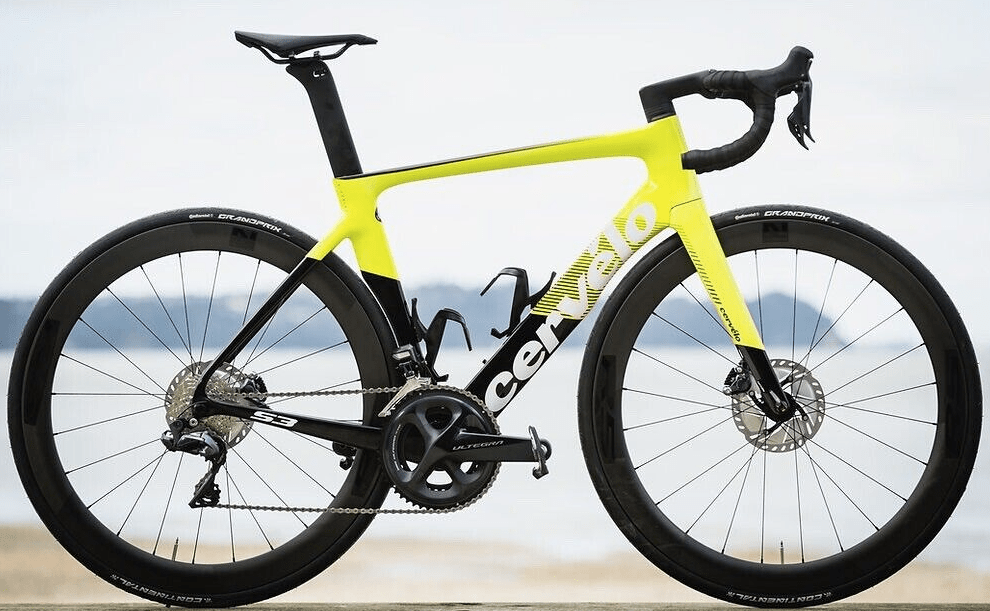
The Vittoria Corsa Pro and Vittoria Corsa Speed, alongside the Continental 5000, have emerged as the leading options for avid cyclists who need the best speed from their tires. These tires are all designed to provide good speed and acceleration on various road conditions, but they also have some subtle differences that are worth knowing about before you buy one. The Vittoria Corsa series is celebrated for its blend of low rolling resistance, grip, and durability. The Corsa Pro model offers a balanced performance that appeals to both competitive and casual riders. The Vittoria Corsa Speed is focused on delivering the lowest rolling resistance and is a top choice for time trials and high-speed endeavors. Its thin tread and puncture-protection layer make it a specialized tire for races against the clock. The venerable Continental 5000 tire is a direct competitor, renowned for its all-round performance. It incorporates Continental’s latest technologies, like the BlackChili compound and Vectran breaker, offering exceptional grip and puncture resistance. We have always appreciated its versatility and reliability, which is why it has become a staple on the road biking scene for various types of riders and terrains. All are considered some of the best road bike tires on the market today. Overview of 3 Premium Road Bike Tires When it comes down to it, most cyclists are trying to balance between speed, durability, and puncture resistance. Every tire has a set of tradeoffs. The key is knowing which tradeoffs you can live with and which are nonstarters for you. Vittoria Corsa Pro The Vittoria Corsa Pro tire is recognized for its excellent grip and durability. Cyclists like its puncture resistance and consistent air retention, particularly in the tubeless models when used with sealant. Though it may be marginally slower than some competitors, reliable sources suggest that its overall performance is comparable to other top-tier tires. Vittoria Corsa Speed For riders who are focused mainly on speed, the Vittoria Corsa Speed emerges as a top choice, reportedly saving about 3 watts per tire compared to other models. Ideal for time trials and smooth tarmac racing, this tire offers an aerodynamic advantage. However, it is optimized for speed at the potential cost of reduced puncture resistance, a tradeoff that we don’t think is worth it for most cyclists. Continental 5000 The Continental 5000 is a versatile all-rounder that has stood the test of time, touted for its balance between aerodynamics and durability. This tire is a favorite for a wide range of road cycling activities, from training to racing time trials. Its popularity stems from a combination of good puncture resistance and a competitive price point, making it a repeat choice for many cyclists. Comparative Analysis We wanted to get down-and-dirty with each tire, having them in hand both on a rim and off. Here is what we saw. Performance Factors The Vittoria Corsa Pro and Corsa Speed tires are known for their superior grip and comfort, especially in wet conditions. The Corsa Pro balances flexibility and strength for a responsive ride, while the Corsa Speed is designed for optimal speed with a lighter construction. The Continental 5000 is the jack-of-all-trades, recognized for its exceptional handling and all-around performance, making it a versatile option. Tire Durability In terms of durability, the Continental 5000 shows a resilience that is well-suited for high-mileage riders — really important to our testers. It’s built with a robust Vectran breaker layer which contributes to its longevity. The Vittoria Corsa Pro, with its thicker tread, also offers an impressive lifespan and our team has owned some Corsa Pros that stand-up very well to wear. The Vittoria Corsa Speed, though highly efficient for race day, may not have the same long-term durability due to its focus on reducing weight for speed. You’ll probably have more flats. Rolling Resistance A lower rolling resistance translates to faster speeds on the road. The Vittoria Corsa Speed is specifically designed to minimize rolling resistance, giving it an edge in time-trial and race scenarios. The edge is slight, but might be noticeable if you are being timed. The Continental 5000 competes closely with a laser-focused design on low rolling resistance while maintaining good grip. The Vittoria Corsa Pro offers a balance between low resistance and other performance factors but may not be as optimized as the Corsa Speed in this particular aspect. Our Road Test We did a few spins with each of the three tires — there is no substitute for actually riding them on real roads and trails. In test-riding the Vittoria Corsa Pro, Corsa Speed, and the Continental 5000, we observed notable differences in real-world conditions. Speed Comparison Vittoria Corsa Speed: Offers a very slight speed advantage on certain (perfect) road conditions. However, the gain is subtle and may not be perceptible during a ride. Probably more of a time trial advantage. Vittoria Corsa Pro: Provides a reliable alternative with basically the same speed, with competitive speed and efficiency noted. The differences in speed compared to the Corsa Speed are very minute for non-competitive riders. The tire feels more durable, and we’re all about fewer flats. Continental 5000: Remains a firm favorite for its all-around capabilities, rolls nicely and can accelerate easily, is durable enough to withstand road debris. Our team often chooses it for its consistency during different types of rides. Mounting and Durability All tires mounted as expected, no significant differences were observed. Our riders had a couple flats with the Vittoria, but none with the Continental 5000. We can’t say this was a controlled experiment though — road and riding conditions change by the hour as you know. Rider Preferences Several riders expressed a preference for the Continental 5000 during training, citing its balance of speed and durability. For time trials, the Vittoria Corsa Speed was the overwhelming preferred choice, although many riders were content with the Continental 5000. Aero and Rolling Resistance In terms of aerodynamics, there are some very slight differences but are generally they are overshadowed by other factors such as rider position and equipment. The Vittoria … Read more

Shifting from Indoor to Outdoor Cycling

moving to outdoor cycling

You’ve been training indoors, getting your conditioning up and doing structure bike workouts. You probably have a decent base built, but are ready to get outside and work on your endurance. How do you known when is the right time? And what do you need to know before you hit the pavement or trails? Indoor cycling is often full of shorter workouts, interval training, and other structured work that can really improve your VO2 max and FTP threshold. Outdoor riding is more often longer endurance riding with less focus on power output. One can definitely translate to the other. Indoor Cycling to Prepare for Outdoor Biking Bike training indoors is a great way to prepare for your outdoor ride and race season. By using indoor cycling as a tool for conditioning and improving your cycling capacity, cyclists can train year-round regardless of the weather conditions outside. The goal of indoor cycling should be to get you ready for the real, outdoor rides and races — and to keep you in excellent shape, of course. Indoor Cycling Periodization Cycling indoors requires some precision, and can actually provide a more structured type of training than your outdoor rides. One way to add precision is by intentional periodization. Periodization is an important concept in cycling training. It involves breaking up your training into different phases or cycles, each with a specific focus. Indoor cycling can be used to help with the different phases of periodization. For example, during the off-season, indoor cycling can be used for base training, with increasing load levels is you get closer to your outdoor training season. This involves structured rides that might include phases of riding at specific power ranges. As the season approaches, indoor cycling can be used for more intense training, such as intervals and hill repeats. Speed Work vs. Endurance Work Take advantage of your indoor cycling season to focus on both speed work and endurance work. Speed work involves shorter, high-intensity efforts to improve your ability to generate power. Endurance work involves longer, lower-intensity efforts to improve your aerobic capacity. Some of the best indoor training weeks are a combination of longer sweet spot sets, right below the functional threshold power (FTP) mixed with other, shorter workouts that have high power output, for 30-45 seconds at a time. These higher power workouts might resemble sprinting down a road during an outdoor race. Training Programs and Apps Indoor cycling isn’t what it used to be, and that is a very good thing!  There are so many training programs and apps available for indoor cycling. These programs and apps can provide cyclists with structured workouts and training plans, often with actual coaching behind them. Some popular indoor cycling training programs include TrainerRoad and Zwift. These programs offer a variety of workouts and training plans to help cyclists improve their fitness and performance. They by far work best when used with a smart bike trainer, which will help you dial-in on specific power levels and be incredibly precise with your rides. Shifting Gears to Outdoor Riding So it’s time to transition to outdoor riding. If you have had a productive indoor riding season, this transition should be a welcomed one that you are very ready for. For someone who has been cycling indoors to get themselves into shape, transitioning to outdoor riding can be an exciting and challenging experience. Here are some of our first-hand tips (from experience) to help make the transition smoother and more enjoyable. Get your cycling gear ready That bike that has been hanging in the garage for the winter, or mounted on your trainer?  Yeah, it needs to be checked-out before you start whipping around corners at 20mph. As you should regularly do, check your bike for any necessary repairs or maintenance, and while you are at it, take a good look at your clothing and accessories. On the bike, put the bike up on a bike stand so it is easier to inspect, and take a close look at: Did any screws or metal parts corrode? This is especially important for people who used the bike on their trainer. All that sweat accelerates corrosion. Are your spokes and rims in good shape? How are your tires?  Sometimes we finish a season with tires that are well-worn. Might want to start the new season with fresh ones. If you use tubeless tires, put some new sealant in them Lube everything Take a torque wrench to all bolts and screws, and be sure things are snug up to specifications As for your other gear, some essential items to consider include: Is your helmet still fitting well, or do you need to upgrade? They are meant to be replaced occasionally. Did you finish last season with clothing that was on its last leg? Are your cycling shoes – and the pedal cleats on them – in good shape? Do you have some good sunglasses? That’s something you don’t have to think about indoors. Water bottle or hydration packs Take a look at your bike bag, probably for the first time in months. Do you have tire repair tools and CO2 cartridges, and a multi tool?  Safety Reminders for Outdoor Riding For those first few rides outside, you might have a learning curve on safety items, after all that safe indoor cycling. Think about: Always wear a helmet and eye protection Be sure you are adept at clipping-in and out of your pedals, when stopped. This might mean adjusting the pedal tension. Stay visible by wearing brightly colored or reflective clothing and using lights on your bike Avoid distractions such as using your phone while riding Ride with a partner or group for added safety Weather conditions: Avoid riding in extreme weather conditions such as heavy rain or strong cross winds, especially if riding on roads and shoulders. Time of day: Consider riding during daylight hours to ensure visibility and avoid potential hazards. Many bike accidents occur at dusk and dawn. Traffic: Find routes … Read more

What to Wear for Cold Weather Cycling

fat bike tire

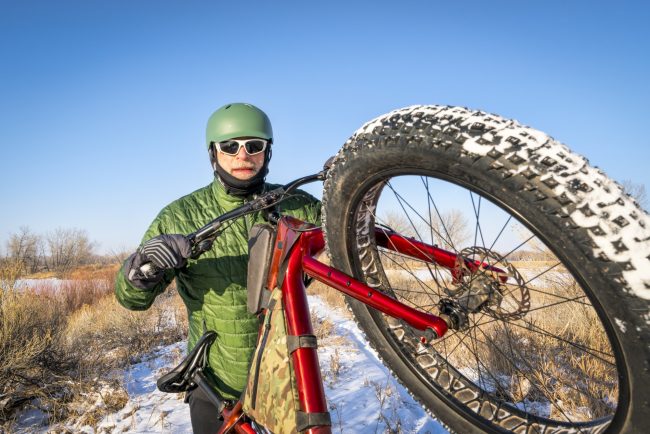
I’ve done my share of cold weather rides, be it pure winter rides on a fat bike or those fall or spring rides when it looks warmer than it really is. I’ve learned it is a delicate balance of being cold or overdressing, neither of which are good. The art and science involved in dressing for colder-weather cycling is something that takes a while to develop, but I want to share with you what I’ve learned over many years of dialing-in my cold weather riding system. I’ll go body part by body part, which seems like the best way to do it. What to Wear for Cold Weather Cycling Core Warmth: Base Layer and Jacket It all starts with the core. Keeping your core warm is essential for cold weather cycling. If your core can’t stay warm, you will have a hard time being comfortable on the ride. At the same time, overdressing on the core can very quickly cause you to overheat. Start with a moisture-wicking base layer to keep sweat away from your skin. For me, this is often a synthetic t-shirt. Then, I often add another long-sleeved base layer if it is a cold day, but one that is thin enough to not be bulky. Once I feel I have my core heat taken care of, I add a windproof jacket, but one without too much insulation. I’d rather rely on layers than a heavy outer layer. Look for jackets with vents to prevent overheating. I like my jacket to be design specifically for cycling, with a svelte cut and pockets in the back. Recommendation: The Pearl Izumi Amfib jacket is great. It is quite warm for how low-profile it is. Legs: Knee Warmers or Cycling Tights Next up, those legs. Your legs will actually stay warmer than you think, but you still need to take care of covering them. For your legs, you have two options: knee warmers or cycling tights. it is usually an either-or, I don’t use them together. Knee warmers are a great option for milder temperatures. They are just what they sound like, meant to be worn over your knees to keep the joint and ligaments warm. You might be tempted to use them for running, too, but they really don’t work for that. The running motion makes them jostle down your leg. But they are great for cycling. Best of all, they are small enough so if it warms up and you want to take them off, you can just toss them in your jacket or jersey pocket or your bike bag. Cycling tights provide more insulation for colder weather, along with full coverage (knee warmers leave some exposed skin.) Look for tights with a sheen that will break the wind. They key is to not get thick or cloth tights – it is hard to explain, but you don’t want them to double-up on your bike shorts in the saddle. That would cause discomfort over a long ride. I prefer to wear my regular cycling shorts with both knee warmers or cycling tights, so I don’t choose the tights with a chamois. Just thin ones that can go over my bike shorts. Recommendation: The Castelli brand Knee Warmer is comfortable and you will be shocked how effective it is down to relatively low temps. It is only for cycling, not running, though. When running, it will work its way down off your knee. Hands: Gloves Your hands are one of the most vulnerable parts of your body in cold weather. Look for cycling-specific gloves with insulation and windproof material to keep your hands warm and dry. Consider getting gloves with touchscreen compatibility so you can use your phone without taking them off. Be sure that when you gloves are on with your preferred cycling jacket, you don’t have a gap of exposed skin between the glove cuff and the jacket cuff. This might mean either having a longer jacket or a longer glove cuff. Every cyclist should have multiples pairs of bike gloves, because this is one area where you will want to be able to choose based on conditions. 10 degrees can make a huge difference. Recommended: For colder weather rides, I really like the Pearl Izumi Lobster Evo gloves. They are a cross between a glove and a mitt, and are extremely effective against the cold even without any additional layers or handwarmers.   Feet: Heavy Socks, Maybe Shoe Covers Far and away, the body part that gives me the most trouble on rides are my feet. Specifically, my toes. Even on rides that aren’t brutally cold, my toes freeze before any other body part. I think it is because the toes are cutting into the wind the entire ride, with little break. Most cycling shoes are designed for warmer weather, so what makes them breathable when it is 90 degrees out makes then not great when it is 25. Keeping your feet warm is crucial for a comfortable ride. Wear heavy socks made of wool or synthetic material to keep your feet dry and warm, and ideally socks that extend well up your shin and calf.  If you ride when it is quite cold or have a history of freezing toes, you can also consider wearing shoe covers to protect your shoes from the elements. They provide just enough coverage to keep some of the windchill off your toes. Neck: Gaiter or Balaclava It is often forgotten, but I really like to keep my neck warm on a ride. I use a neck gaiter on 90% of our colder rides, and a full balaclava on the other 10%. You can pull the gaiter up over your chin, mouth, or even most of your face if you need to. A balaclava is a more complete way to keep your neck and face from the cold. It’s a good option if you are worried about your face getting cold, but I usually am OK on the face, I just … Read more

Schrader Valves vs. Presta Valves

presta vs. schrader

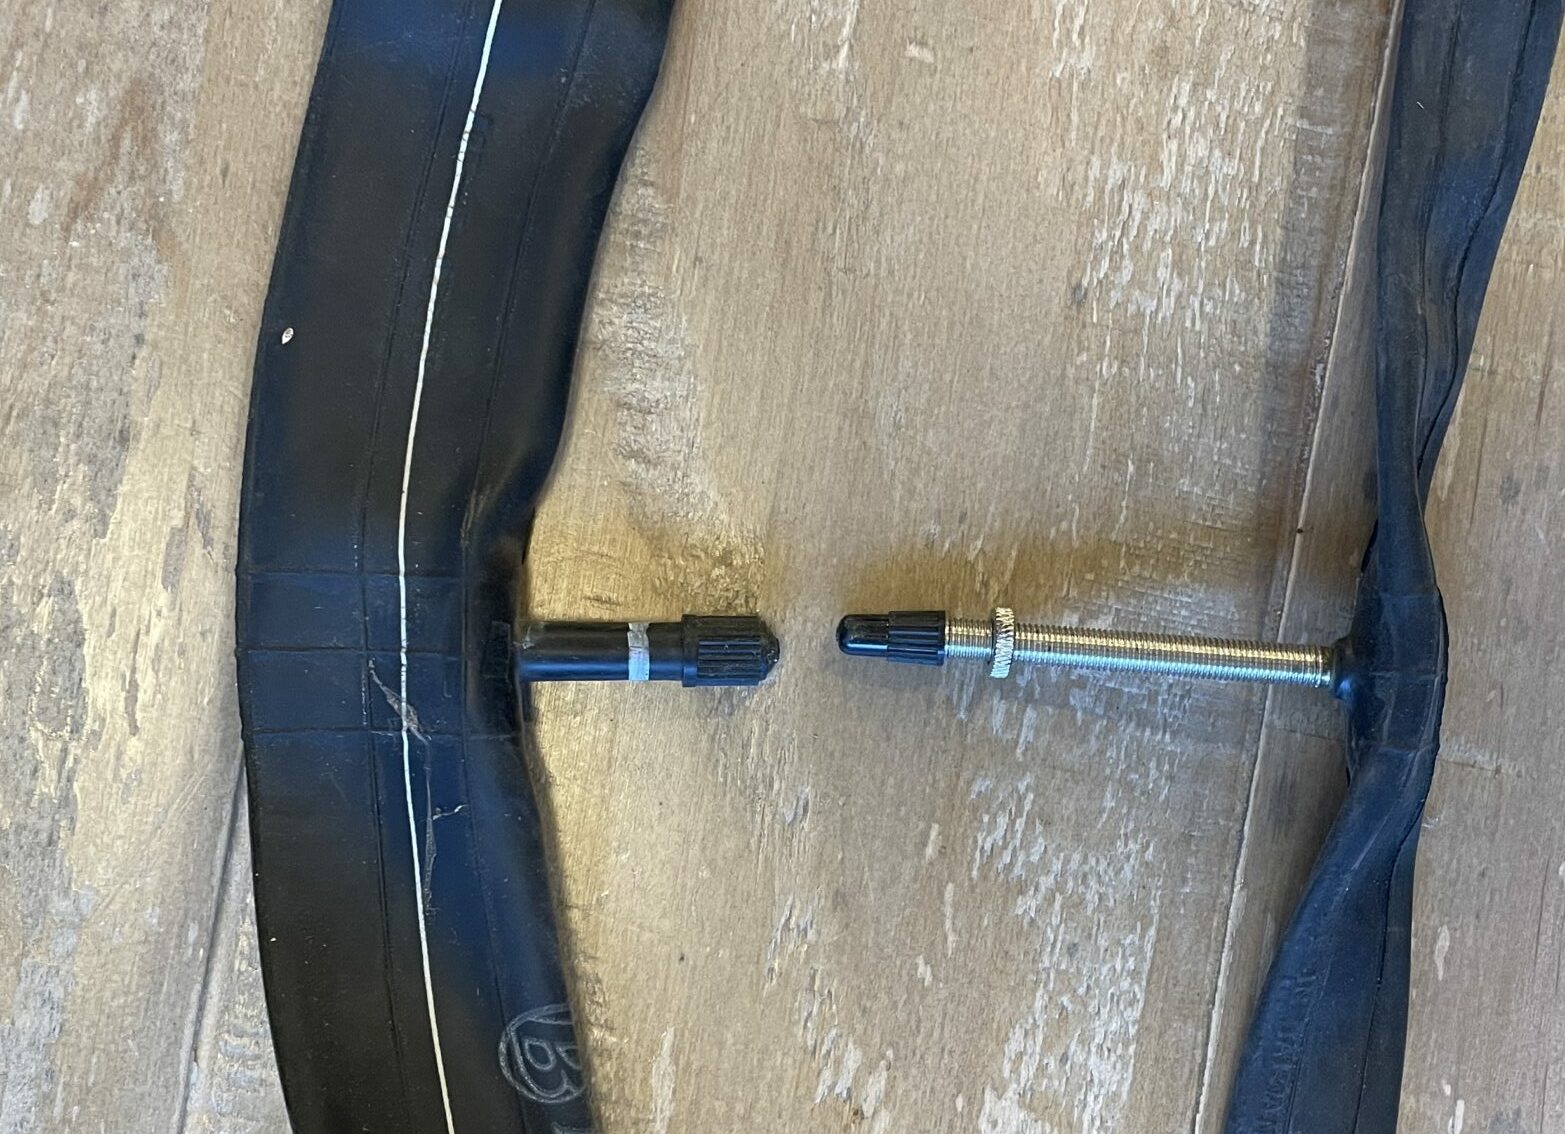
I’ve seen it a few times. I get someone setup on their beginner road bike, their first one ever. They start looking over the bike, and get to the wheels, look at the valve, and ask “what’s this?!” There are two main types of bike wheel valves: The Schrader valve and the Presta valve. Both serve the same purpose of controlling air flow in and out of the tire, but there is a reason the two are used in very different situations. The Schrader valve is the most common valve found on general bikes, and it is probably the one you had on your bikes as a kid or the commuter bike you ride around town. It’s also the same type of valve used on car tires. It’s a sturdy, all-purpose valve that’s easy to use and can handle high pressure. You’ll recognize it by its wider stem and a spring-loaded valve core that is kind of recessed in the center. Schrader valves are the ones found on more entry-level bikes, cheaper mountain bikes, and kids’ bikes. The Presta valve, also known as a French valve, is the one that you will find on nearly every road or tri bike. It is a narrower valve that’s increasingly used on higher-end mountain bikes too. It has a threaded stem with a locking nut that you need to unscrew before inflating the tire. The Presta valve is designed for high-pressure tires and it can dial-in the PSI (pounds per square inch) more precisely than the Schrader valve. It’s also lighter and more aerodynamic, making it a popular choice among road cyclists or anyone who has a higher-performance bike. Schrader Valve Design and Functionality For years growing up, all I knew was the Schrader Valve from my mountain bikes and BMX bikes. This is what many might consider the standard bike tire valve. This valve has a simple design consisting of a metal stem with a rubber seal that is pressed against the valve opening to prevent air from escaping. The valve is opened by depressing a spring-loaded pin in the center of the valve stem, allowing air to flow in or out. Common Uses Schrader valves are commonly used on tires for mountain bikes, BMX bikes, and some hybrid and cruiser bikes. They are also used on car tires, air compressors, and some inflatable toys. Compatibility and Sizing When it comes to compatibility and sizing, Schrader valves are generally easier to work with than Presta valves. They are compatible with most pumps and can be inflated at gas stations or with a standard air compressor. Schrader valves are available in two sizes: standard and large. Standard Schrader valves have a diameter of 8mm, while large Schrader valves have a diameter of 10mm. Advantages and Disadvantages A big advantage of Schrader valves is their durability. They are stubby and strong, so less prone to damage from debris and can withstand more knocking around than Presta valves. Schrader valves are also compatible with almost any air pump, like those found at gas stations, so they can be an advantage if you need to pump your tire while on the go. However, Schrader valves are heavier and bulkier than Presta valves, which can be a disadvantage for road cyclists who prioritize weight savings. Additionally, Schrader valves require a larger hole in the rim, which can weaken the rim over time. Presta Valve Design and Functionality I am exclusively using Presta valves these days on all my bikes. It is a slender valve that is commonly found on high-performance bikes. The valve has a threaded stem that allows it to be securely fastened to the rim of the wheel. The valve core is also removable, which makes it easy to add or remove air from the tire. Common Uses Presta valves are the valves you see on road bikes, gravel bikes, higher-end mountain bikes, and other high-performance bikes. They are also used in tubeless tire setups. Because of their design, Presta valves can handle higher pressure than Schrader valves, making them right for any tire that needs higher pressure like a road bike tire. They can also let air out of the tire with great precision, an advantage if you are trying to dial-in your PSI very precisely. Compatibility and Sizing When it comes to compatibility, Presta valves are not as widely used as Schrader valves in the overall bike universe, but they are actually much more common in the world of road bikes, triathlon bikes, and gravel bikes.. Most bike pumps come with a Presta valve adapter, which allows you to inflate tires with either type of valve. Presta valves come in different lengths, so it is important to choose the correct length for your rim depth. If you have a rim that is deep and aerodynamic, you need a longer valve or it won’t be able to peek out of the rim! Advantages and Disadvantages The biggest advantage of Presta valves is that they are able to handle higher pressure than Schrader valves. This makes them the best for road and triathlon cyclists. Another advantage is that the valve core is removable, which makes it easy to add or remove air from the tire. The only real disadvantage of Presta valves is that they are not as widely used as Schrader valves, so lots of tire pumps in parks or at convenience stores might not have the ability to pump a Presta valve.  Another downside is that te valve stem is more fragile than the Schrader valve, which can make it more prone to damage. What makes the Presta valve so ideal for getting precise PSI is also a downside in some cases perhaps. If you put pressure on the valve core to let some air out, you can let 20 PSI out in a hurry!  A Schrader valve isn’t as touchy. When to Use Schrader Valves, When to Use Presta Valves Here are some simple guidelines on when to use Schrader valves … Read more

Cold Weather Running Gear

running winter

Runners who live in colder climates or climates with the possibility of a couple colds snaps a year undoubtedly face a common question: Should I run outside, run inside on a treadmill, or temporarily stop my training until it gets warmer?  Being a Minnesota-based organization, we know a thing or two about cold weather running.  We hope you choose to run outside, and we are here to help you learn how to embrace the cold and enjoy some cooler workouts. Any cold weather runner will tell you that running in cold weather can actually be an invigorating experience – the landscape is different, the trails are often quieter, and you can get a respite from hot or muggy summer days that drain your energy. Winter runs are often some of the sunniest days you will find, adding to the energy of a run. If you need additional reasons to run outside in the cold, don’t forget that you get a nice two-for-one on your metabolic rate — the energy required to keep your core warm is above and beyond what you will expend by running alone. If you are new to cold weather running, or just want to do it more comfortably, ask yourself a few questions first: Do you have the right cold weather running gear? We’ve all heard that active people should wear layers in cold weather, but there is more to it than that. Are your extremities protected?  Once your extremities get cold, it is hard to stay comfortable because your blood flow is reduced in cold temps. Are you only running, or are you biking in winter too?  Cold weather cycling clothing overlaps with cold weather running clothing, but there are some differences. Are you wearing materials that prevent you from becoming chilled?  Different conditions call for different materials – thermals, waterproof, windbreaking, etc. Do you have appropriate wind protection?  Even on a sunny day, the wind can sometimes make the difference between a chilled core and a warm one.  Having the right kind of running jacket makes a huge difference. Is your footwear compatible with your running surface?  This is less about warmth and more about your safety. Answering these questions well will significantly increase your comfort in cold weather, not to mention your safety. COLD RUNNING WEATHER DEFINED What is the definition of cold weather? For folks in Florida, anything below 55 degrees might be considered cold, or at least cool. If you live in Maine or Michigan, you might consider 20 degrees tolerable if conditions are right, and may even be willing to run outside in below zero temps. And running in snow may require different considerations than simply running on a cold day but a dry surface. Are you physically able to handle the cold? In most cases, if you are a runner, the answer is an easy yes. But just like some people can’t handle a hot, humid run, others aren’t built for a cold weather run. If you have lungs that are sensitive to cold air, you may want to limit your cold weather runs to 35 degrees or higher. If your knees act up when running in lower temps, you might need to invest in additional leg warming gear, thermal running tights, or use treadmills in extreme cases. Knee warmers shouldn’t be out of the question for people with achy knees. In most cases, though, you can dress perfectly for a cold weather run with just a little investment and planning. Cold weather running often has as much to do with the running surface as the air temp.  If your favorite trail has a thin layer of ice, or there is a risk of getting splashed by passing-by cars spraying wet rain or slush, then you are definitely in a different mode of running than in the summer. Cold weather runs can be among the most enjoyable of the entire year. With a little preparation, you’ll be ready to seize that winter day. RUNNING IN COLD WEATHER: GEAR CONSIDERATIONS When you bike, swim, or rock climb, you wear the right gear for the activity. The same goes for running in cold weather. From head to toe, making sure you have the workout gear can make the run exponentially more comfortable. Before we describe your various options, let’s outline the different factors involved with cold weather running: Temperature. Most people think of cold weather as being low temps. That is part of the equation. We generally start to think about dressing for the elements at temps lower than 55, and go into all out winter gear at about 35 or 40 degrees.  However, there is way more to it as you will see in the following points. Wind. Wind has a huge effect on cold weather running comfort. A 30 degree day can be very comfortable if there is no wind, but very chilly if you have a moist breeze blowing.  In some conditions, frostbite can set in quickly if the wind is just right.  Having a lightweight shell available can allow you to throw on wind protection whenever you need it without significantly adding weight or changing your heat level. Precipitation. Obviously, precip makes a huge difference on your comfort outside, even in warm temperatures. In many cases, your wind protection layer can double as rain or snow gear, but only to a point. In our opinion, running in cold rain is not worth it. In particular, protect your feet when running in wet conditions – it is a prime condition or introducing blisters, even in warm weather. Snow, on the other hand, is often easier and less dangerous to run in than rain, especially with colder, drier snow, as the flakes will simply slide off of you as you run. Sun. The inverse of our precipitation point, if it is a sunny day, you can often get by with a little less thermal coverage than if it is overcast or precipitating, even if the temp is the same. Beware of the long activities when … Read more

Best E-Bike Tires

e-bike tire continental

E-bikes have exploded in popularity. As e-bikes get used more and more, their tires can wear, which requires some knowledge of which are the best e-bike tires to use as replacements. Selecting the right e-bike tire depends heavily on your riding type and the terrain the bike is used on. Urban riders might prioritize smooth rolling tires for city streets, while off-road enthusiasts might look for tires with aggressive tread patterns for better grip and stability. Regardless of the type of riding e-bike tires need to be able to handle the additional weight and speed that come with e-bikes. E-bike tires can experience more wear due to the motor’s torque and the overall increased weight of the bike. It’s important to regularly check tire pressure, tread depth, and overall condition to be sure your tires are always ready for the next adventure. Types of E-Bike Tires There are a few main types of tires to choose from, and part of it depends on your wheel’s rim and which type of tire it can handle. Beyond that, I focus on durability and compatibility with electric-assist speeds.  Tubed Tires Tubed tires are the traditional tire design you find on many bikes, including e-bikes, and are often referred-to as clinchers. These tires contain an inner tube that holds air andmaintains pressure. They are generally more affordable and easier to repair or replace if punctured. Most people who have been road bike riders are very familiar with the clincher-style bike tires. Pros Cost Effective Easier to repair: At least once you learn how Tubeless Tires Tubeless bike tires have become a favorite of cyclists over the past few years, and eventually will be the industry standard in my opinion. With tubeless tires, you are going to benefit from a reduction in punctures due to no inner tube being present. These tires let you ride at lower tire pressures, which can improve traction and ride comfort in many situations. Their self-sealing capability when punctured is great, as long as you carry some sealant with you. Pros Puncture Resistance: Higher resistance due to no pinch flats caused by tubes Performance: Lower pressures enhance grip and ride comfort on varied terrains. A proper sealant and tubeless-ready rims are essential to maintain the integrity of these tires. Solid Tires Solid tires, also referred to as airless tires, are entirely puncture-proof. I recommend them for riders who prioritize minimal maintenance and who will not be riding long distances. However, the ride quality is not as good as air-filled tires, so I don’t like them for longer touring rides. Pros No Flat Tires: Complete elimination of flat tires and need for maintenance. Durability: Typically last longer than their pneumatic counterparts. Solid tires require a compatible e-bike frame and wheels, as they can be harder to install due to their rigidity. Only use them if you really need a tire that requires zero maintenance. Understanding Bike Tire Dimensions Tire dimensions can seem like a foreign language to newbies. Don’t get overwhelmed, just focus on a few things. First, your rim, or wheel, dictates what tire you can use. Second, pay attention to width and diameter, as these are critical to performance and ride quality. Tire size is typically noted in a format such as 700x35C—700 representing the nominal diameter in millimeters, and 35 the width in millimeters, while ‘C’ refers to the tire width code.  As the tires get larger, they jump to being measured in inches – like 2.5 inch tires. This is a relic to the world of road bikes (which measure in centimeters) and mountain bikes (which measure in inches). The rule of thumb:  Wider tires can be ridden at lower tire pressures, which makes them more comfortable on rough terrain and gives them more traction in loose surfaces, mud, sand, or snow.  Skinnier tires are superior on pavement and flats, due to having less draft, but because they need to be ridden at higher pressures, they can feel stiff. For older e-bike riders, I suggest using a wider tire as opposed to a narrower one. Older riders might not have the same reflexes as a younger rider, and a wider tire is more sure-footed if you hit a pitch of loose trail or snow or ice. Tire Tread and Terrain Adaptability When I choose tires for an e-bike, I consider the types of terrain or trail surface the bike will spend time on. For urban riding, smoother tires are my go-to. They offer less rolling resistance, which means I can ride more efficiently and effortlessly on city streets. They can also tackle basic rough patches as long as they are not wet or prolonged. On the other hand, if I anticipate a variety of trail surfaces including dirt trails, loose paths, gravel, or unpredictable terrain, I look for knobbier tires. These have deeper grooves and more pronounced tread patterns that provide better grip and stability. Below is a quick comparison: Smooth Tires Best for: Asphalt, city roads Advantages: Lower rolling resistance; increased speed Disadvantages: Reduced grip on loose or “greasy” surfaces Knobby Tires Best for: Off-road, rough trails, gravel, varied terrain Advantages: Enhanced grip; improved control Disadvantages: Higher rolling resistance; potentially slower on smooth surfaces. Lots of “drag.” Terrain Guide: Pavement: I opt for a semi-slick or slick tire. Mixed Terrain: I lean towards tires with intermediate tread, and slightly wider. Rough Terrain: I choose tires with aggressive tread patterns. Remember, the condition of tires impacts not just my ride experience but also my safety. I always prefer to match my tire tread to the conditions I expect to encounter. Best Ebike Tires Here are some top choices each with their own strengths and challenges. Schwalbe Big Ben The Schwalbe Big Ben offers a dependable balance of comfort and stability for urban riders. It is a tire that you find one lots of fat bikes, too. Its puncture-resistant layer and reinforced sidewalls make it strong enough to bear the weight of an e-biker and rider, and we have always trusted the … Read more

Thule T2 and T2 Pro XT Bike Rack Review

As far as hitch-based bike racks go, the Thule T2 lineup (classic and Pro XT) are sturdy, durable, and will get the job done for a long, long time.  While the price is a little higher than we would prefer, if you have the ability to extend your budget to this price point, you won’t be disappointed by the Thule T2 models. Find them here: Thule T2 Pro XT Thule T2 Classic How I Tested the Thule Racks I gave the Thule XT racks a good test in two settings. First, I did a thorough in-store inspection, which allowed me to see the racks in an out-of-the-box state and perfectly clean, which was nice. Second, at a bike race I was, doing, I arranged through my riding partners to examine and use the Thule T2 and T2 Pro. I was looking specifically for things like: Is the rack intuitive to use? How securely does a bike attach to the rack? Is the rack hard on the bike? Does the rack sit securely in the car hitch mount? Can you fit the advertised number of bikes on the rack without them rubbing each other? Thule T2 and T2 Pro XT Overview I love the Thule car bike carriers because, in our experience, they are well-built and very intuitive to use even for someone who is new to cycling.  They cost a little more, but car bike carriers are one area where you truly get what you pay for.  Skimp and your bike will be hanging from a flimsy carrier while you are doing 65mph down the road. The Thule brand name, build quality, and reputation for durability all contribute to the premium pricing, but what you get for it is a premium product.  Not to mention, if you ever decide to sell it used, you will fetch a lot more for a Thule than you will for a no-name rack from China. The expense of a lost or damaged bike obviously depends on the bike itself, and it follows that serious cyclists with significant investment in their bikes should invest proportionally in racks to carry them. That means eschewing the private-label racks from the discount tool supply or mega-combo department-grocery for a more thoughtfully engineered and constructed rack from a respected brand. Any model carried by a bike shop or upscale sporting outlet fits that bill, but few brands are as synonymous with quality rack and carrier solutions as the venerable Swedish outfit Thule (pronounced “TOO-lee”). Dating to the 1960s, Thule’s current line features carriers for everything from skis to stand-up paddleboards, including their most refined bike racks yet. We are big fans of the T2 bike rack lineup. Thule T2 Features Thule’s T2 range are the ideal configuration for many cyclists: tow-hitch mounted, with trays to securely hold bikes by the wheels. The hitch mount means a rack effectively bolted to the vehicle frame, while the tray system holds bikes in place only by the wheels to prevent damage from clamping on carbon fiber frames or delicate finishes. And while the rubber bands on some racks may work, the security of the Thule T2’s metal and composite construction is an undeniable benefit, even if it’s largely psychological. As the name suggests, the T2 iterates on the popular T1. The default configuration carries two bikes, with additional two-bike add-on units available. The Thule T2 Classic and T2 Pro XT models share the same 2-bike hitch-mount and tray-secured design, as well as the same basic operation. Both are clearly priced as premium offerings compared to Thule’s more affordable frame-hanging and clamping options, but the T2 Classic still provides a significant savings over the T2 Pro XT. The greater use of aluminum in the Pro XT’s frame provides an 8 lbs weight savings over the Classic, but at 52 and 60 lbs, respectively, the difference is not immense. Instead, the XT promises greater strength and stability with large-section shaped aluminum tubes replacing the Classic’s plain steel rectangles. The XT’s adjustment points are also significantly more substantial and ergonomic in use, especially the tilting function: an exposed steel linkage and small latch on the car end of the Classic are replaced by a large handle on the XT, placed conveniently at the very rear end of the rack. On both models, the tilt serves a dual purpose, allowing a slight tilt with bikes mounted for hatch access and folding away completely when not in use. For fat bike riders, you can buy a conversion kit (here) to make the wheel tray wide enough for your fattie. You will need to buy one kit per bike, it only converts one pair of trays. Thule T2 and T2 Pro – Positives and Negatives What I liked: Sits solidly in a 2-inch hitch receiver Super intuitive folding up when the rack is not in use Holds bike to rack securely with all the pressure on the tires, not the frame Fast to mount and dismount bikes. Intuitive design. What I would change: Feels “plastic-y”. Probably doesn’t affect the performance of the rack at all, but I like when these racks have more of a metal feel. I wish the rack had some reflective tape, to remind vehicles behind you that it is on there. You can always add this yourself. I might not want to cram the max number of bikes on, if they are higher-end carbon fiber bikes. But that goes for most racks I test. Thule T2 Classic vs. T2 Pro XT Let’s address one elephant in the room:  Thule’s T2 comes in a couple popular varieties — the old Classic (which has been discontinued but you might find several floating around used), and the Pro XT.  Which is better? For Thule shoppers picking between the T2’s Classic and Pro XT flavors, budget is likely to be the first consideration. However, those interested in exploring the 4-bike capacity offered with Thule’s add-on system might take caution from user reports of quality issues. T2 pro … Read more

Should You Buy a Used Bike?

Should You Buy Used Bike: A Guide to Used Cycle Shopping When I first started cycling more seriously I (like many of you) had some sticker shock at the price of new bikes. Unless you are a high-earner getting into cycling after making a few bucks, it can seem crazy to spend as much on a bike as you would on a basic used car. Naturally, I looked at used bikes. My first two “real” road bikes were used, and while they worked out fine, I learned a few things about used bike buying in the process. The bottom line – buying a used bike can be a way to get more for your money, but don’t let the tail wag the dog when you start seeing discount prices. Don’t settled for the wrong bike! Why Consider a Used Bike Budget Friendliness Obviously, the whole point of buying a used bike is to save money. New bikes can be crazy expensive, even cheaper road bikes, whereas used bikes are often significantly cheaper. This means that I can get a better quality bike for my budget if I choose to go used instead. I might even be able to find a really good deal on a brand-name bike that’s been well-maintained by its previous owner. It is pretty common for a 5-year-old bike to be about 40% the cost of what it was new….. and that is assuming it is still in excellent condition. Shopping for used bikes could mean that your money will get you a road bike and a mountain bike, for example, instead of having to choose between one or the other. Environmental Impact Another reason I’d consider a used bike is that it’s an environmentally friendly choice. Cycling itself is already a green mode of transportation, but buying a used bike takes it a step further. When I buy a used bike, I’m helping to reduce waste and extend the life of a perfectly functional item. It’s a small step towards a more sustainable lifestyle. Factors to Consider When Buying a Used Bike When I decide to buy a used bike, there are a few factors I need to take into consideration. I want to make sure I’m getting a good deal and a bike that will serve me well. The last thing you want to do is regret saving a few bucks because you get the wrong bike, or a defective bike. Bike Condition Just like buying anything used – a car, or even a home – you want to be sure the bike is in the condition that works for you! Before purchasing a used bike, I always check the bike’s condition in detail (which makes it difficult to buy site-unseen on Ebay.) This includes inspecting the frame for any cracks – especially if carbon fiber, or any signs that the frame was damaged or bent in a crash.  I like to look at metal parts like the chain for rust, as it can be an indication on how well the bike has been cared for. Check to see if the wheels spin true and straight, or if there is a wobble. Then be sure that the brakes are working properly and don’t squeak.  If the prior owner was content with poorly-fitting brakes, then he or she probably didn’t take perfect care of the bike. I make a note of any parts that need to be replaced or repaired, as this will add to the cost of the used bike. If there are too many issues, I move on to the next bike.  I am not looking for a fixer-upper. Bike Fit One of the biggest advantages of buying a new bike is that you can get the size that fits you just right.  Be sure that your buying used doesn’t compromise your ability to get the right fit! I once bought a bike on Ebay that was a great deal, and a relatively new bike for the right price.  But instead of buying the 58 that I should have gotten, this bike was a 56.  It was fine for a summer, with the right adjustments, but it was never going to be the bike that I would grow to love, due to the sizing.  I sold it a few months later. In short, look for: Standover height: When straddling the bike, I make sure there’s about an inch of clearance between my groin and the top tube. Saddle height: I adjust the seat height so that when my heel touches the pedal at its lowest point, my leg is fully extended. Reach: Sitting on the saddle, I check that I can comfortably reach the handlebars without leaning too far forward or back. Another approach could be to buy a used bike that generally fits you well, but then get a professional bike fitting to modify it and perhaps update parts like the stem and saddle so it fits just right. Doing so might still save you money versus a new bike, in many situations. Plus, you should be doing a bike fitting anyway, any time you get a new bike. Safety Checks Don’t skimp on safety when it comes to your new bike!  Check the following: Frame Go over the frame with your finger, feeling for any cracks or ridges that might be caused by a fracture. They can be hard to detect with your eye. Especially on a carbon fiber bike, a frame crack could be a major safety risk.   Tires and wheels I examine the tires and wheels for any damage, such as cuts or excessive wear. Don’t worry about tire pressure, you can pump it up, but do be concerned if the tire doesn’t hold air (which can be common with a tubeless tire that has not been used in a while).  Then you need to decide if the tire just needs new sealant or a tube, or if there is a bigger issues.  Also, be sure the spokes are all good … Read more

Core Exercises for Cyclists

best core exercises cyclist

Cyclists assume that they need to have strong legs to improve their riding speed and distance. That’s true, but many overlook the core. A strong core is a key part of any cyclist’s conditioning. A strong core is surprisingly critical to cycling. Why Strengthen Your Core? Improved Stability Strong core muscles help to stabilize the body and increases balance. This is especially important for cyclists who may find themselves riding in difficult terrain or in bad weather. A strong core can help the cyclist maintain better control of their bike and remain upright, even in challenging conditions. Strong core muscles also make it much easier to get out of the saddle and stand-up while pedaling, something you should be doing when trying to muster more power or climb up that tough hill. Enhanced Endurance Core strength helps to improve your overall endurance on the bike. A strong core helps to support the body and can reduce fatigue, allowing the cyclist to go farther and faster. You will especially notice the benefits of a strong core in the final 25% of a long ride — you will have less overall fatigue and feel like your form is still good. Reduced Risk of Injury A strong core will keep you honest on your cycling form, meaning you will get fewer injuries. Misalignment is one of the main causes of cycling injuries, and if you are misaligned over a long ride, that could mean thousands of motions that actually hurt your body. Strong cores allow cyclists to ride in proper form, even when they start to get tired.  When you combine good core work with other injury-prevention techniques like foam rolling or even ice baths, then you are starting to really focus on keeping yourself injury-free if at all possible. More Aggressive Riding Positions Anyone who has done a bike fitting will know that your core strength dictates how aggressive your bike can be setup. The stronger the core, the more aggressive you can be. Those with weaker cores often need their bike setup in a more relaxed position to compensate. You will also find that you can stay in your drop bars or your aerobars for longer periods of time, helping you on race day. I have been working on my core for 15 years, and have seen the work translate to my cycling.  I find that I am able to get out of the saddle and stand much more easily and with less weight on my wrists, that my form stays sound even into long rides, and that I can go into my drops or aerobars for much longer than before. 5 Great Core Exercises for Cyclists Crunches How to do them Lie on your back with your knees bent and your feet flat on the ground. Place your hands behind your head, keeping your elbows out, or you can cross your arms across your chest. Engage your core and slowly raise your chest up towards your knees and then slowly lower back down. Repeat 10–15 times. Why we love them Crunches are the epitome of an ab working, and it is not hard to see how being good at them translates to holding yourself in a strong cycling position for hours at a time. Plank How to do them Start in a pushup position, with your hands directly under your shoulders. Lower your forearms to the floor and hold yourself up in a straight line from your head to your heels. Hold for 30–60 seconds. Why we love them The ultimate exercise for building all of those stabilizer muscles around your core. By doing lots of plank you will be able to ride without having so much pressure on your arms and wrists. Bicycle Crunches How to do them Lie on your back with your hands behind your head. Lift your legs off the ground and bring your right elbow to your left knee while straightening your right leg. Then switch sides and bring your left elbow to your right knee while straightening your left leg. Repeat 10–15 times. Why we love them As the name implies, this mimics the movement of cycling and is a more dynamic version of regular crunches. Leg Raises How to do them Lie on your back and place your hands on the ground for support. Lift your legs off the ground and raise them until they are at a 90–degree angle from your body. Lower your legs back to the ground and repeat 10–15 times.  You can do many variations of this, such as one leg at a time, or moving your legs outward and inward as part of the motion. Why we love them Leg raises help you work the lower abs and lower core, important because it will help with your endurance as you are in hour 2 or 3 of your ride. Glute Bridges How to do them Lie on your back with your knees bent, feet flat on the ground. Lift your hips off the ground while squeezing your glutes and hamstrings. Hold for 5 seconds, then lower your hips back to the ground. Repeat 10–15 times. Why we love them The core isn’t just about the front, it is about the back, too.  Working your back core helps balance the muscle and prevent lower back injuries while riding.  It also helps you when you hit that rough patch on your mountain bike or gravel bike and need to improvise and shift you weight while in the saddle. Glute bridges also work a number of the key muscles used in cycling, so they are an exercise that gives you benefits far beyond the core. They provide good work for the glute and hamstrings as well. All of these exercises target specific core areas and provide unique benefits, which is why you should do them all as part of a workout set.  Crunches are great for improving abdominal strength and stability. Plank is a great exercise for building core strength … Read more