Complete Tri

How Much Protein Do You Need After a Workout?

Protein, what’s the big deal? The most important aspect of any athlete’s life is health. We can’t do what we love if we have been sidelined by injury or forced to take days off due to fatigue. Oftentimes we are so focused on training that we neglect the tools at our disposal, which can make training easier, more efficient, and much more valuable. We’re talking about protein, and while there are differing opinions on methodology, there are ways for an athlete to be sure they have covered all the bases. What is Protein? And Why is It Important? Protein is vital for enhancing post exercise recovery. It provides the body with necessary equipment for rebuilding and repairing muscle tissue after a fasted state (i.e. exercise). Meeting the demands of your body will optimize muscle growth, quality, and performance of any athlete, but it can be difficult to pinpoint what those demands are, as they change from workout to workout and from athlete to athlete. Prolonged exercise, especially high intensity work, depletes our stored energy and the body begins to dip into protein for fuel. So, if our body doesn’t have enough fuel to begin with (carbs and certain fats), it will eat up that protein storage, leaving your muscles tired and incapable of maintaining a high level. The timing of introducing protein, among other nutrients, and maintaining the proper protein intake, can work to offset this and promote development instead of injury and fatigue. So, How Much Protein Do You Need After a Workout? A general rule for athletes is to make sure they are consuming somewhere between 1.4 to 2.0 grams of protein per kilogram of body weight, everyday. This means an athlete of 60kg (132 lbs) should be looking to get between 84-120 grams of protein everyday. Note that this is higher than the amount recommended for people who are not as active, which is more in the 7 grams per pound of bodyweight range (so that 132 pound person would be shooting for 48-50 grams.) The more protein that is consistently in your diet, the better adapted your body is to absorb protein efficiently when it is introduced. With that being said, the ideal amount of consumption in one sitting is 20-30 grams, this includes post workout, anything else may be considered excess. Therefore, the best way to maintain performance is to practice consistency and keep track of daily protein consumption as well as increased intake around exercise.   It is important to note that the requirement of protein intake in order to maximize recovery can and often does change depending on the type of exercise. Endurance workouts — like a multi-hour bike ride —  could require up to 60% greater intake than resistance training. The best thing an athlete can do is make sure they are meeting the minimum daily recommendation and continue to be conscious of how the body is feeling during and after a workout. If you’re low energy, perhaps you need more carbohydrates and electrolytes. If you are waking up the day after a workout out feeling weak and depleted, maybe you didn’t provide your body with enough protein. But, in most cases a combination of the two is the best method. When Is Protein The Most Important? We have all heard of the infamous recovery window, the magic period of one to two hours after a workout in which we need to refuel our muscles. Consuming rapidly digested protein is the most effective way to kickstart the recovery process—but the body continues to remodel and replenish for at least 24 hours after exercise. It is crucial to aid this process all the way through, and in ideal cases, get ahead of it. Sandwiching your workout with protein ingestion is a great way to make sure your muscles are covered. An ideal application might be 20-25 grams of protein one hour before exercise, then another 20 grams within the first hour post workout. This, accompanied with a meal 3-4 hours later, can insure your body is getting both fast and slow absorbing proteins throughout the recovery process. In fact, making sure you are getting a well balanced meal every 3-4 hours during the day is an easy way to stay fueled. Not that this doesn’t only go for strength training.  You should give your body protein during the recovery window after everything from endurance rides to indoor training sessions to core workouts. Where Can You Find Protein? When it is possible, an athlete should always try to achieve their protein goals through whole foods alone. But sometimes meals are inconvenient and supplementation is often a great option for athletes looking to boost their protein intake. Supplements are not limited to protein powder and bars, another great option is an amino acids supplement, referred to as BCAAs, which can be found in powders and used before, during, or after a workout. Most protein powder options now include BCAAs in their mixture. But to make sure your body is absorbing and breaking down protein efficiently, it is important not to rely on only supplementation and make sure you’re using natural whole foods to the best of their ability. The amount of protein powder you get in a day should not be your only protein intake – not even close. Some examples of protein sources you may not normally reach for: Greek yogurt Cottage cheese Bone broth Chickpeas Lentils Pumpkin/hemp seeds But remember: protein isn’t everything. Your body needs a variety of nutrients to perform at a high level, and it is never good to focus only on protein while ignoring other important aspects of diet like carbohydrates and fats. Consuming carbs along with protein gives your body the best chance at recovering properly, especially if you have multiple workouts in a shorter period of time. An easy formula to make sure you’re on the right track is: 3 to 1 carbs to protein. So, if you’re getting in 30 grams of protein post workout, … Read more

Offseason Triathlon Training Tips

You’ve raced in a triathlon, or several.  You have completed your inaugural triathlon season, or perhaps your twentieth.  What now? A triathlete’s offseason is a time to rest, refresh, plan and prepare for the next season.  It is a great time to think about fitness, rather than racing. We consider the offseason to be the time in between your last race of the year and the beginning of your next year’s training plan. For most of us, the offseason lasts anywhere from three to six months. While many triathletes are motivated, driven people who have a hard time taking time off, it is important that any triathlete affords themselves a few months of a change of pace before hitting it hard again.  Whether your last race was in July or September, using your offseason wisely can not only get your body in the right long-term condition, but can actually serve as a launchpad for next year’s training and racing.  Here are a few tips on how to use your offseason. Step 1:  Rest.  Easier said than done for most triathletes, but getting some real rest is important for your muscles and joints.  For many endurance events such as marathon and longer triathlons, the recommended time away from working out is as long as two weeks, followed by relatively light workouts after that.  The concept of periodization is an important one — it is strategically planning your training calendar so you have various phases of training throughout the months.  Part of periodization is getting some rest or lighter work at a good time, and then going into a multi-week base-building period. Rest, as a related note, is important at all times, not just in the offseason.  Studies have proven that an athlete who pushes themselves hard and then rests will gain in performance ability; but those who push themselves hard with little rest may actually begin to see a decline. If you ended the season with worrisome injuries, more rest is a good idea. This allows many minor injuries to heal themselves, and your muscles and joints to gain the full benefit of your nutrition and stretching.  If you have more than minor injuries that developed during your season, this may also be a great time to visit a therapist or masseuse multiple times to accelerate the recovery process.  Yoga and dedicated stretching time can also help restore alignment and flexibility.  You may also want to experiment with compression gear, like compression socks, as they can help blood flow and recovery for targeted areas. More than anything, let your body’s battery recharge. Step 2:  Mix It Up. Cross training in the fall can be a great way to take advantage of the condition you left yourself in after a season of challenging and relatively monotone workouts.  Even getting varied runs in throughout the season are, after all, runs, which can get relatively routine and give your body the same type of pounding.  For the one or two months after the initial rest, we know several top triathletes who begin doing slower, social group road rides, mountain biking, getting a fat bike, hiking, or even playing soccer or other sports in the fall, just in time to enjoy the fall colors in many parts of the country.  An occasional swim or run doesn’t hurt, but the key point here is to break the routine of your tri-season workouts.  This is also an excellent time to begin to incorporate weight training, especially in colder parts of the country where you may need a reason to get indoors during some days. Ditch the triathlon watch and worrying about your times, have some fun, don’t worry about your speed or distance, and focus on getting your sweat on and being outdoors.  This is the time of year to just enjoy that fact that you are a reasonably-fit person, and can enjoy being active in many different ways. This is a great time to do some HIIT workouts for runners or cyclists, because you likely have the time to devote to it.  Doing some HIIT will give you core strength as well as improve your flexibility. Step 3:  Set Goals. Taking stock of where you are in your triathlon progression and setting goals for the upcoming season is the next step to undertake in your offseason.  Many triathletes we hear from begin with an internal and external approach. Internally:  Inventory your past season’s performance, how pleased you are with various legs of the races you raced, and your injury status.  You may realize that you want to dramatically improve your swim times, or lose 10 lbs to be faster on the bike, or that you had a nagging IT band injury that you need to address prior to hard training again.  Or maybe this upcoming year is the year you jump to a longer-distance triathlon. Making improvements in your desired growth areas can then become part of your goals for the next season.  Don’t forget to set a goal for how to take action on each objective.  To become a better swimmer, perhaps you need to sign up for a local masters swim group.  To get rid of the IT band issue, perhaps you need to set a series of appointments with a rehab therapist. Externally:  This is the fun part.  Look ahead at a race calendar from a site such as a local tri club website.  Compare the race dates with your desired training sequence, your personal schedule, and any ‘A’ races you want to take part in.  Space races apart in a cadence that works for your body — some like to have a cluster of four shorter, local races during eight weeks of peaking and then be done, while others might prefer one or two ‘A’ races over the entire summer, with plenty of build-up before hand.  Other brave souls might circle an Ironman on their calendar and then train for that with singular focus.  Be sure to factor in likely vacations … Read more

Coaching Options for Endurance Athletes

run coach

Runners, cyclists, ultramarathoners, triathletes, and other endurance athletes can sometimes benefit from coaching. Stagnation is a fear of every athlete, the crippling feeling of a plateau.  Whether you have found yourself feeling flat, want to prevent that feeling, or simply want to see what options you have for improvement, it might be time to hire some help.  So, what are the options?  Find a local personal coach Get coaching through a gym or club Virtual or remote coaching  Using an app or online program Which coaching option best suits you is the most important. Therefore, first consider:  Your goals. Your aim may be to improve your fitness, technical skills, mentality, or a combination of all three.  Your availability. This includes not only location and time boundaries, but also what you can afford.  Your training preferences. This may take some reflection in order to understand what motivates you, or where you excel. Think of these options as a continuum ranging from in person hands on critique (personal coaching), to strictly informational (online program). Endurance Athlete Coaching Options Local Personal Coach A local, personal coach is one in your community who provides 1:1 coaching for a period of time and has specific knowledge in your sport. They might help you train for an Ironman, for example. Pros: Its biggest attribute is in the name: personal. Having one on one training sessions allows a coach to individualize a program that is not only specific to your abilities, but the physical and mental changes that you endure (example: proper load management by a coach prevents injuries and improves the longevity of an athlete). A coach can help you identify your goals and the steps you need to take to reach them. While this can also be done online, a local coach can actually track your progress in person and give you accurate feedback so that you can modify as you need to get over that next hurdle. In person training creates mutual accountability, and a commitment will improve the dedication of any athlete. If you have a hard time getting yourself going, or think you are lacking in focus, a personal coach can give you the proper motivation and improve training habits. Many triathlon clubs or run or cycling clubs are affiliated with a coach, and may even have a few on the team. Cons: Scheduling could be limiting, because it relies on the flexibility of both parties. If you already have a hard time trying to fit your trainings in, you might struggle to find a coach with the openings you need. Gives you the best opportunity to take your abilities to the next level, but does the opposite to your bank account. Sport-specific coaches will charge either hourly or monthly, hourly ranging from $25 to $100 while monthly might look like $40 to $400 (consider your desired training schedule and calculate the hours to find the best deal for you). Coaching Through a Gym/Club Many gyms and health clubs — especially the larger ones — have a staff of coaches and personal trainers, and some may be suited to provided specific coaching on your endurance sport. Pros Personalization with many of the same benefits of a local coach. You have an expert by your side for motivation, direction, and peace of mind. Real-time critique leads to real-time adjustments. It doesn’t need to be repeated, the quicker you improve, the better. Group sessions can spark your competitive drive. Changing up your training to feature other athletes alongside you is extremely beneficial not only for motivation but to test yourself and your progress. Socializing with other athletes is also a good way to create a network to exchange ideas and experiences. Cons: Scheduling window is smaller than some other options. Training times will need to adhere to the hours of operation of the gym staff, normally the average work day. Depending on the frequency you would like to train, and the availability in your schedule, this could diminish your options. Limited in the sense that the coaching is dedicated to the location of training (example: a local personal coach is available outside of trainings and in sport-specific environments). This means the communication and relationship aspect of a personal coach is significantly decreased. The average rate of a gym coach is $50 per hour. Depending on the frequency of training, it could be similar to a local personal coach. A great option to note here is to research gyms in your area dedicated to the specific type of athlete you are. For example, a running performance gym will oftentimes have a triathlon coach, optimizing your experience and time spent training inside.  Virtual / Remote Coaching Virtual and remote coaching is still 1:1, but it is done by someone who is not in your community.  These coaches typically have lots of experience doing virtual coaching. Pros: Still holds some of the value of personalized coaching such as accountability, tailored training, and accurate management of stress and load. Because virtual coaches are available for daily communication, you can update your coach in real time about any changes or development in your progress. Without a commitment to location, your schedule becomes much more flexible. Depending on the coach you choose, most will provide you with instruction and perhaps have you video yourself doing certain exercises, but outside of that you have the freedom of place and time. Suddenly a busy schedule is no longer an obstacle. Because your pool of possible coaches is suddenly broadened, there is a good chance you will find a coach with the exact right experience and focus for you. Most virtual training options are as easy as downloading an app, connecting you with a wider range of coaches. Not only is this convenient for finding your best fit, but it also makes the price of a remote coach much more affordable. On average the monthly price range is $35 to $200, depending on the experience of the coach. Don’t be afraid to … Read more

Best Triathlon Training Plans and Guides

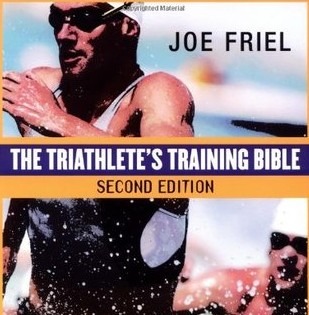
Whether you are a triathlon newbie or simply looking to improve your times or distances, triathlon training plans and guides can be invaluable.  Where else can you get advice from an experienced coach or triathlete from the comfort of your own home? One of the first things triathletes should do at the start of their training season is to look for some type of plan to help them structure their training and race season.  The options are seemingly unlimited, so we are going to attempt to help you save some time and find the best training plans or guides from the get-go. While some “best triathlon book/guide” reviews simply regurgitate everything they see on an Amazon review, we have a different approach.  Everything you see in this article has become a go-to resource for us over the years.  These have proven to be the tried-and-true guides for us. Investing in a triathlon training plan can be a great way to get your own training on track, but is also a brilliant gift for the triathlete in your life. The First Question to Ask: What are My Triathlon Goals? It is hard to give a one-size-fits-all answer when it comes to advice on endurance coaching and guides.  When it comes to getting into shape to finish your first Sprint, we think a book and a good training plan will set you on the right path, and you can probably start your training just 12-14 weeks before your race.  When it comes to, say, an Ironman, we would not attempt to do it without a coach.  The extensive training for a longer race will probably begin several months before, even if it means riding on a bike trainer and swimming in a crowded lap pool during winter months. Our point is that your overall goals are very important to understand, not only in terms of getting a guide or plan, but also to more broadly define the intensity of your Tri season. A few of the key questions to ask at this stage are: What triathlon distance do you want to do? Is your goal to finish, to improve, or to win? Have you done a triathlon before? If so, where do you need to improve? What is your base level of fitness? Do you have any broader health issues to factor in to your training? How much time do you have to train, both in terms of hours per week, as well as weeks/months until the event? What is your budget? Tri Coaching vs. Training Plans vs. Books You have a few options when it comes to getting the right triathlon training guide or plan for you.  Each has a different budget range, different benefits, and will provide a different set of experiences in the end.  You also need to factor in your personality and what kind of motivation you think you will respond to. Triathlon Books and Guides Using a triathlon book or guide can be a great, one-stop resource for triathletes of all kinds.  It allows you to learn about the sport, and understand the “why” behind different techniques and phases of training.  It also enables you to go back and reference it time and time again whenever needed, as well as review the materials on your own time.  I do that all the time, when I want to brush-up on something that I was perhaps not experienced enough to grasp or utilize the previous time I read it. Most good books will also have some type of training plan included. Triathlon Training Plans Google “triathlon training plans”, and you will get over a million results.  It seems that everyone and their uncle has published some type of triathlon training plan.  Having a plan is important, but we stress that it is not about following the plan in a task-by-task way that is important, but rather having an idea of how intense each progressive training week should be, and then fitting that into your life in a way that works for you.  Note that finding a training plan that is right for you and your goals is critical.  Some are geared for beginners and will be far too easy for a serious triathlete, others are geared for elites and might cause a newbie to overtrain.  Be wary of anyone who publishes an exact training plan that is intended to be one-size-fits-all. Tri Coaches Getting a triathlon coach is the ultimate in personalized service, but it might also be the most expensive option on this list.  If you are doing an Ironman or even an HIM, we suggest at least finding a coach who can review your training plan and check-in weekly or more.  Beyond that, coaching can be effective for those with the budget, as it will take you a step further in precision than an online training plan or book might.  The great news is that nowadays, coaches can be virtual — meaning you have a real, qualified person on the other end, you just won’t happen to train with them in-person. Best Triathlon Books and Guides Here are the triathlon books and guides we would recommend. The Triathlete’s Training Bible (here on Amazon) by Joel Friel is an authoritative collection of many topics on triathlon, and can be useful for newbies and experienced triathletes alike. It has more of an exercise physiology bent than most, allowing you to understanding why a certain regimen is important.  Almost every experienced triathlon is using some concepts from Friel’s work, whether they realize it or not.  Friel goes into great detail on the science behind training, periodization, and the importance of a thoughtful and phased training plan.  It is really a lesson in how to mix intensity with rest, build speed, and build endurance. Your First Triathlon Guide (here on Amazon) by Von Collins is more brief and only available via ebook and Kindle, but does a good job of distilling what you need to know into a step-by-step how-to. It … Read more

Best Dumbbell Racks

At some point in your fitness journey you may be looking around your workout space and seeing the clutter. When it comes to creating a comfortable and motivating weight lifting area, a dumbbell rack is a great place to start. As we see more and more endurance athletes get in to weight and strength training to maintain muscle mass, a small weight area in a home gym is common.  Along with doing some at-home HIIT training, keeping a few dumbbells around offers the best flexibility for home workouts.  Keeping dumbbells on a rack is the way to go. But, the importance of a dumbbell rack is not just for storage and organization. It contributes to the ease and safety of workouts both at home, and in the gym. Imagine how good it will feel to never have to lift a heavy dumbbell off the floor again. We all want the hardest part of our workouts to be the reps, not the retrieving and replacing of equipment.  Just like how having a Zwift or Peloton setup in your basement is such a time saver, the whole point of having the dumbbells at home is to get able to sneak efficient workouts in. What Should You Look for in Dumbbell Racks? First things first, you need to identify what you need out of a dumbbell rack! Are you looking to downsize your current setup in order to make more room in your workout space? Maybe you’re making a jump from beginner weights to heavier dumbbells and need a rack to support your transition. Or, perhaps you are dipping your toes into the world of dumbbells and want the best product for the lowest price. Regardless of your motivations, you may get lost in the variety of dumbbell racks at your disposal, but there are key things to keep in mind that will help you to narrow down your search. Weight Capacity Each dumbbell rack has a weight limit ranging between 200-1500 lbs depending on size, design, and material. It is important to make sure the rack meets the requirements of your dumbbells, and many cyclists use rather heavy weights to work the big muscles used in cycling.  So, if you are looking to store pairs of 5, 10, 15, 25 pound dumbbells, a weight limit of 200 lbs may be sufficient for you, but insufficient for someone looking to store say, four to five dumbbells 50 lbs or heavier. Safety The overall design of a rack contributes to the safety and convenience for the user. Some features to pay attention to are: the angle of the racks (racks that have layered tiers or angled rails for dumbbells are especially important if you’re dealing with heavier weights in order to prevent injuries), spacing of the rack (consider your dumbbell type and size so that you don’t risk pinching fingers or dropping weights), and the material of the rack (look for sturdy material like steel instead of rubber and plastic variants). Sizing You can narrow down your search by looking for dumbbell racks that best fit your gym space. When considering where a rack might fit, don’t forget to leave enough space for the easiest access to the weights. Be sure to take into account the size of the rails for the dumbbells themselves and if they are compatible with the ones you wish to store. Best Dumbbell Racks To get you started, here are three of the best dumbbell racks for any gym level. They are easy to assemble, safe, and kind to your wallet. Royal Fitness 3-Tier Dumbbell Rack The Royal Fitness rack is the largest and strongest of the three listed here, with a weight capacity of 1,000 lbs. All three tiers are angled using rails, which are compatible with several variations of dumbbells. Angled rails are a good edition for a rack with this weight capacity, allowing you to handle your heaviest dumbbells with ease. The rack is also supported by a triangular base for maximum stability, an d is celebrated for its safety. If you’re looking to store other weights, such as kettlebells, this rack might not be for you due to the rail design. Yet, a three tier design, versus a one or two tier, gives the user optimal storage for a wider range of weight. If you are sharing space with a lifting partner of different capabilities, this could be a good option to house multiple weight sizes. Pros: Large, strong, and provides great presentation of dumbbells Cons: Anecdotes of shipping issues / blemishes on new products Find here. Cap 2-tier Rack Slightly smaller, but just as sturdy, this two tier option does a lot for its size. The first tier is flat while the one below it is angled for easy removal of dumbbells. Most consumers use the upper section for smaller weights, but with a weight capacity of 500 lbs the design allows for you to use both the top and bottom rails for heavy weights. So, if you have a few pairs of ultra-heavy dumbbells, the safety of this rack will do the trick. The Cap 2-tier is great for small spaces that are looking to do a lot: compact, stable, and versatile. It is also a good option if you’re needing to store double the amount of weights. Side by side, two of these racks can be arranged more conveniently than other, larger options, especially if you’re having to be creative in limited gym space. Pros: Easy access to weights if you have space against a wall Price is right Cons: Need two racks if you have a full dumbbell set Find here on Amazon. Cap A-frame Where this rack lacks might, it excels in efficiency. The A-frame design is an ideal space saver, and with the dumbbells stored on the exterior there is space to store other equipment, such as kettlebells, underneath. It holds 200 lbs and would be ideal for neoprene dumbbells, but is compatible with several different dumbbell types. … Read more

Strava vs. MapMyRun (or ride) vs. Runtastic vs. Runkeeper

Running and cycling apps take workout precision to a whole new level, while adding the element of community.   Gone are the days when you would put on your Garmin watch and just track your mileage and speed.  Granted, that was a huge leap forward from where we were before then, but nowadays you can be even more precise and connected.  It is a gamechanger, especially for those who are motivated by social pressure and a competitive drive. We wanted to look at the four apps that we hear the most buzz about and compare them head-to-head for both running and cycling.  Here is what we found. Strava Strava is huge in the cycling world.  That is not to say it doesn’t also do a great job for runners, but cycling is where it got its first traction, and where it is a dominant app today.   Honestly, we use it for running, swimming, and cycling and it performs very well.  It is our go-to. We love the leaderboard functionality, allowing you to peg yourself against other riders who do the same routes as you, which are broken up into “segments”. A segment can be anywhere from a few hundred meters to several miles long and is a time trial of sorts. You can see how you rank on a daily, yearly, or all-time basis compared to all the other Strava users who have done the same segments. Additionally, the Strava Challenges are designed to award digital badges if you meet the challenge criteria. Examples include the monthly ‘How far can you ride?’, ‘Run a half marathon’, and climbing challenges for runners or riders. Oh, and we have to bring up the fact that the Strava app doesn’t drain your phone’s battery, which is amazing for those long rides and runs. Social-wise, Strava lets you connect with athletes from all around the world. You can become friends, follow other riders or runners, give them kudos, or comment on their rides and runs. They can also return the compliment and follow you. Furthermore, that you can create online Clubs and invite your friends. Each week, Strava will calculate which club member has ridden the furthest, climbed or ran the most, ridden the single longest rides, and so on. And you’re not limited to the Strava social platform; you can actually share your results via social media platforms such as Facebook. It even has automatic integration with Zwift and Trainerroad, so those indoor cycling trainer workouts automatically show up on your Zwift feed. A great feature of Strava is the Heatmap, that allows you to see where other locals ride or run. This is very handy for finding a good route especially when you’re riding or running on unfamiliar terrain, or building a new route in the Strava route-builder tool (available for paid subscribers). The FlyBy feature is another awesome one, letting you interact with fellow riders and runners on your route or find out a bit about them if they choose to make their data public. Hence, whenever you see someone blow past you, you can use the FlyBy to get in touch or check out their public data. In essence, Strava is what the tech-savvy call a social fitness app.  It’s a lovely combination between a GPS logging tool and a social media app. It does a fantastic job of tracking metrics and offers data visualization by emphasizing various aspects of the overall experience. While these are not exactly unique in the world of training tools, the social community and competition focus set it in front of other similar apps. For 2023, Strava has upped their game regarding integrations.  They do a good job of integrating with Trainerroad, Strava, and even Peloton and can group riders together who are using those apps.  Strava has always had great and seamless integrations with Garmin watches and trackers and most bike computers too.  You just want to be sure that your settings are initially customized the way you want, so the right level of information is shared.  Strava is becoming a ubiquitous platform for workouts even if you are using other apps. Strava is the ideal choice for those of you who want to connect with fellow athletes, share your metrics, and compare your scores. And although its premium version offers some nice extra perks, we consider that the free membership consists of all the features that you might need for recording and comparing your results as well as keeping in touch with the community.    MapMyRun (and MapMyRide) As their names suggest, MapMyRun caters to runners while its sister app, MapMyRide, is designed for cyclists. Each one is popular for its own niche and both have managed to become among the top tools for those looking to keep count of their metrics. In terms of features and interface they’re pretty similar, so we’ll analyze them at the same time. What’s cool about these apps is that they let you track unlimited mapped routes and have a great online route creation toolset that makes the entire process easy and quick.  Besides that, the maps are exportable to GPX, and the apps allow you to either share maps and routes or keep them private. The route overview screens are straightforward and include the rating of elevation gain stats and climbs. In terms of route building, you can go for the blank starter map, browse through other user-generated maps, or redo your previous routes. When you create a brand-new route, you can set your start location and the type of ride or run (road, mountain, and so on). The zoomable, pannable maps are loading and zooming in a jiffy and you can move them effortlessly. The route creation tools do exactly what you expect them to do and flawlessly track the roads. Plus, it’s easy peasy to go back and correct any mistake you might make. The total route mileage is nicely displayed in real time and you can also use the elevation graph … Read more

Best Bike Rack or Carrier Options

We took a look at all of the car bike carriers on the market, can the best products quickly became pretty apparent.  Which bike rack you can use gets a little complicated, though, because the car you drive will impact the rack you can use. When you want to transport your bike, you are going to have three choices:  Either disassemble part of the bike, and fold down seats in our car to make room for it, stick it in your SUV or truck if you are lucky enough to own one, or throw the bike(s) on a bike carrier or rack.  Since a bike (when it’s not used as its own transportation) is not the most compact and portable object, a bike carrier or rack is something that nearly every cyclist will look to invest in at some point. We will share a bit about the criteria you can use to choose a bike rack, followed by our favorite bike carriers in each category. Our Recommended Car Bike Rack (based on personal experience) Let’s cut to the chase.  If have a vehicle hitch to accommodate it (and the budget for it) — the best option is a hitch-mounted bike rack that holds the bikes using fixed wheel mounts.  The Thule T2 Series (here on Amazon) is probably the best example of that.  If your vehicle cannot accommodate a hitch-based carrier, then the Saris Bones 2 is a good trunk-based rack (here). If you are serious about biking, go with the hitch-based option.  It is much more secure on long drives.  It may require putting an aftermarket hitch receiver on your vehicle. If some of these terms are foreign to you, read on, because we explain it all. What should you look for in a bike rack? Bike racks can be added to any kind of vehicle, so it doesn’t matter if you own a sports cart or a large truck, you’ll find one to fit your needs.  Some fit certain models better than others.  Most of them are attached to the trunk door, to the trailer hitch or to the back of the car, but some models can be installed and secured on the rooftop or in the rear cabin of a pick-up truck.  We will take a look at all types. Most bike racks come in various sizes that can carry anywhere from 2-4 bikes.  However, if you max out the capacity of the rack, you will really be wedging your bikes together.  If you want to comfortably carry, say, 2 bikes, we suggest investing in a carrier meant for 3-4 bikes.  That way, you won’t run the risk of a steel component digging into the carbon frame of the bike next to it, or other similar issues. We think the most important things to consider when you look at bike racks are: Durability.  A flimsy bike rack will end up in the trash heap soon, and you will have wasted your money.  Buy a carrier that is made of quality construction, has welds instead of screws, and is firm when you grip it. Size.  Get a bike rack that suits the number of bikes you will haul.  Like we mention above, our experience is that if you want to comfortably and safely care 2 bikes, you may need a 3-4 bike carrier. Firm Point of Contact.  Be sure that the carrier attaches to your vehicle in a way that is firm and stable.  The last thing you want is a trunk carrier that moves around and leaves marks on your car, or a hitch-based rack that wobbles from side-to-side, swaying your bikes with it.  If you are getting a hitch-mounted rack, be sure it uses a threaded bolt to attach to your hitch. Convenience.  Does the rack have the convenience features you are will to spend money on — such as an easy swing-out option, a one-hand fold-up option, or simple and quick ways to mount the bike? Flexibility.  At the same time, you want your rack to be one that can fold up into a compact unit when in storage, and if you go the route of a hitch rack, it is nice to have the ability for the carrier to either fold down or swing to the side when mounted, so you can still access the trunk or hatch of the vehicle. Compatibility with your vehicle.  This one should be obvious, but if you are getting a hitch-based rack, be sure your car has a hitch receiver that will fit it.  If you are getting a trunk-based rack, make sure the design will work on your style of vehicle. Locking Ability.  Having a bike rack that can creating a locking mechanism for your bike will add to security, for those times when you might have to pull off the road and grab lunch, or part outside someone’s home for a couple hours.  If you buy a rack without a lock, we recommend at least using a cable lock while the car is parked. A Reliable Manufacturer.  We are not brand snobs, but we do like to know that the company making our gear has been in business for a while.  Because of the flood of cycling-related gear made sight-unseen in China and then sold on Amazon, we like to stick with some tried-and-true brands like Thule and Yakima. Stability.  You might want to consider wheel stabilizer straps (here on Amazon) for a carrier that doesn’t mount on your wheels.  When a bike is hanging from a hitch or trunk rack, the wheels can spin excessively while you are driving, which is a bit unsettling and probably causes unnecessary wear. Hitch bike racks Why a hitch rack? Hitch racks are great because they put the bike in a vary secure space, mounted to your car’s hitch and not rubbing on the hatch or drunk.  They tend to be heavy, which means they are a little harder to attach, but once on are quite stable.  Be sure … Read more

Winter Cycling for Triathletes and Cyclists

fat bike tire

In the depths of winter, triathletes and cyclists in Northern climates have to adjust their training to the weather.  Some stay outdoors (minus the swim) as much as humanly possible for their training, while others tend to take it inside at a health club or gym for several months.  While we are fans of being outdoors as much as possible, and think that there are many reasons to keep training outside even in cold weather, occasionally there is a day that is too nasty or workout that you just can’t do outside in the cold. Location is everything as well.  If you have access to good trails, you have a different situation available to you than if you can only ride on roads.  First and foremost, we want you to be safe, so make sure you are only riding in areas where you are not increasing your odds of an accident.  Safety first. While Running in winter is pretty straightforward – you just layer up and pick your path carefully, and you can usually stay outdoors for most if not all of the winter, cycling training is a little more complex in cold weather.  When it comes to cycling in winter, we have experimented with a little of everything, and see pros and cons in several approaches.  We have ridden our road bike on hard pack trails.  We have transitioned to fat bikes.  We’ve gone inside. As with all things training-related, the right answer you is probably a thoughtful blend of a few different approached to keep yourself in great bike shape until Spring.  Here are three winter cycling training approaches, along with our thoughts on each. Winter Cycling Options Option 1:  Stay Outside Year-Round.  If you live in Southern California or Florida, this one is probably pretty easy.  You just do in January what you were doing in June.  For those of us in the Mountains, Midwest, North, or Northeast, however, it isn’t so simple.  Being outside on your bike at a minimum requires changing your setup and adapting some of our routes.  Many cyclists move to fatter bike tires in the winter or change bikes altogether to something that is made less for speed and aerodynamics and more for stability and lower-gearing.  There are really two things to consider for winter riders in the North – one is temp, which can often be mitigated by the right winter cycling clothing.  The other is surface, which can only be safely mitigated by helping your bike adapt to ice and snow.  Keep in mind that road shoulders may be much narrower as a result of snow, and what shoulders exist just might be covered with road salt which can create unpredictable soft patches. The advent of the fat tire bike has allowed many cyclists to look forward to a 4th season of biking.  We could do an entirely separate article on fat tire bikes, but the bottom line is that they are a different animal altogether.  They have different things to look for, and sometimes are made by manufacturers who we don’t see elsewhere.  If you have the budget and the storage space, getting a good entry-level bike like the Cannondale CAAD can give you a reason to ride hard all winter long, outside.  When we are riding outside in the winter, we are usually going for time instead of speed or a precise distance. We did an entire piece on the best entry level fat bikes.  Check it out. Regardless of what you decide to do outside, make sure you are dressing for the weather.  This includes protecting yourself from cold as well as making sure your footing is good on ice.  We recommend using layers, including outer windbreaking layers (a good running jacket can be just fine, but try to get cycling-specific leggings or tights) that will keep the wind off of you, middle thermal layers to keep you warm, and base layers which wick away moisture and prevent your perspiration from creating clamminess.  For your legs, some good thermal running or cycling tights over your regular bike shorts are usually the answer — just be sure they have a bit of a film on them to keep the wind from chilling your knees and leg muscles. Once you have the gear, simply layer up or down for the weather — and don’t forget about covering your head and hands!  A good pair of all-weather cycling gloves will be one of the best investments you ever make! Option 2:  Spin Classes.  Many triathletes swear by spin classes in winter, as a good spin class can give you leg strength as well as keep your heart rate high for an extended period of time.  The sense of community in a spin class can be a motivator as well – where else can a husband and wife who might be of two different fitness levels sit side-by-side and enjoy the same workout.  We are fans of spin classes, from the fat they burn to the sweat that they can give you.  We also like that they require no investment in additional equipment, just a health club membership (which we know can add up quickly). Keep in mind, however, that a spin class can be highly-dependent on the instructor, and some instructors are a better fit for an individual than others.  In the end, thought, a spin class is what you make of it, and if you want it to be an “A” workout, you can make it so. If you decide to look at spin classes, try a few and settle on one or two that fit your style.  Find an instructor who gives you the challenge-level you are working for, and know that some classes focus more on intensity and might only be 45 minutes long, while others are geared toward endurance and could run 75 or even 90 minutes. A nice thing about most spin class bikes is that you don’t need to wear your bike shorts … Read more

Zwift vs. Sufferfest vs. Trainerroad vs. Peloton

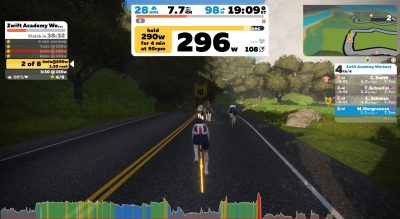
The market for streaming cycling and bike training apps has exploded in the past three years.  A worldwide pandemic in 2020 only reminded people how important it was to be able to get a good workout without leaving home, a trend we expect to increase in 2021 and beyond. With increases in bandwidth speeds across the world, and the steady growth of smart bike trainers, the combination of smart bike trainers and streaming training apps is poised to become the new norm in cycling training. While we love the good old-fashioned bike trainers and the training DVDs that go with them, there are two things that the training apps can give you that no DVD can:  Community, and real-time feedback. Where else can you jump on with a friend who is 1,000 miles away and go for a ride together?  And unless you ride power meter on your bike, it used to be that you did not know your wattage output and are left to guess. While there are probably 15 decent streaming options for people who want to get good indoor bike workouts on smart trainers, we chose the four that we are seeing the most, and compared them to each other:  Zwift, Sufferfest, TrainerRoad, and Peloton.  All four are heavy-hitters in the world of indoor smart cycling. Zwift Zwift is the true interactive, gaming-type experience.  It is the most interactive of all the options (perhaps except for Peloton), as you are competing with other riders, can choose which fork in the road to take mid-ride, and can even chat with and encourage your fellow riders.  For the other apps, the main interaction is between your legs, stats, and the app. Since we are dealing with private companies, we don’t have exact usage figures, but based on the buzz within the cycling community, we believe Zwift is the most popular of the bunch. The fully-fledged product was launched back in October 2015 and has enjoyed a growing — even explosive — success ever since. In 2017, Facebook CEO Mark Zuckerberg famously started to use the platform to continue training after he suffered a broken arm. Additionally, accomplished cyclists using and loving Zwift include Adam Myerson, Steve Cummings, Edvald Boasson Hagen, Nathan Guerra, and Lawson Craddock. KISS was among the first groups that offered established racing on Zwift and became one of the largest organizers present on the platform. All you need for using Zwift is your bike, a smart trainer, and a computer / phone / tv / other device.  If you don’t have a smart trainer, you can use a traditional trainer with a power meter (ANT+ or BLE), a cadence sensor, and a bridge (or a receiver) for handling the ANT+/BLE signal. Zwift is available for Mac, iOS, and Windows operating systems and uses ANT+ and Bluetooth SMART technology to send data that, when combined with the rider’s weight and equipment choices, is used to adjust the effort, power and speed. Our preferred method of streaming Zwift, as we describe in our “Perfect Zwift Setup” article, is using an Apple TV box paired with our regular old flat screen TV on the wall.  Works like a charm, and you get the benefit of a larger screen and better audio than if you were trying to do it on a pc or tablet.  To us, compatibility with Apple TV is one of the strongest features of Zwift as compared to the competition. It is the one app reviewed here that really is meant to work well with Apple TV. The others rely on the mirroring feature which can create some streaming issues at times. Other common ways to stream Zwift are on a tablet, desktop or laptop computer, or a phone…. although the phone display may be a little small to truly read your statistics on. At first, the platform allows you to create your profile by adding your height and weight and then selecting the kit and bike you use. As you progress (there are 25 levels to explore), you’ll have even more optimizing options available. Zwift’s pre-planning courses lets users cruise through several virtual worlds: Innsbruck, London, New York, Richmond, and the make-believe Watopia. All of these contain a variety of different routes, with varying distances, hills, and scenery.  It is all done using gamification — the imagery is not real, but it is done in a way that is interesting and believable. The four main ways you can ride in Zwift are a free ride, group ride, racing, and workout mode. With all, you will be riding the “gamified” routes created by Zwift, with other riders around you. You can go for easy rides to more intense ones, and you can be competitive with others. You can complete missions (some of these are only available for a limited time) and get perks, attend online events, and join entertaining challenges. Truth be told, when you hit a timed climb segment on a Zwift ride — it is hard not to try to kick it down. The leaderboard will show you how you are doing against other riders and your previous PRs on those segments. Besides the social rides and races, the workouts (pre-made or customized) give you a variety of options.  We tend to choose the interval workouts, which when combined with the presence of a power meter built in to the smart trainer, can make for very precise workouts. Once the activities (rides, races, workouts) are finished, all the data can be saved as a .fit file which can be uploaded to programs like Map My Run/Ride, Strava, Today’s Plan, Garmin Connect, and Training Peaks. We have a couple minor annoyances with Zwift.  First, we wish the routes would provide more visibility for the climbs and time-trials that you embark on.  Sometimes, it is hard to know how long you will be kicking it for.  Second, many of the forks in the road where you get to choose your turn come up quickly, and … Read more

2 Great Quick Indoor Workouts for Winter Training

indoor bike trainer

We often get asked about offseason training ideas. While we address the topic of offseason training in our triathlon and training ebooks, we wanted to provide you with two of our favorite, quick, easy offseason workouts that you can use right now. Each winter, triathletes around the world try to figure out how to stay in training shape while bearing the elements and the shorter days of sunlight. In some parts, winter means more rain and cooler temps, at a minimum requiring some layers like a good running jacket. In other parts, it means several feet of snow and a fundamentally different way of training. Regardless of where you are, winter is probably spent recovering from a good triathlon season, and beginning to base for the next one. Smart offseason triathlon training involves knowing when your body needs to recover and heal, and when it is time to start gradually turning the training dial back up. While our winter swim workouts usually consist of shorter, slower workouts that are focused on regaining and improving form, we have two favorite “in-a-pinch” indoor tri workouts that we think you would benefit from throwing in to your rotation. 2 Great Indoor Workouts, Under 35 Minutes in Duration 1st workout: 20 + 100 — run and burpee. The first workout we will outline is very simple (actually, they all are).  A great workout if you are relegated to a treadmill on a cold or rainy day. This workout is a 20-minute treadmill run followed by 100 burpees. The treadmill run can easily be replaced by an outdoor run if conditions are good, but the whole point here is doing something that doesn’t take a lot of prep time or extra gear, and that can allow you to not have to navigate the elements of icy, snowy running trails. 20 minutes is enough of a run to get the heart rate up without stressing your joints, and the burpees help give you a quick core / upper body / fast-twitch session that is hard to get elsewhere.   20 minutes also strikes that balance of getting enough work to get warm and the heart pumping, without losing any focus. The treadmill portion can easily be replaced by using a bike on a spin trainer.  Just be sure you keep your intensity up.  Here is the routine: 1. On the treadmill, warmup for 2-3 minutes at your normal warmup pace. Then, run for 17-20 minutes at a steady LSD (long slow distance) pace, which for me is typically about 9:30 / mile, but for one of my faster training partners tends to be sub-8:00.  It is all about where you can get into a nice groove. This pace should be a good minute or two slower than your faster summer training pace. 2. After the treadmill, move to a yoga mat or firmly carpeted area. Start a stopwatch, timer on your phone, or run your Fitbit – anything that you can easily see while standing (I just use the clock function on my Ipad). Do 10 burpees as fast as you can, and then rest. The goal here is to begin a new round of 10 burpees at the top of every minute. Do whichever burpees fit for you. We generally mix the basic plank burpee (starting in a pushup position, but with the arms straight and not doing the pushup) with the pushup burpees (doing a pushup with each burpee, many times more difficult). With each burpee, move to your feet and jump up as high in the air as you can, reaching upward. With the plank burpee, we can usually do 10 in about 30 seconds, leaving 30 seconds for rest. With the pushup burpee, we are lucky to knock them out in 40 seconds, leaving just 20 seconds for rest.  Both the plank and pushup burpees give you a nice core exercise as part of the motion. Because you start a new round at the top of every minute, the faster you can knock out each set of 10, the more rest you are rewarded with! 3.  Cool down.  At the end of 100 burpees, you should be pretty winded and ready for a nice break.   2nd Workout: 35 min Spinner HIIT A quick, but very effective, spinner workout that we do 1-2 times each week is a very quick ride on the spinner, but one that incorporates high intensity interval training (HIIT). It is a myth that you have to get on your indoor bike trainer for 90 minutes every time you want a decent winter bike ride. Even if you only have an hour, you can knock out this workout and be showered in that time. 1. Start by warming up in an easy gear on your bike, either a stationary spinner bike or your regular bike on a trainer.  We prefer a bike trainer, because you get the feel for using your own bike, complete with your regular saddle and your typical bike positioning and angles.  This will help translate your workouts to the road in the spring and summer. 2. Have a clock or stopwatch (or again, an Ipad clock) within view, running. 3. Warmup for 5-7 minutes. 4. Begin 8 sets that will start on every 3rd minute. The first 90 seconds of the set, shift to a harder gear – big chainring in the front and any of the harder 5 gears in the back. The second 90 seconds, shift to the small chainring and an easier gear, but keep spinning. 5. Repeat the 3-minute set 8 times, varying the gearing you choose on the hard part. 6. Cool down for 3-5 minutes. With both workouts, keep one thing in mind:  The goal is to get some very good High Intensity Interval Training in, but not necessarily giving you the type of long, steady ride you would get outside in the summer.  The key is to give yourself short spurts of high intensity, followed by some … Read more