Complete Tri

Best Fat Bike Tire Guide

fat bike tire

Cycling can be a notorious rabbit hole for those easily taken with marketing claims.  Admittedly, it is a past time that attracts gear junkies.  The vast options for fat bike tires is no exception. The newest bikes, parts, and accessories offer competitive cyclists a leg up, and even tempt recreational riders with promises of a revolutionized riding experience. For most of us with finite budgets and lives beyond bicycle technology, value is the name of the game: which investments offer real and noticeable improvements? Tires — in this article, specifically those for fat bikes — are the common answer, for an undeniable reason: no other part of a bike should touch the ground. Of course, even a bald and fraying tire might serve for grocery-getting, and its replacement could cost little more than an inner tube. It’s the extremes of bicycle performance where advanced designs, quality construction, and hefty price tags can come into play. High speeds, long distances, and challenging terrains can all make tire choice critically important. Fat biking is certainly an extreme, with tires to match. Ranging from just under 4” to over 5” wide, in 26” and 27.5” diameters, fat bike tire sizes alone can disorient a shopper more used to dry roads. Other factors are hardly simpler. Tread patterns vary in knob shapes, sizes, patterns and densities. Technical designators from “EXO” to “TRS” create a letter-and-word salad that varies from brand to brand. And brands themselves might be unfamiliar, with household names like Continental and Michelin replaced by such niche brands as Surly and Terrene. If your head is spinning by your fat bike tire options, you are not alone. Don’t worry – this guide makes picking the right tire for your fat bike a breeze. We’ll move step by step through the key features of your ideal tire. Then, we’ll highlight a few tire brands with particular strengths in the fat tire market, and discuss how specific models line up. What to Look for in Fat Bike Tires Diameter This is an area that is evolving.  In general, older fat bike models use 26” diameter wheels and tires while newer models use 27.5”. Some 27.5” models could fit 26” rubber, but interchanging the two sizes means new wheels and numerous pitfalls. We recommend sticking with what already works: 26” or 27.5” should be clearly marked on the sidewall of a tire, unless the respective metric numbers of 559 or 584 are used instead.  It is important to note that this is not simply about slapping wider tires on your mountain bike rims.  See the next section for fat tire width considerations. Width Tire width is really where fat bike tires become their own thing, as opposed to the mountain bike market. Tire width is usually measured in inches, but consider it more of a guideline than a precise specification. That’s why it’s important to use tires only as wide as a fat bike’s manufacturer (and just as importantly, the rim maker) recommends. The factory tire width has the right amount of space figured in for muck, sticks, and differences in size between makers. Go bigger at your peril: tires that don’t fit can be difficult to return, and it’s possible for even a tire that physically “fits” to cut into a bike frame over time! Most fat bike riders will seek the widest tire possible for grip, but what about smaller widths? The biggest tires are most capable in sand and snow, but carry a penalty in weight and drag. Fat bike riders with experience mountain biking may prefer the feeling of smaller tires on the trail. Tire “width” really means height too: a large change could feel more stable but may put pedals perilously close to the ground. What is confusing for many entry-level fat bikers is that the rims/wheel widths are usually measured in millimeters, while the tires are almost always marketed in terms of inches of width.  An 80mm rim is pretty standard for stock fat bikes these days. If there is a “standard” fit tire width, we’d say it is in the 3-to-4-inch range.  The equates to roughly 80-100mm tire, as you might often see them referred to.  This also goes for ebikes that call for fat tires, too. What is the widest fat tire width?  We see a couple models that are just over 5″, a width that usually is advertised as a specialty snow tire. Tread Bicycle tire tread is broadly misunderstood, and busting tread myths fill an entire article. Line up a half dozen knobby tires side by side and relatively few cyclists could correctly match the tire design to the intended terrain. Even worse, tire designers and manufacturers themselves have been known to mislead or misunderstand. Did you know that the most effective road or commuter bike tire for riding in the rain is completely smooth? The majority of new bikes for sale tell a different story, with numerous small channels or “sipes” in their tires even for pavement duties. The truth is, taking away material on the surface of a road tire means less area to contact the ground and less grip, plus a waste of energy if deep, wide sipes let a tire squirm on hard ground. Mountain bikes and fat bikes obey the same rules but ride on tall, thick knobs. These knobs mean more area to contact, and so more grip, because they dig into soft surfaces. The effect is proportional: the hardest surfaces like pavement are best ridden with completely smooth tires, while the softest surfaces like mud are the focus of extremely knobby tires sometimes called “spikes.” Somewhere in the middle, hard-packed dirt and snow have enough give for small knobs to add grip, without needing heavy and slow-rolling spikes. Speaking of spikes, “studded” tires bear mentioning: small metal points in these tires provide a dramatic increase in traction on slick, glassy ice. However, studs range from useless to harmful in other conditions. On pavement, studs make a distinct … Read more

Triathlon Shorts Buying Guide

best triathlon shorts

Triathlon shorts are perhaps one of the most versatile and core pieces of a triathlon clothing wardrobe for any serious or beginning triathlete.  Because it is the one piece of gear that you wear for each leg — the swim, bike, and run – investing in a pair is an easy way to check an important box for your race-day triathlon attire.  Other than shoes, a good pair of triathlon shorts will be all you need to wear on your lower half during a triathlon.   In most triathlons, the majority of racers have some combination of triathlon shorts and triathlon or workout shirt, if they are not using a full-on triathlon suit.  Investing in a good pair of triathlon shorts can be a good way to get into the sport of triathlon without dropping a ton of money on higher-end gear, and a way to simplify the race because you won’t have to worry about ever changing your bottoms.  Even in cases were you may choose to race in a tri suit, having a good pair of tri shorts (or a few good pairs) will be useful for your training and open water swims. Triathlon shorts come in a couple major quality levels, and share a few key features. In this article, we summarize what you should look for in a good triathlon short as well as our preferred models. The Bottom Line: Our Tri Shorts Picks We have listed five triathlon shorts that we recommend below, but if you are in a hurry, here is a quick summary.  Read down below for much more detail. Our favorite higher-end triathlon short is the De Soto 4-Pocket Forza Model, great for any race distance.  Perfect combination of comfort, quality, and performance.  Find Here on Amazon. If you don’t want to spend as much, our top mid-range tri short is the Pearl Izumi Select, about half the price of the De Soto, and a reliable garment good for Sprints and Olympic races.  Find Here on Amazon. Triathlon Shorts:  What to Look For Tri shorts are a key part of your training and your race.  Few other garments are expected to deliver on the all-purpose duty that you will need from your shorts.  They need to be both durable and breathable.  They need to do well in the water as well as on the bike.  Those are tall orders for any pair of shorts, but fortunately today’s tri gear makers have done a nice job of blending the right fabric and features so you truly can wear one pair of shorts throughout the race. A good pair of tri shorts quickly become a go-to garment that you can use for training for any event, as well as on race day.  Note, however, that tri shorts are not intended to be used in chlorinated pools.  Doing so will wear them out quickly.  Most triathletes who we know reserve their tri shorts for bricks (combo bike and run workouts) and race day, using swim jammers in the pool and cycling shorts on their longer rides. Tri shorts are different from cycling shorts or compression shorts.  While compression gear is meant truly to increase blood flow and recovery, and cycling shorts are purpose-built specifically for the activity of cycling, tri shorts are much more versatile in both form and function. When you are buying your tri shorts, key things to look for include: Fabric that is truly all-purpose.   The material in your shorts need to be breathable on the bike and run, quick drying out of the water, but great during the swim.  Most makers know how to create great fabric blends that are good during the swim but will essentially be dry by the time you get on the bike.  We don’t know how they do it, but they do. A bike seat pad that is sufficient for longer rides and quick-drying as you exit the water.  Bike pads in triathlon shorts are not as substantial or thick as those you find in single-purpose bike shorts.  In fact, they are quite a bit thinner.  That is necessary, however, in order for your pad to not remain wet while you ride the bike in the second leg of the race.  If it did, it would introduce chafing that would in turn introduce misery. Seams that you can’t feel.  Like a good pair of compression shorts or compression tights, the seams in a triathlon short need to be flat enough so you don’t even know they are there, yet strong enough so they are durable.  Seam construction is one of the things that usually improves as you spend more on the shorts. The right length.  Most tri shorts have an inseam length ranging from 6 inches (very short) to 10 inches (on the long side).  There is no perfect length – it is a personal preference thing.  But don’t settle for a length that you are not comfortable in. Comfortable leg grips.  The grips on the bottom of the shorts need to do two things:  hold tight on your leg so the shorts don’t ride up, and do it without digging in to your skin.  Most makers have developed a good system of leg grips, capable of keeping your shorts from riding up on the bike or run, and from bunching up underneath your tri wetsuit. However, this is another area where spending more sometimes gets you better comfort.  The best leg grippers are the ones that you don’t even know are there. Pockets.  We go back and forth on pockets…. while they certainly are not a necessity, especially for those doing a Sprint, they are a nice feature that you get used to, once you have them.  Especially if you are someone who does longer races or relies on gel packs during your bike or run, you might want to consider the models that include a couple pockets. A good fit.  Having the right fit in all of your workout gear is essential, and it is no different with … Read more

Tacx Flux Smart Trainer Review

tacx flux 2 review

The Flux models, the Flux 2 and Flux S by Tacx, are solid smart trainer options for the money.  The term “sweet spot” comes to mind when writing about them — they occupy a nice price point but also provide impressive functionality. What we like most about the Flux models is that they give you a full ability to enjoy smart bike training, but hold off on just enough of the “splurge” features to provide a significant value. Tacx is a legitimate leader in the connected smart trainer market. Best known for the “hold nothing back” Neo 2T, a high-end trainer, Tacx has a couple more affordable smart trainers on the market too.  The Flux lineup makes the outstanding Tacx technology a little more accessible who want to keep their investment under $1,000. Here, we will take a hard look at the two Flux models — the Flux 2 and the Flux S.  You can get them both direct from Garmin, here. Tacx Smart Trainer History and Lineup Tacx has been making smart trainers since 2014, but the company has been around a lot longer than that.  Tacx is one of the longstanding cycling companies, originally building old-fashioned rollers and roller parts.  Rollers gave way to spinners and trainers, which gave way to the smart bike trainers we know today.  Actually many rollers and traditional trainers are still in use by people across the globe. While the Neo 2T sits atop the lineup for Tacx, the Flux models — the 2 and the S, are lower-priced options that can be great buys for some riders, depending on what you are looking for. Today, Tacx is owned by Garmin, the maker of everything from GPS units to the best fitness watches on the market. If you are into other Garmin equipment, it might be to your advantage to go with a Tacx trainer. Garmin tends to add features that are only available to people on their platform with every new product release. Tacx Flux Competition and Alternatives The Flux 2 and Flux S sit in a unique spot in the market.  The primary competition probably comes from the Wahoo KICKR Core, the less-expensive version of the Wahoo KICKR.  Saris, another heavy-hitter in the industry, only makes the one trainer — the Saris H3 — but they keep some bells and whistles off and price it just a hair above the two flux models. I guess you could say the other competition for the Flux 2 and Flux S are traditional bike trainers, which sell for less.  But comparing traditional vs. smart trainers is really like comparing apples and oranges, which is why we really don’t consider them competition. We commend Tacx for offering these lower-priced options to the decked-out Neo 2T, much like we like the fact that Wahoo has a KICKR Core option for people looking to save a few bucks.  What do you lose out on by spending less on the Flux models versus the Neo lineup?  We go in to more detail down below, but in short you will get a lighter flywheel and less of a ride-simulating feel. Don’t let that make you think you won’t get great workouts on a Flux.  You can get the same sweat on a Flux that you will on a Neo or Peloton, only or much less. Flux Ride Experience We love riding Tacx products, because are smooth to pedal, very quiet, and connect seamlessly with your app — no matter which you are using. For the money, we found that both the Flux 2 and Flux S provide a great indoor riding experience.  Fully connected, you really don’t lose any compatibility with the bike training app that you use, be it Zwift, Sufferfest, Rouvy, Trainerroad, or something else. Our experience with the ride quality was excellent — the Tacx Flux is smooth, although you will notice that you don’t quite have the resistance that you do with the Neo 2T.  That is because the flywheel is smaller.   This is a good time to note some of the differences between the Flux 2 and Flux S, and it starts with the aforementioned flywheel.  Think about the Flux 2 as being midway in between the low-end Flux S, and the high-end Neo 2T.  The flywheel on the Flux S is the smallest, while the Neo 2T has a big, heavy flywheel.  The Flux 2 is positioned right in the middle, in a sweet spot of sorts. Why is this important?  Because the flywheel size is a big factor in your ride experience, especially at heavier resistance levels.  Flywheel size and weight determines several things:  The overall resistance you can get (max wattage), the responsiveness of increases and decreases in power, and in some cases the smoothness of the overall ride — although Tacx tends to excel on that last point, regardless of which model we are talking about.   We found that the flywheel of a Flux model is going to be enough to give us some really hard work, and we think it will work for most riders as well.  We found that the Flux can give a solid, stable resistance in that magic zone of 150 to 400 watts, which is where most riders will spend their time.  Spurts up to 900 watts were high-quality.   The Flux 2 is going to be a bit more smooth and stable if you are someone who does intervals (or climbs on Zwift) and really wants to push into high wattage routinely. The Flux 2 offers a max power of 2,000, the Flux S offers 1,500.  Both are enough for virtually any rider out there, although if you are a semi-pro, it is nice to not be riding at the very top-end of the trainer’s limits. With all of that said, there is a difference in the inertia you feel when riding the Flux 2 vs. Flux S, so if you are asking yourself “what makes the 2 worth $150 more?”…. that is probably … Read more

Clincher vs. Tubular Bike Tires

Clincher or Tubular?  When it comes to bike tires, those are your choices.  It is a common question among cyclists, triathletes, and recreational bikers.  Why are there even two types of bike tires?  Each evolved with its own set of reasons and following.  We wanted to give you the definitive low-down on which tire you should go with. Before we go any further, the clincher is the “normal” tire that you are probably used to from riding other bikes – ranging from your childhood bike to a BMX racer to a typical mountain bike or comfort bike.  The clincher is far more common, and generally viewed as the standard. Clincher Bike Tires Clinchers are the bike tires you rode as a kid.  They have an outer “carcass” made for whatever type bike they need to be.  The name clincher comes from the fact that these tires “clinch” to the rim of the wheel with a bead of hard rubber.  Like a car tire, a clincher has an open bottom, and the only way it stays on the rim is to clinch to it. A clincher needs an innertube in order to operate.  The tube is what holds the air, and creates solid pressure against the tire.  When you pump air into a clincher tire, you are really pumping air into the tube.  The tire just sits on top of the tube. You will have a couple choices in valve stems for pump air into the tire – Schrader vs. Presta valves. The one found on many kids and standard bike is a Shrader valve, it is wider and more basic.  The thinner, sleeker valve stem is the Presta valve.  It is what you find on pretty much all road or triathlon bikes, but you need to make sure you have a bike tire pump that can accommodate it. Clinchers are easy. Easy to install, relatively easy to fix on the road if you get a flat. There are many great clincher tires to choose from, and it really all depends on the combination of durability and performance you are looking for.  Our favorite clincher tire right now is the Vittoria Rubino Pro. (find it here on Amazon). Tubular Bike Tires Hardcore cyclists and road bike racers have long considered tubulars to be the gold standard.  They ride like a dream because of the lighter weight and tight adherence to the him. Tubular tires look the same as clinchers on the outside, but work in a very different way.  Tubulars are completely round, so there is no open part of the tire that needs to clinch.  There is also no tube needed – -the tube is basically sewn into the tire and is part of it.  As a result, the tubular is just one piece, whereas the clincher is two pieces (tube and tire).  Tubular tires are often glued to the rim, because without some glue they tend to move around a bit. Tubulars are less common, but have a strong following with many road and triathlon cyclists.  We will get into a comparison below, but they tend to be lighter and sometimes more durable.  If you are not used to working with tubulars, though, it may take a little practice to become handy with them. Tubulars are a pain for install and repair, so bear that in mind. Our favorite all-purpose tubular is the Vittoria Rubino G+ (here on Amazon). Comparison of Clincher vs. Tubular Bike Tires Here are a few of the pros and cons of tubulars vs. clinchers, based on our experience in input from many experienced cyclists. Cost.  Advantage Clinchers.  Clinchers tend to cost less than tubulars, and while not significant difference it is probably in the 20-30% range.  What really causes the clinchers to cost less is the fact that when a tubular goes flat, you change the whole tubular.  When a clincher goes flat, you typically just change the tube, which costs $5 – $7.  (note that you need to change a clincher tire once in a while too) Note that tubulars require a different rim for your bike wheel, as well. Simplicity.  Advantage Clinchers.  Some would argue that as long as you learn how to work on a tubular, it is every bit as easy to change as a clincher.  That is the problem though – most beginner and intermediate cyclists have not worked on tubulars, but they know clinchers.  Tubular tires also require glueing them to the rim.  That can be a tedious job, but something you get good at just like changing a clincher tire (for a road fix, you can usually get by without the glue for the ride home).  Just know that if you make the move to clinchers, you will need to spend a little time learning how to change the tire. Durability.  Advantage Tubulars.  This obviously depends on which tire you buy.  A clincher Gatorskin is going to be stronger than a tubular slick.  But all things being equal, the tubular is typically going to give you a little more mileage because of its construction.  Having the tube basically sewn to the tire gives you a bit more strength, and it also eliminates the possibility of pinch flats or getting a small piece of rock in between the tire and tube (which almost always causes a flat). Weight.  Advantage Tubulars.  Because you don’t have the clincher bead, and the tube is really part of the tire, the tubular tire is usually going to be a bit lighter.  It is not uncommon for a tubular setup to be 200 grams lighter – per tire – than a clincher setup.  While this might matter for elite cyclists, most of us would probably notice more of a weight difference if we simply lost a pound or two! Road fixes.  Advantage Clinchers.  This one is a very clear advantage.  Fixing a road flat is pretty quick with a clincher, especially if you have a few reps under your belt.  Fixing a … Read more

Buying an Entry Level Triathlon Bike

Buying your first entry level triathlon bike can be a daunting task.  When I bought mine, I was extremely excited about getting on a built-for-triathlon bike, but a little nervous that it was going to be an entirely new type of bike for me. Of all the investments you will make in the sport of triathlon, no single one has the potential to carry the cost of your tri bike. While any given race will see its share of $3,000, $4,000, and higher-priced top-end cycles, the right bike for a beginner triathlete doesn’t have to be that expensive even though the triathlon bike entry-level pricing has gone up dramatically in recent years.  Still, it is pretty easy to spend $1,500 to $2,000 on a quality starter triathlon bike and end up with a very good ride. Here are a few things to look for in your entry-level tri bike, along with a few recommendations. Tri Bike or Road Bike? Perhaps the most common question from new triathletes is if they should even buy a triathlon bike at all, or if it is smarter to just go with a road bike.  (By the way, if you were looking for a deep dive on road bikes, we did that too.  Check it our complete guide to road bikes) The answer seems obvious, but it is worth articulating: It depends on the type of riding that you plan to do. If triathlon might be a once-every-few-years type of thing for you, but you have paved trails in your area, you might opt for a road bike. We won’t go into road bike recommendations, because they exist all over the web. If you think, however, that you might want to do a triathlon each summer, or maybe train for a Half or an Ironman, then investing in a triathlon bike can be a great idea. Triathlon bikes are built with specific geometry to give you a posture allowing for a more direct transfer of power to the cranks, and puts you in a position that will leave you with a little more gas in the tank for the run. You will most notice the power difference of a tri bike when cycling hard down a straightaway. The power transfer to your cranks can be pretty exhilarating. We do recommend investing in one or the other — a triathlon bike or a nice road bike — instead of splitting the difference on two mediocre bikes.  Having a go-to bike that you can get to really well, become comfortable with, and gradually upgrade the componentry on will make you a better cyclist over time.  We even like putting that bike on an indoor bike trainer in the winter so you get good work on the very bike you will be racing on.  Riding the same bike year-round will give you a great feel for the bike and make it very responsive for you over time. Of course, if you have the budget, having both a nice tri bike and a nice road bike are nice to have, but we know it comes at a cost. What to Look for in a Triathlon Bike There are a few things I recommend you look for in your triathlon bike, regardless of your budget.  Triathlon bikes come in all shapes and sizes, and all price points. At the entry level, here are a few things we suggest you focus on to make sure you are getting the most value for your money. Fit Every good bike advisor will tell you that getting the right fit is the single most important factor in if you will enjoy your bike. The fit should be one that feels comfortable, but also allows you to transfer max power to the pedals. A high-end bike that stretches you out a bit too much, for example, will not ride nearly as well as a lesser bike that fits you. Note that different brands have different angles and builds, so a 56cm bike in one brand is not always identical to the same size in another brand. The bottom line:  Do not compromise on fit. Invest in a good bike fitting once you choose your bike, or even before you choose it! Frame One of the biggest determinants of triathlon bike pricing is the frame materials.  It is not as easy as saying “this one is the best”, it really depends on how you plan to ride. Carbon Fiber costs more than Aluminum, which costs more than Steel. You really won’t see many steel bikes on the market anymore, so let’s rule those out for purposes of triathlon training.  As you look at frame options, know that carbon is going to be the lightest of the entry-level price point frames, and it typically provides the best overall ride on the road.  It can be a very responsive frame on hills and accelerations, and is in some ways the standard out there today.  The downfall is that it can be easily damaged, and the damage is not always visible which can create safety issues. Aluminum is by no means going away.  People like the durability of aluminum, and the fact that it is less expensive.  If a manufacturer makes a bike with an aluminum frame, it often means that they had more money left over to put better components on it, all while staying within their target MSRP.  In some ways, you get get more bike for the money, although it is likely going to be a little bumpier riding down a rough road.  You won’t see many steel-framed bikes on the triathlon market, save for some very old used models.  Titanium is also a growing type of frame, but typically not as the entry-level price point.  In general, try to get the highest-end frame that you can afford, because you can always update components over the years. Why? Because the better the frame, the a) lighter it will be, and b) the more your effort will … Read more

5 Great Entry-Level Road Bikes

best felt road bike $

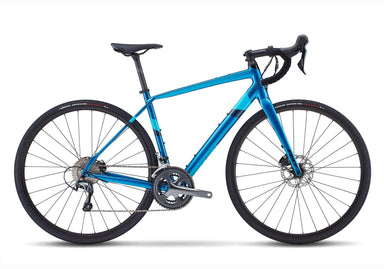
We love seeing people get into cycling – whether it is purely recreational, or to build up to longer rides, or to ultimately compete in a bike race or triathlon.  Our attitude is that the more cyclists there are — regardless of your budget — the more demand for trails, dedicated bike lanes, and bike amenities which we all benefit from.  It creates a productive cycle – not to mention, it can make the population healthier which is good for all of us. Buying an entry-level bike, though, can be mind-boggling.  Not only do you have dozens of brands to choose from, but each model seems to have an unlimited combination of components.  No doubt, when you start looking for a bike, you will either fall in love with the first one you see, or be numbed by all the choices and decisions you can make. What’s more, for many manufacturers nowadays, “entry level” can mean anything up to about $2,500.  That is a bit more than the typical newbie might consider to be entry level, but if you plan to ride a lot, you don’t want t skimp either.  Luckily, there are still some pretty good options in the $1,000 to $2,000 range, too. A Note About Road Bike Buying Before we get into the entry-level road bikes that we really like, we wanted to make a couple comments on the process of buying a bike.  We might be a triathlon blog, but at any tri club or on race morning of a triathlon, you will see lots and lots of road bikes.  They are part of our sport so we know a thing or two about buying them. First, there is a reason that Independent Bike Dealers have been a mainstay of the cycling community for so many years.  If you aren’t quite sure what you are looking for, and even if you are, they can be incredibly helpful in finding a bike that works for you.  Sure, we can make a buck or two if you buy through one of our partners (linked below), but in the bigger picture we want people to ride the right bike for them.  If that means a trip to your local bike shop, we are all for it.  Our website has never been intended to take business away from local bike shops.  Just the opposite — we want to get more people into the sport so that independent bike dealers have a larger universe of customers! Fred Clements of the National Bike Dealers Association says it best, “a good bike mechanic is an artisan, not a laborer or engineer.”  Find a good mechanic at a local shop, and he or she will get you on the right bike for you. Second, the decision that you really need to make is threefold when it comes to buying a road bike.  Which bike frame/make do you want (and this should largely be based on fit), which “moving component” set to do want, and then which bells and whistles are you looking for.  This is why you might see one bike model that comes in 20 different variations – there could be an almost endless number of component combinations you can outfit a single bike with. Third, we list some bikes  here that eclipse the $2,000 mark – which might seem like it is way above entry level.  We do this for a couple reasons – first, for the right cyclist, $2,000 is a bargain for a good road bike.  If you are someone who ultimately gets hooked and puts 5,000 miles a year on your bike, you will want something with some quality and features.  Finally, bikes are often discounted by various retailers – so a $2,000 bike might be found for way less if you can catch it at the right time. 5 Great Entry Level Road Bikes Let’s just get to the point.  Here are 5 “entry-level’ road bikes that we really like right now and are easier on the budget (if you were looking for triathlon bikes, don’t worry, we researched that as well, here). (Cutting to the Chase, our Favorite is…..) If you want to spare the reading, we will help you get to the point.  We assessed these bikes, rode them, inspected them.  There are two that stand out.  The Felt VR40 is just such a great value for what you get, riding the smooth aluminum frame is a dream.  And you gotta love the Trek Emonda, especially when it gets the hand-me-down features from its more decked-out siblings. With that said, let’s outline the top 5. Cannondale Topstone Road Bike The Cannondale company has been building bikes since 1971.  While many bike companies tend to be based in the Northwoods of Wisconsin or Minnesota and Western USA, Cannondale is an East Coast company, based in Connecticut.  We like the lineup that Cannondale offers, although they crank out enough bike models so it can take some time to get your head around it all. The Topstone is actually a pretty massive lineup of bikes — positioned just under the Synapse lineup which has become a little too pricey to be “entry level” in our book.  Some Topstone models can be found at the entry-level price point, and depending on componentry will typically be found for $1,000 to $2,000.  That is a good price for a very high-quality bike.  Other models can cost double that price or more.  We are obviously focused on the entry-level price point for this article, so are talking about the alloy frame.  The one that we recommend is the Topstone 1, a great alloy bike that gives you an excellent ride on both fast pavement and hardpack gravel (it is actually also on our list of best gravel bikes for this reason), and is even a good commuter bike — an excellent all-around model.  If you want to spend just a little more, there is the Synapse 105, coming with (as you could … Read more

Fat Bike Buying Guide (and Best Entry-Level models)

fat bike best

Fat biking (or fat tire biking) was invented, you could say, in Alaska back in the late 1900s, but it really started to become popular in the early 2000s.  Since then, the number of fat bikes you see on the trails, even when the weather is just fine, has really grown. The bar for what we consider to be the best entry level bikes fat bikes has really been raised. Fat bikes give cyclists a way to get outside and ride in terrain that would stop most other bikes in their tracks, including most mountain bikes.  Fat tire bikes have been known to cruise for miles on a frozen lake, a sandy beach, or along a rural bike trail that might not be cleared for weeks. No problem if you are on a fat bike. For many Northerners, the fat bike is an alternative to moving indoors and mounting your road bike on an indoor bike trainer.  Bike trainers are great, and there is an important place for them (I will probably hop on mine in about an hour!), but we talk to many diehard cyclists who swear that they would rather ride outdoors whatever the weather. We can’t blame them. Today, cyclists from the original fat bike diehards to committed road riders and commuters enjoy fat biking. The right fat bike with the right tires can expand the riding season by months in some places, and good quality fat bikes compete on price with some high-end indoor training solutions.  Not only are fat bikes popular with the cold weather set when they are trying to avoid being relegated to the smart trainer, but they are also catching-on for beach and desert bike riders because of their proficiency on sand. Read on for everything you need to buy your first fat bike, and look out for our detailed look at fat bike tire selection coming soon. How is a Fat Bike Different? Fat bikes and mountain bikes share some designs and components, but some unique features are unmistakably fat bike, including: Wider tires. The hallmark of any fat bike, fat bike tires have grown over the years, from around 4 inches wide to a whopping 5 inches in some cases. In comparison, mountain bike tires now range from 2 to 3 inches. Many road bikes sport tires of less than 1 inch! Fat-specific frames.  Frames and forks need space for huge rubber, and anything else in the way is moved too: fat bike wheels are wider at the axle and even the pedals on fat bikes can be further apart than other bikes.  So, it is not as simple as slapping wide wheels on that mountain bike you have in your garage — the frame design is fundamentally different. Wider wheels (and other components). Wider tires need a wider rim for the whole wheel and tire to stay hooked together. Wheels with wide rims must be wider still in the center, with a wide hub and axle to cut down on flex. Much Lower Tire Pressure. Tire retention is especially important with low tire pressures in mind, and no tire rides as soft as a fat bike tire. This gives the rider more grip and an ability to really “float” along in snow or sand. The high grip creates more drag or rolling resistance on pavement, so fat bikes are unlikely to replace your time trial bike or summer commuter. What to Look for in an Entry-Level Fat Tire Bike If you are looking for a fat bike, you will want to search for many of the same things you would in your other bikes. The differences involved can be intimidating at first, but this guide makes choosing a new fat bike quick and easy. Frame Like today’s common road or mountain bikes, fat tire bikes can be made of aluminum or carbon fiber for light weight and strength. Some fat bikes are steel for maximum longevity at the expense of weight. Even the highest performance fat bike frame is designed for some durability and versatility, while utilitarian models support huge loads on racks or in bags. As with almost any bike, lightweight frames can make for a quick, responsive feel. However, performance comes with a cost, and components such as wheels and tires are a big part of overall weight. Fat bike frames are also specific to one of two wheel sizes, 26” or 27.5”. The difference in wheel sizes is small in practice, but newer 27.5” bikes may hold more value in the short term. Tires We did a whole guide on fat bike tires, so check it out if you wanted a deep-dive.   Tires are easy to change out if you need new ones, but the amount of rubber involved means the right tires on a bike could save hundreds of dollars. Much like our advice on gravel bikes, match the tire aggressiveness to the type of riding you need to do.  Fat bike tires inherently have quite a bit of tread and tend to be a bit knobby.  Go with a plenty knobby tire if you think your riding will involve soft surfaces like loose snow, dirt or mud. Width of the tires is an important factor as well, ranging from less than 4 inches on the low end to more than 5 inches on the high end. Generally speaking, narrower tires are better for riding on hardpacked snow or terrain where you know the surface will at least be solid.  If you run the risk of sinking into snow or sand, go with a wider tire that can be ridden at quite low PSI. Many fat bike riders will ride “tubeless,” removing the fragile inner tube from their tires and replacing it with a combination of tape and liquid tire sealant to use lower pressures. Both systems have ups and downs, but a factory tubeless bike can save time and money for tubeless fans while easily accepting a tube. Suspension Some fat bikes have … Read more

Cycling Training While Traveling

traveler

Bike Training Travel: Tips and Tricks for Cycling While Traveling Keeping your cycling conditioning up while on vacation or traveling can be a challenge, especially on longer trips like vacations. Unlike running, where you can just pack some running shoes, preparing for bike training requires many more steps. I’ve been training for triathlons while doing longer vacations, and can tell you it requires a little planning. Whether you’re going on a vacation or traveling for work, there are many ways to incorporate bike training into your trip. From renting a bike and exploring the local area to joining a guided cycling tour, there are plenty of options available to suit all levels of fitness and experience. Not only does bike training travel allow you to keep up your fitness levels, but it also gives you the opportunity to explore new places and meet like-minded people along the way. Travel with your bike The ideal bike training to do, in terms of your training plan, would be to train on your bike outdoors. The wrinkle is that traveling with your bike can be a challenge, but if you are able to pull it off, this can be the best way to keep your training going. Shipping your bike If you are going to be traveling by air and need your bike at the destination, consider shipping it to your destination. This option is ideal for people who are traveling long distances or internationally. Some key things to remember when shipping your bike: Research shipping companies: Look for companies that specialize in bike shipping and have experience with handling bikes. BikeFlights is our preferred way to ship a bike. Pack your bike properly: Use a sturdy bike box and plenty of padding to protect your bike during shipping. Plan ahead: Shipping can take several days, so make sure to plan accordingly and allow enough time for your bike to arrive before you do. Transporting Your Bike Another option for traveling with your bike is to transport it yourself. This is a good option for shorter distances and iyou are traveling by car. Here are some tips for transporting your bike: Use a bike rack: Invest in a sturdy bike rack that can be attached to your car. We did an extensive piece on bike racks, and there are many to choose from. My personal advice is to not skimp on a rack, especially if you might use it repeatedly. Flimsy bike racks just don’t protect your precious bike very well. Secure your bike: Make sure your bike is securely fastened to the rack and won’t move during transport. Using a wheel-mount bike rack, where the bike wheels are fixed into place on a tray, is the best in my assessment. Protect your bike: Consider using a bike cover to protect your bike from dirt and debris during transport. Not so important if you are just driving a couple hours on a nice day. Consider a travel bike trainer If you are not sure about what kind of roads or routes you will have access to at your destination, consider a travel bike trainer. It is basically an indoor bike trainer, but one designed to be a bit more portable. They aren’t nearly as nice as a big smart trainer, but those big heavy units don’t travel well. Probably the best one on the market, in terms of combining function with portability, is the Travel Trac Comp. It is lightweight and will work in a pinch, but you don’t want it to be your primary everday trainer. Rent a bike at your destination If you’re traveling and don’t want to bring your own bike, renting one at your destination can be a great option. It allows you to explore the area on two wheels without having to worry about transporting your own bike. I’ve rented bikes in mountain towns, coastal towns, and everywhere in between, and it can be a good option.  A few tips: Find a high-end bike shop When renting a bike while on vacation, it’s important to find a bike shop that offers high-end bikes. The last thing you want is to show up and realize you have a single speed, all-purpose bike as your trainer. Call ahead, make sure they have the style bike you need. There is a good chance you will need to reserve it in advance! Know your bike measurements If you don’t have detailed geometry and measurements from a professional bike fitting, at least measure your current bike setup down to the millimeter. This will allow the rental shop to set your bike up as close as possible to your preferred geometry. Key things to know are your distance from the seat to the pedal, seat to the bars, height of the bars, and angle of your seat. When renting a bike, it’s also a good idea to bring your own bike pedals and cleats to be sure you can clip-in. Not every rental shop carries every type of pedal.  More than one cyclist I’ve been riding with has been spurned by not bringing pedals or cleats. Find Spin Classes at Your Destination If I am going to be in a place with fitness clubs, I can often get by for a few days by hitting some local spin classes. It won’t exactly simulate your hard outdoor training rides, but indoor cycling workouts can absolutely can keep you in bike shape until you get back home.  A few tips: 1. Check with Local Fitness Clubs or Cycling Studios One of the easiest ways to find spin classes is by checking with local fitness clubs. Most clubs offer spin classes as part of their group fitness schedule. Good option if you will be near a larger city with fitness clubs. Expect to pay by session. 2. Use Fitness Apps There are several fitness apps that can help you find spin classes in your area. Apps like ClassPass and Mindbody allow you to search for classes … Read more

Saris H3 Smart Trainer Review

h3 vs. flux

When it comes to smart trainers, there are really three that I consider top contenders.  The Saris H3 just might be my favorite of the bunch right now, especially when factoring-in the price tag. A few big changes have happened at CycleOps over the past couple years, especially when it comes to smart trainers.  First, CycleOps went through a rebranding to more closely align with the parent company, Wisconsin-based Saris.  In other words, Saris = Cycleops.  Saris, the maker of some of our favorite bike carriers and power meters, owns the legacy CycleOps brand. Then, Saris rolled-out a new and vastly improved smart trainer, the H3.  The H2 had been built and marketed for a few years, but while it was a good, reliable performer, it had a couple flaws.  The H3 fixed those.   The bottom line:  The Saris H3 is now our favorite trainer on the market, when factoring in the price tag. Find the H3 on Amazon, here. Buy directly from Saris, here. Saris H3 Competition I have ridden most of the smart trainers on the market, and given them a good indoor test. Based on that riding, I would consider the main H3 competitors as being the Tacx Neo, perhaps the Tacx Flux models, and the Wahoo KICKR.  All are great models that I review separately, and make some mention of below.  There are other smart trainers on the market, but we consider these three to be the ones that are most reputable and have stood the test of time. My H3 Riding Experience I gave the Saris H3 an extensive test ride using both Zwift and Trainerroad.  I was impressed by the overall riding experienced, when compared to its main competitors.  I love several things about the model, not to mention its stability on the floor, the overall responsiveness, and the relatively quiet noise level.  The H3’s setup was relatively fast. I say relatively because you will need to assemble a cartridge on the unit, which you can try doing yourself or drop it off at a local bike shop to do – it is a simple job for them.  Either way, that is really the only setup wrinkle. Everything else connects surprisingly fast. No fumbling with your riding app to try to find the H3 – it happens almost instantly. Being a big guy who likes to ride hard, I am a stickler when it comes to a unit that is wobbly, connects poorly or loses its connection, or is too noisy at high wattage.  While the old H2 model was highly-competent but had a couple shortcomings, including excessive noise at higher power. Based on my test rides, I think the H3 addressed the shortcoming and is right up there with the Tacx models, which have always been the gold standard for noise. There are some who think that Saris just just kind of keeping pace with the competitive landscape, but we think the H3 is a product they should be proud of, and at the peak of the market in terms of performance. The maximum power output is 2,000 watts, so more than enough for any avid cyclist.  If you are needing more than 2,000 watt capacity for your workouts, allow me to introduce you to the Olympic committee. H3 Connectivity and Compatibility The overall connectivity of the H3 to your favorite apps is pretty seamless.  We typically are trying to connect either to an Ipad tablet, or to an Apple TV device (in the case of Zwift).  Either way, the H3 recognizes the connection quickly, and no messing with the firmware is required. After testing the unit for several weeks, we only noticed a couple dropped connections.  It was unclear if that was from the unit itself or from the receiving device. Our conclusion is that, whether you are using Zwift, Sufferfest, Rouvy, Trainerroad, or another app, the H3 is going to find and connect to the app with ease.  This is consistent with the H2, which always had a great reputation for finding and holding on to the connection with the app or the Apple TV device. The H3 is compatible with all major indoor cycling apps, including Zwift, Rouvy, Trainerroad, Sufferfest and others.  It is officially Zwift-certified, and actually comes with a free month of Rouvy. Noise The most noticeable improvement in the H3 when compared to the H2 is a no brainer.  It is quieter.  Way quieter. We love that Saris took all the feedback on the “whine” that the H2 put out, and focused on fixing the problem in the H3.  Don’t get us wrong, the H2 is a great trainer and one that we rode LOTS of miles on, but there is a whine that is a little annoying at first.  You tune it out after a while. The H3 has a new drive system that greatly reduces the sound.  The company says the sound is dampened by about 5 times, and that is feasible if you compare to the H2.  It may not have the silence level of the Tacx Neo, but there is a point where you can just say it is “quiet enough”.  And we think the H3 is definitely quiet enough.  More exactly, Saris says that the sound output on the H3, at 20mph, is 59 decibels.  We don’t have a decibel meter, but can tell you that it is quieter than the H2 by a long shot. Accuracy The accuracy of the H3 appears to be very good.  The only true way to test the power accuracy is to ride the trainer at the same time as using a separate power meter, and we have not yet done that.  We plan to run that test in the next 30 days, and when we do we will post the results. However, the wattage at the exertion levels we are familiar with appear to line-up to within 5% (or less) and the responsiveness has been very good when increasing or decreasing power. There is … Read more

What to Keep in Your Bike Bag

bikepacking bag

What to Keep in Your Bike Bag: Essential Items for Every Cyclist Bike bags are perhaps one of the underrated pieces of equipment for cyclist, whether you’re a beginner or a seasoned pro. Actually, the bike bag itself is not the point — it is what you decide to keep in your bike bag. So what goes inside the bike bag? Well, it is obvious to have the right tools for any potential repairs on the road. A multi-tool is a great option, as it can include a variety of useful tools in a compact package. A spare tube and tire levers are also essential, as a flat tire can quickly end a ride. Additionally, carrying a small pump or CO2 inflator can help ensure that you’re able to inflate your tire to the proper pressure. In addition to repair tools, you probably want to carry some very basic first aid supplies. A couple bandages, antiseptic wipes, and pain relievers can come in handy in case of minor injuries.  There are some other things too — I will cover them in a minute — that I have learned through trail and error can be nice to keep in that compact little bike bag. Essentials to Pack in your Bike or Saddle Bag I’ve done lots of riding, and much of it in places where help isn’t going to come anytime soon if you have a problem. When you are away from your stash of bike tools at your home, you still want to have the ability to do common fixes on the road or trail so you can keep on riding. Here are the top five things to include in your bike bag: Multi Tool Always carry a good, compact multi-tool bike wrench. It can be helpful for everything from adjusting a rubbing disc brake to tightening some loose bike cleats on your shoe. Buy one that you know as the Allen wrench sizes compatible with what you need. I prefer a flatter-profile multi tool because it can fit comfortably in my jersey pocket in the event my bag is getting too full.  Be sure the tool’s wrenches work on your cleats in addition to your bike. Tire Repair Supplies The most common issue you will probably have out on the road or trail is a tire problem.  You for sure want to carry a tire change lever or two, two CO2 cartridges (you’d be surprised how often you wished you had more than just one), and don’t forget the correct nozzle for your cartridges. What else to bring with you depends on if you are using tubeless, clincher, or tubular tires. For the two most popular, tubeless and clincher, here is what to pack: Tubeless:  Pack a sealant bottle (they are small) or two to do a road fix if needed, and be extra sure you have CO2 cartridges, instead of a bike pump. A pump probably will not be strong enough to set the tire given you have no tubes. You need the power from a CO2 blast. Clincher:  Clinchers (a fancy way of saying tubed tires) require an extra tube. 90% of the time, a new tube will be enough to get you to the end of your ride, when you can further inspect the tire. First Aid Components Accidents can happen, so it’s important to have a first aid kit with you. You might also have some chafing develop that you want to nip in the bid.  I carry a couple bandages, a couple antiseptic wipes, and 3-4 pain relievers. In total, they take up very little space but can be a lifesaver on the road or trail. High Nutrient Snacks Staying fueled is crucial for a successful bike ride. I usually keep most of my nutrition on my body as I ride, but I like to keep a spare bar or gel shot in my bag. You just never know when you feel a blow-up coming and need a shot of something. Whatever you carry should be dense and keep for a long time.  A Pro Bar Meal Bar fits the bill well. Money I always have a $20 stashed in my bike bag. You never know when you come across a store or stand that has water exactly when you desperately need it, but they don’t take credit or Apple Pay. Plus, I often offer some cash to someone who stops and gives me a spare part, if I need one. They usually don’t take the money, but I’m glad if they do. Portable Charger If you have the space, a small compact portable charger can be nice on longer rides, in the event you start having a low battery on your phone or bike computer.  However, some of these chargers are too awkward or bulky to fit in a saddle bag, but are great to have in a frame bag. Sunscreen I like to have a very tiny tube of sunscreen along. It can be a single or double-use application, so it doesn’t take up much space. I’ve had several times when 11am rolls around, the sun is unexpectedly out, and I still have an hour to go in the hot sun. Rubber Bands and Zip Ties For the tiny amount of space they take up, carrying a few rubber bands and a zip tie or two is really, really smart. More than once, I have been saved by a rubber band or twist tie to keep a bike component, like a cable, in a safe position until I can finish my ride and correctly fix it at home.  Best of all, a few rubber bands and a couple zip ties add virtually no weight to the ride, given how handy they can be on the trail or road. What Types of Bike Bags are Best? When it comes to choosing the right bike bag, it’s important to consider your individual needs. There are three main types of bike bags that I recommended … Read more